

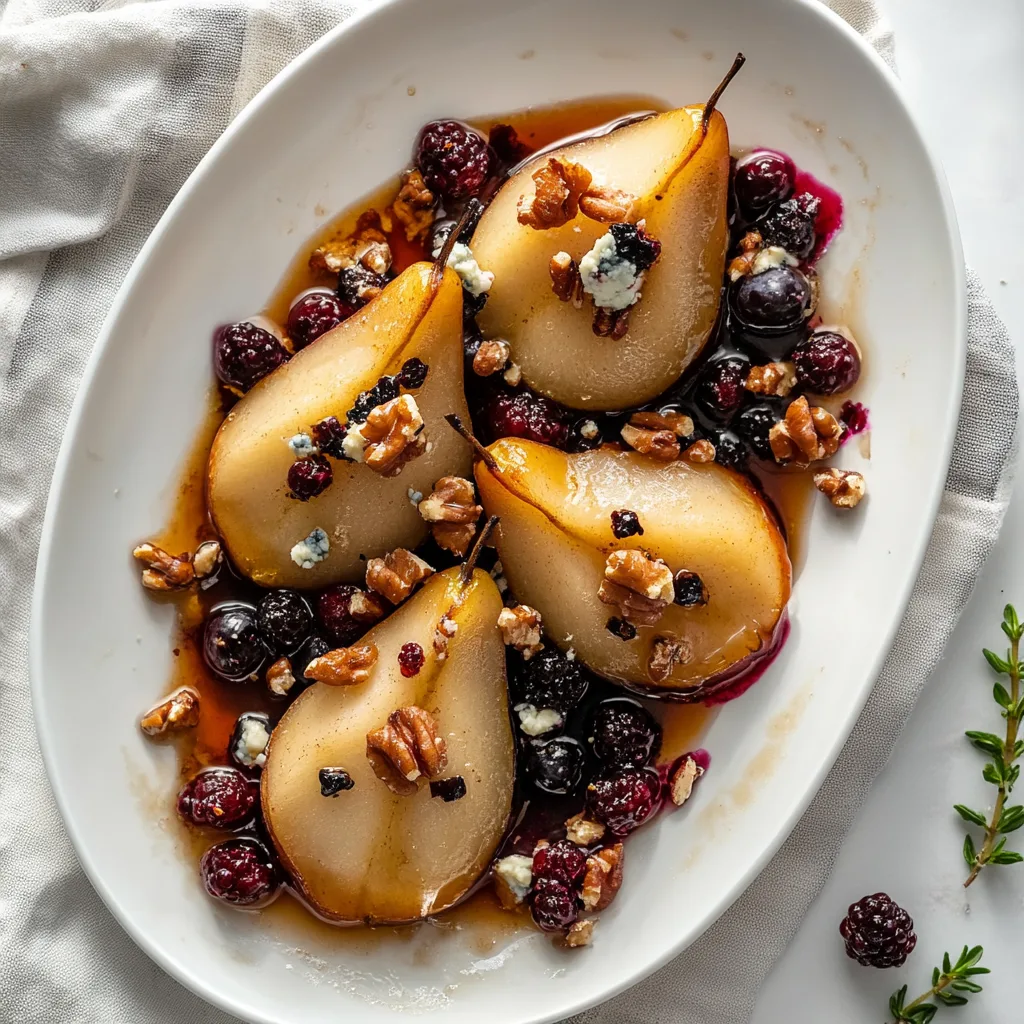
The aroma of baking Baked Pears with Berries, Honey, Walnuts & Blue Cheese fills my kitchen with the most intoxicating scent—sweet pears caramelizing, berries bubbling, and that irresistible hint of toasted walnuts. This elegant dessert (or appetizer!) has become my go-to when I want something that feels fancy but requires minimal effort. The contrast between warm, tender pears and cool, tangy blue cheese creates a flavor symphony that never fails to impress guests. I discovered this recipe during a fall weekend at my friend’s orchard, and it’s been a staple in my home ever since. The best part? It’s endlessly customizable and perfect for both casual family dinners and special occasions.
Table of Contents
Recipe
Print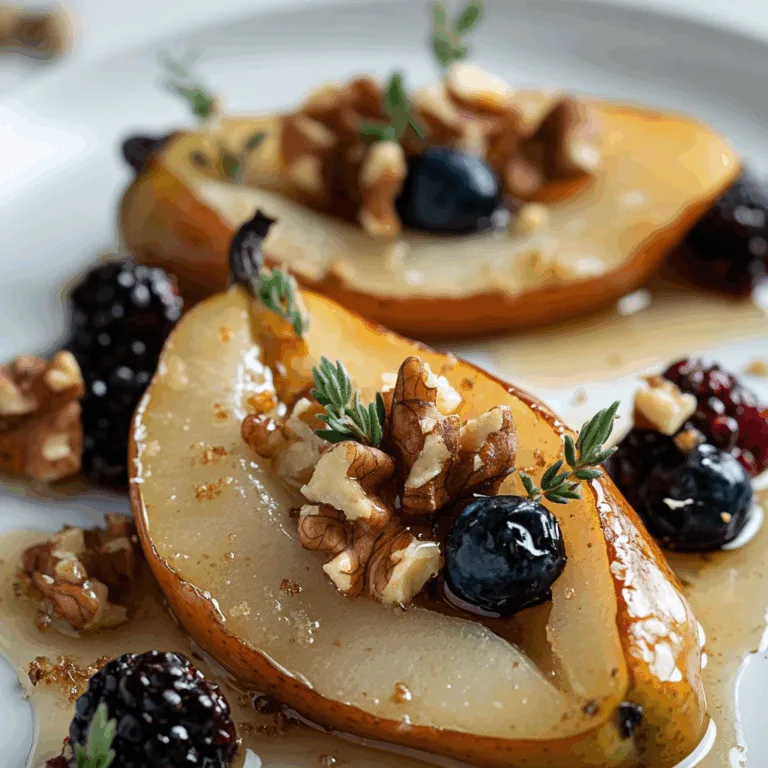
Delicious Baked Pears with Berries, Honey, Walnuts & Blue Cheese Recipe
Ingredients
Why You’ll Love This Baked Pears with Berries, Honey, Walnuts & Blue Cheese
A Perfect Balance of Flavors and Textures
There’s something magical about the way these ingredients come together. The natural sweetness of ripe pears deepens as they bake, creating a tender, almost custard-like interior. When you add tart berries, they burst with juicy brightness against the mellow pear backdrop. The drizzle of honey adds another layer of sweetness with floral notes that complement the fruit perfectly. Then comes the crunch of toasted walnuts and that unmistakable tang of blue cheese—creamy, sharp, and slightly salty. I love watching guests take their first bite and experience this flavor dance. It’s that perfect balance of sweet and savory, soft and crunchy, warm and cool that makes this dish truly special.
Effortlessly Impressive Yet Simple
Don’t let the elegant presentation fool you—this dish is remarkably easy to prepare. I recently threw this together for an impromptu dinner party when time was tight, and guests assumed I’d spent hours in the kitchen! The beauty lies in its simplicity: just halve the pears, scoop out the seeds, fill with berries, and add your toppings. The oven does all the heavy lifting while you attend to other dishes or simply relax with a glass of wine. The visual impact of these jewel-toned pears emerging from the oven, topped with golden walnuts and creamy cheese, belies the minimal effort required. It’s my secret weapon for those times when I want to impress without stress.
Essential Tips & Tricks
Selecting and Preparing the Perfect Pears
Choosing the right pears makes all the difference in this dish. Look for firm but ripe Anjou, Bosc, or Bartlett pears—they should yield slightly to pressure at the stem end but not be too soft. I learned this lesson the hard way when I once used overripe pears that collapsed during baking! For optimal results, select pears of similar size so they cook evenly.
When halving, use a melon baller to neatly remove the core and create a perfect cavity for your berry filling. Leave the stems intact for a rustic, elegant presentation. A light brush of lemon juice prevents browning and adds a subtle brightness that enhances the other flavors. For an extra touch, score the flesh in a crosshatch pattern to help the honey penetrate.
Balancing Your Cheese and Honey Selection
The blue cheese you choose dramatically impacts the final flavor profile. For beginners or those who find blue cheese overwhelming, I recommend starting with a milder variety like Gorgonzola Dolce or Danish Blue. These offer creaminess with just enough tang without dominating the dish. For cheese enthusiasts, a robust Roquefort or Stilton creates a more pronounced contrast with the sweet elements. As for honey, different varieties bring unique flavor notes—try orange blossom honey for citrusy brightness or buckwheat honey for a deeper, more robust sweetness. The key is balance—about a tablespoon of honey per pear half and a modest crumble of cheese allows all flavors to shine without overwhelming the delicate pears.
Serving Ideas & Creative Variations
Seasonal Adaptations and Fruit Pairings
One reason I adore this recipe is its seasonal versatility. In summer, pair pears with fresh blackberries and raspberries for vibrant color and juicy tartness. Come fall, try cranberries with a pinch of cinnamon for a holiday-worthy treat. Winter calls for frozen berries (no need to thaw!) mixed with a touch of vanilla extract. Beyond berries, consider stone fruits like diced plums or cherries when in season. I once made this with fresh figs and a drizzle of aged balsamic—absolutely divine! The recipe also works beautifully with apples instead of pears; just increase the baking time by about 10 minutes. For a tropical twist, try using mangoes with blueberries and a sprinkle of shredded coconut alongside the walnuts.
Elevating for Different Occasions
This dish effortlessly transitions from casual weeknight treat to sophisticated dinner party finale. For everyday enjoyment, serve it warm from the oven with a simple dollop of Greek yogurt. When entertaining, elevate the presentation by placing each pear half on a small pool of vanilla bean custard or crème fraîche. A light dusting of powdered sugar just before serving adds elegant visual appeal.
For a dinner party, consider serving smaller portions as an appetizer with a glass of dessert wine. I’ve even transformed this into a brunch star by serving it alongside sourdough toast with a side of ricotta. For holiday gatherings, arrange the pears on a large platter surrounded by fresh greenery and additional berries for a stunning centerpiece.
Storage & Troubleshooting Guide
Make-Ahead Options and Reheating
This dish offers excellent make-ahead potential for busy entertainers. You can prepare the pears up to the point of baking, cover tightly with plastic wrap, and refrigerate for up to 24 hours. When ready to serve, simply bake as directed, adding an extra 5 minutes to account for the chilled temperature. Already baked leftovers store well in an airtight container in the refrigerator for up to 3 days. To reheat, place in a 300°F oven for 10-15 minutes until just warmed through—avoid microwaving, which can make the pears mushy and the walnuts soft.
The blue cheese is best added after reheating. I often make a double batch specifically to enjoy leftovers for breakfast, gently warmed and topped with a spoonful of Greek yogurt.
Solving Common Challenges
Even this simple recipe can present occasional challenges. If your pears are browning too quickly in the oven, loosely tent them with foil for the remainder of the baking time. Conversely, if your pears aren’t softening enough, they may have been underripe—increase baking time in 5-minute increments until tender when pierced with a knife. For pears that won’t sit flat, slice a thin piece off the rounded side to create a stable base.
If blue cheese isn’t your preference, goat cheese or mascarpone make excellent substitutes. For dairy-free guests, I’ve had success with coconut yogurt sprinkled with nutritional yeast for a cheesy note. And if your berries release too much liquid during baking, simply spoon this flavorful syrup over the finished pears—it’s too delicious to waste!
Frequently Asked Questions
Can I make this recipe dairy-free?
Absolutely! Skip the blue cheese and drizzle with extra honey or maple syrup. For a creamy element, try coconut yogurt or a dollop of dairy-free ice cream when serving.
What’s the best way to tell when pears are perfectly ripe?
Apply gentle pressure near the stem—it should yield slightly but not be mushy. The pear should smell sweet at the stem end and have a slight give without being soft throughout.
Can I prepare Baked Pears with Berries, Honey, Walnuts & Blue Cheese in advance?
Yes! Prepare everything up to 24 hours ahead, stopping before baking. Cover and refrigerate, then bake just before serving, adding 5 extra minutes to the cooking time.
What can I substitute for walnuts if I have a nut allergy?
Pepitas (pumpkin seeds) or sunflower seeds work beautifully for crunch. For a nut-free, seed-free option, try crispy granola clusters or even crushed graham crackers.
What wine pairs best with this dessert?
A late-harvest Riesling or Sauternes complements the sweetness, while a tawny port brings out the blue cheese notes. For non-alcoholic pairings, try sparkling apple cider.
Final Thoughts
These Baked Pears with Berries, Honey, Walnuts & Blue Cheese represent everything I love about cooking—simple ingredients transformed into something truly special with minimal effort. There’s a certain magic in watching guests’ eyes light up when they taste the complex flavors working in harmony. The dish adapts to any season and occasion, making it a reliable standby in my recipe collection. Whether you’re cooking for yourself on a quiet evening or hosting a dinner party, these pears deliver comfort and elegance in equal measure. I hope you’ll make this recipe your own, experimenting with different fruits, cheeses, and nuts to create your perfect version. Find more inspiration for seasonal fruit desserts on my Pinterest board.