

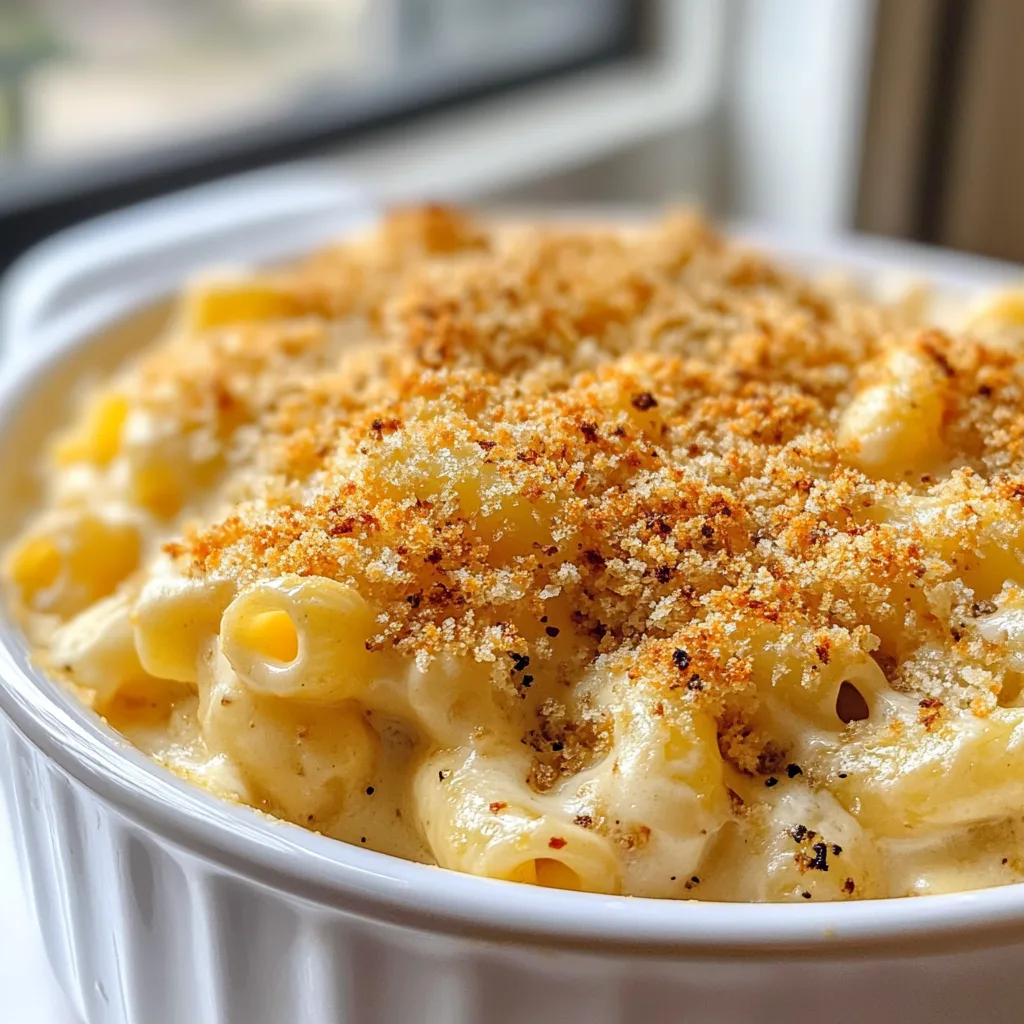
There’s something magical about a bubbling dish of Baked Macaroni and Cheese with Crispy Panko Topping fresh from the oven. The way the golden crust shatters under your fork, revealing creamy, molten cheese sauce clinging to each pasta curve. I’ve been perfecting this recipe since my college days when I desperately needed comfort food during finals week. Now it’s my go-to when friends gather at my home—there’s never a single leftover noodle! This ultimate comfort dish combines sharp cheddar and creamy gruyère with a buttery, crunchy panko crown that elevates it beyond ordinary mac and cheese.
Table of Contents
Recipe
Print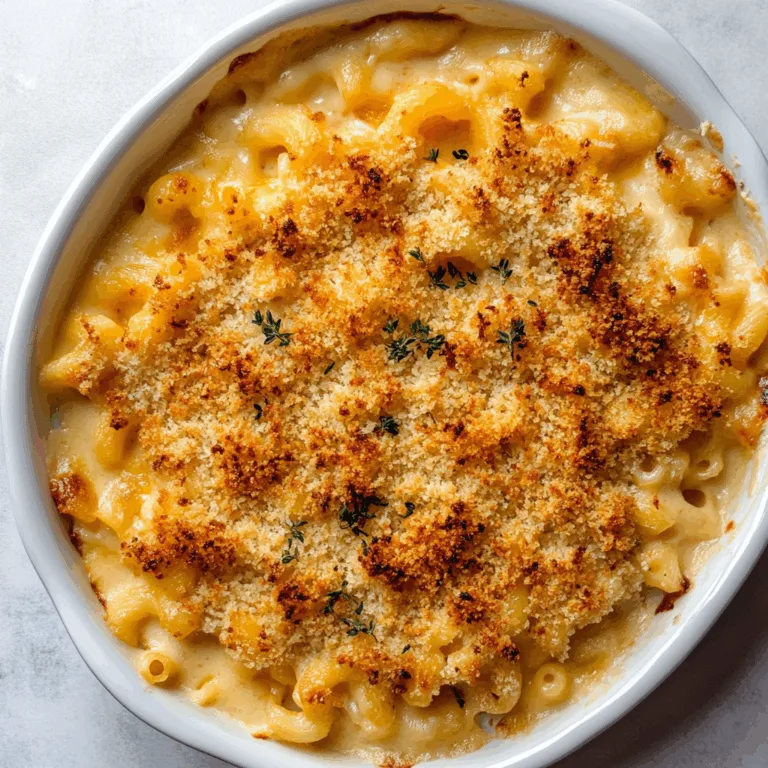
Classic Baked Macaroni and Cheese with Crispy Panko Topping – Cheesy & Crunchy Delight
This classic baked macaroni and cheese features a rich, velvety cheese sauce and a crunchy panko breadcrumb topping. It’s the ultimate comfort food—gooey, golden, and totally satisfying.
- Total Time: 50 minutes
- Yield: 6–8 servings
Ingredients
**Pasta and Sauce**
1 lb elbow macaroni
4 tbsp unsalted butter
1/4 cup all-purpose flour
3 cups whole milk, warmed
1 cup heavy cream
1 tsp salt
1/2 tsp black pepper
1/2 tsp garlic powder
1/4 tsp paprika
3 cups shredded sharp cheddar cheese
1 cup shredded mozzarella
1/2 cup grated Parmesan
**Panko Topping**
1 cup panko breadcrumbs
2 tbsp melted butter
1/4 tsp paprika
Optional: chopped parsley for garnish
Instructions
1. Preheat oven to 375°F (190°C). Lightly grease a 9×13-inch baking dish.
2. Cook macaroni just until al dente. Drain and set aside.
3. In a large saucepan, melt butter over medium heat. Whisk in flour and cook 1–2 minutes to form a roux.
4. Slowly whisk in milk and cream. Cook, whisking often, until thickened—about 4–5 minutes.
5. Stir in salt, pepper, garlic powder, and paprika.
6. Remove from heat and stir in cheddar, mozzarella, and Parmesan until melted and smooth.
7. Fold in cooked macaroni until evenly coated. Pour mixture into prepared baking dish.
8. In a small bowl, mix panko, melted butter, and paprika. Sprinkle evenly over the top.
9. Bake uncovered for 25–30 minutes, or until golden and bubbling. Let sit 5–10 minutes before serving.
Notes
For an extra kick, add a pinch of cayenne or a spoonful of Dijon to the sauce.
Make ahead: assemble, cover, and refrigerate up to 24 hours.
To reheat leftovers, bake covered at 350°F until warmed through.
- Prep Time: 20 minutes
- Cook Time: 30 minutes
- Category: Dinner, Pasta, Comfort Food
- Method: Baking
- Cuisine: American
- Diet: Vegetarian
Why You’ll Love This Baked Macaroni and Cheese with Crispy Panko Topping
The Perfect Cheese-to-Pasta Ratio
Finding that ideal balance between pasta and cheese sauce is like discovering culinary gold. I’ve tested countless variations and found the magic happens with a 1:1 ratio—equal parts cooked pasta to cheese sauce. The béchamel base creates a silky foundation that coats every noodle without pooling at the bottom. I remember making this for my sister after her breakup; she took one bite and actually closed her eyes in blissful silence. That’s when I knew I’d nailed it! The sauce penetrates the macaroni while baking, creating pockets of creamy goodness that burst with each bite.
That Irresistible Crispy Topping
Let’s be honest—the contrast between creamy pasta and that crispy top layer is what makes baked mac and cheese truly special. The panko breadcrumbs create a delicate, airy crunch unlike regular breadcrumbs. I toast them lightly in butter with a hint of garlic powder before sprinkling over the mac and cheese. Last Thanksgiving, my nephew picked off the entire topping layer when I wasn’t looking! Now I make extra topping and serve it in a bowl alongside the main dish. The textural contrast between the crunchy top and velvety pasta beneath creates that perfect bite that keeps everyone coming back for seconds.
Essential Tips & Tricks
Choosing the Right Cheese Blend
The secret to incredible mac and cheese lies in the cheese selection. I always use a combination of sharp cheddar for flavor and gruyère for meltability. Avoid pre-shredded varieties—they contain anti-caking agents that prevent proper melting. I learned this the hard way during a dinner party when my sauce turned grainy! Grate your cheese while cold, then let it come to room temperature before adding to your béchamel. This prevents temperature shock and ensures a silky-smooth sauce. For extra depth, try adding a small amount of smoked gouda or fontina.
The Béchamel Base Technique
A perfect béchamel is the foundation of exceptional mac and cheese. Start with equal parts butter and flour, cooking until it smells nutty but not burnt—about 2-3 minutes. Then slowly add warm milk (never cold!), whisking constantly to prevent lumps. I once tried to rush this step and ended up with a sauce that resembled cottage cheese! Take your time here. The sauce should coat the back of a spoon before you add cheese. Always remove the pot from heat before stirring in cheese to prevent the proteins from seizing and creating a grainy texture.
Serving Ideas & Creative Variations
Elevate Your Mac and Cheese Experience
Transform this classic into a complete meal with thoughtful additions. I love serving it alongside a bright arugula salad with lemon vinaigrette to cut through the richness. For protein, add roasted chicken or crispy bacon bits folded into the pasta before baking. During fall, I serve this in individual ramekins with a side of roasted Brussels sprouts for a cozy dinner party. The combination of creamy pasta with fresh, acidic elements creates a balanced meal that feels both indulgent and complete.
Seasonal and Dietary Adaptations
This recipe welcomes creative adaptations for any season or dietary need. In summer, I stir in fresh basil and cherry tomatoes just before baking. For fall, roasted butternut squash and sage create a harvest-inspired variation. My lactose-intolerant friend adores my version made with plant-based milk and cashew cheese—it’s surprisingly creamy! For gluten-free guests, simply substitute the pasta with rice or corn alternatives and use gluten-free panko. The versatility of this dish means everyone can enjoy its comforting embrace, regardless of dietary restrictions.
Storage & Troubleshooting Guide
Perfect Make-Ahead and Reheating Methods
This mac and cheese excels as a make-ahead dish. Prepare everything except the topping, cool completely, then refrigerate for up to 2 days. When ready to serve, bring to room temperature, add the panko topping, and bake until bubbly. For leftovers, reheat covered portions at 325°F with a splash of milk to restore creaminess. I discovered a game-changing tip during a catering job: portion leftovers in muffin tins, freeze, then pop out the “mac cups” for individual servings. They reheat beautifully and maintain that perfect creamy-to-crispy ratio.
Fixing Common Mac and Cheese Problems
Even experienced cooks encounter mac and cheese challenges. If your sauce seems grainy, whisk in a tablespoon of lemon juice or cream to help re-emulsify the proteins. Too thick? Add warm milk a tablespoon at a time. Too thin? Let it simmer a bit longer or add a small amount of cornstarch slurry. If your topping isn’t browning properly, switch to the broiler for the final 2 minutes—but watch carefully! I once got distracted and turned my beautiful topping into charcoal. Remember that mac and cheese continues to thicken as it cools, so it’s better to err on the slightly saucy side.
Frequently Asked Questions
Can I make Baked Macaroni and Cheese with Crispy Panko Topping ahead of time?
Yes! Prepare everything except the topping, refrigerate for up to 2 days, then add the panko mixture just before baking. Allow extra baking time if coming from the refrigerator.
What’s the best pasta shape to use?
Elbow macaroni is classic, but shells, cavatappi, or fusilli work beautifully too. Choose shapes with ridges or cavities that capture the cheese sauce in every bite.
Can I freeze this mac and cheese?
Absolutely! Freeze without the topping in an airtight container for up to 3 months. Thaw overnight in the refrigerator, add fresh topping, and bake until bubbly.
How do I prevent my sauce from becoming grainy?
Remove the pot from heat before adding cheese, use room-temperature grated cheese (never pre-shredded), and add it gradually while stirring constantly.
What can I add for extra flavor?
Try mustard powder, smoked paprika, caramelized onions, roasted garlic, or fresh herbs like thyme. Each adds wonderful depth to your mac and cheese.
Final Thoughts
Creating the perfect Baked Macaroni and Cheese with Crispy Panko Topping is both an art and a science—one that rewards attention to detail and quality ingredients. The contrast between the creamy, cheesy pasta and that golden, crispy topping creates a comfort food experience that’s simply unmatched. I hope this recipe brings as much joy to your table as it has to mine over the years. Remember that the best mac and cheese is the one made with love and shared with those who appreciate its simple, perfect goodness. For more cozy comfort food ideas, visit my Pinterest collection.