

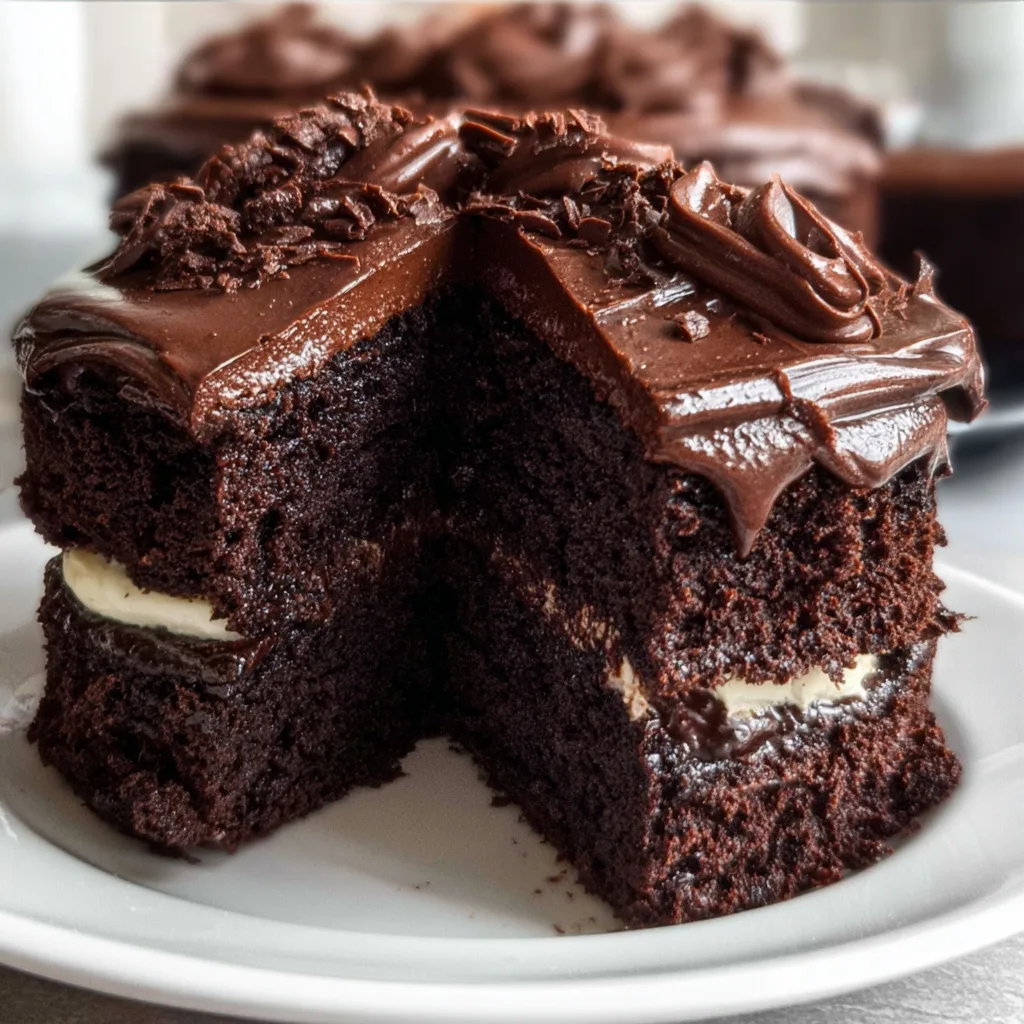
The Ultimate Dark Chocolate Cake is my absolute weakness. There’s something magical about that first bite – when the fork glides through layers of moist, intensely chocolatey cake and your taste buds light up with pure joy. I discovered this recipe during a rainy weekend when nothing but chocolate would do. The kitchen filled with that intoxicating cocoa aroma, and I’ve been perfecting it ever since. This cake manages to be both decadently rich and impossibly light, making it perfect for special occasions or weeknight treats.
Recipe
Print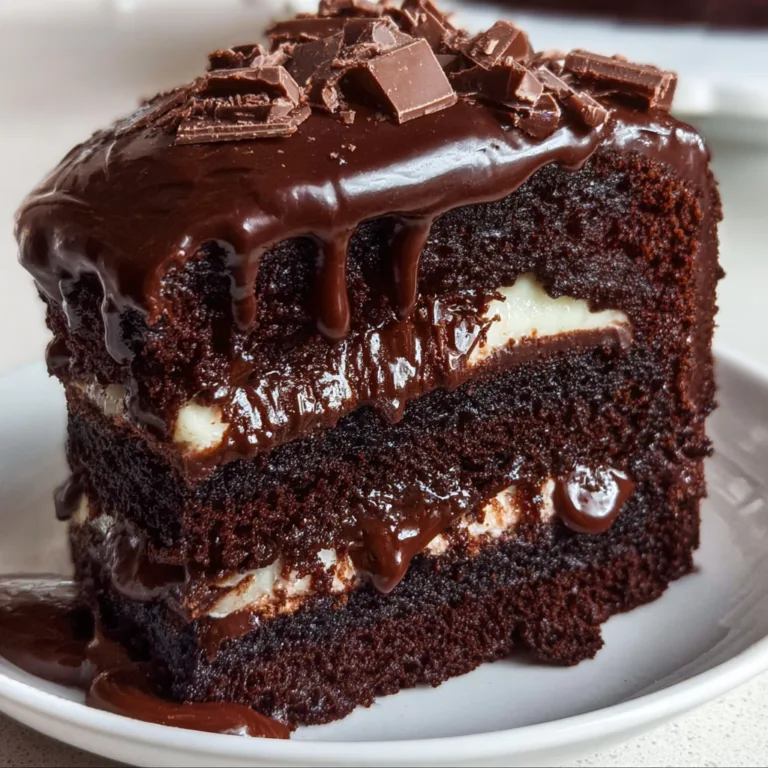
Ultimate Dark Chocolate Cake Recipe | Rich & Decadent Dessert Guide
This Ultimate Dark Chocolate Cake is a rich, moist, and deeply chocolatey dessert for true chocolate lovers. Made with dark cocoa powder, brewed coffee, and layered with luscious chocolate ganache—this cake is a showstopper for birthdays, holidays, or any time you need an indulgent treat.
- Total Time: 55 minutes (+ cooling)
- Yield: 12 slices
Ingredients
For the cake:
1 3/4 cups all-purpose flour
3/4 cup dark cocoa powder (Dutch-processed preferred)
2 cups granulated sugar
2 tsp baking soda
1 tsp baking powder
1/2 tsp salt
2 eggs
1 cup buttermilk
1/2 cup vegetable oil
2 tsp vanilla extract
1 cup freshly brewed hot coffee
For the ganache frosting:
1 cup heavy cream
8 oz dark chocolate, chopped (60–70% cocoa)
1 tbsp butter (optional, for shine)
Instructions
1. Preheat oven to 350°F (175°C). Grease and line two 9-inch cake pans with parchment.
2. In a large bowl, whisk together flour, cocoa powder, sugar, baking soda, baking powder, and salt.
3. Add eggs, buttermilk, oil, and vanilla. Mix until combined. Slowly pour in hot coffee while whisking—batter will be thin.
4. Divide batter evenly between pans. Bake for 30–35 minutes or until a toothpick comes out clean. Cool completely.
5. For ganache: Heat heavy cream in a saucepan until just simmering. Pour over chopped chocolate. Let sit for 2 minutes, then stir until smooth. Add butter if using.
6. Frost cake with ganache once cooled and thickened. Optional: sprinkle with sea salt or shaved chocolate.
Notes
• Use good-quality dark chocolate for best flavor.
• Make ahead: cake layers freeze well for up to 1 month.
• Add espresso powder to intensify chocolate flavor.
- Prep Time: 20 minutes
- Cook Time: 35 minutes
- Category: Dessert, Cake, Chocolate
- Method: Baking
- Cuisine: American
- Diet: Vegetarian
Why You’ll Love This Ultimate Dark Chocolate Cake
Unmatched Flavor Depth
This isn’t just any chocolate cake – it’s a flavor revelation. The secret lies in blooming the cocoa powder in hot coffee, which intensifies the chocolate notes in ways you wouldn’t believe. I remember serving this at my sister’s birthday and watching her close her eyes with that first bite. The combination of high-quality dark cocoa and a touch of espresso creates complex, almost wine-like undertones that make store-bought cakes taste flat in comparison. Plus, the slight tanginess from buttermilk balances the sweetness perfectly.
Foolproof Texture Every Time
The texture of this cake is what truly sets it apart – impossibly moist yet with a perfect crumb that holds together beautifully when sliced. My neighbor Kate, who swore she couldn’t bake, made this successfully on her first try! The cake maintains its moisture for days thanks to the unique combination of oil instead of butter and the addition of sour cream. You’ll never worry about dry cake again. The batter comes together in one bowl, making cleanup a breeze while still delivering bakery-quality results.
Essential Tips & Tricks
The Right Ingredients Make All the Difference
Always use room temperature ingredients for this cake – it creates a smoother batter and more even baking. I learned this the hard way after a disastrous birthday cake attempt with cold eggs! Dutch-processed cocoa gives the deepest color and flavor, but regular unsweetened works too. The coffee doesn’t make the cake taste like coffee – it simply enhances the chocolate flavor. For an alcohol-free version, substitute the coffee with hot water. Sourdough discard can add a wonderful dimension if you have it on hand.
Mastering the Mixing Method
The mixing technique is crucial for achieving that perfect texture. I once overmixed the batter and ended up with a tougher cake that lacked that melt-in-your-mouth quality. Mix dry and wet ingredients separately, then combine just until incorporated – a few small lumps are actually good! Pour the batter evenly between pans and give them a gentle tap on the counter to release air bubbles. For cupcakes, fill liners only 2/3 full to prevent overflow. The batter will be thinner than you might expect – that’s exactly what you want.
Serving Ideas & Creative Variations
Frosting and Filling Options
While this cake is heavenly with classic chocolate buttercream, don’t be afraid to experiment with contrasting flavors. My personal favorite is a salted caramel filling between layers with dark chocolate ganache coating the outside. The slight bitterness of the cake pairs beautifully with raspberry, orange, or even a hint of chili. For a stunning presentation, try a white chocolate drip over dark frosting. The cake also works wonderfully with whipped cream and fresh berries for a lighter option.
Adaptations for Every Occasion
This versatile recipe can be transformed for any celebration. For a holiday twist, add a teaspoon of peppermint extract to the batter and top with crushed candy canes. Make it boozy with a tablespoon of bourbon in both cake and frosting. I’ve baked this as a sheet cake for potlucks, elegant layer cakes for birthdays, and even as a bundt with simple glaze. For a gluten-free version, substitute a 1:1 gluten-free flour blend – I’ve tested this multiple times with excellent results.
Storage & Troubleshooting Guide
Keeping Your Cake Fresh
This cake actually tastes better on day two when the flavors have had time to develop. Store unfrosted layers wrapped tightly in plastic at room temperature for up to 3 days. Once frosted, cover and refrigerate for up to a week, but always bring to room temperature before serving for the best texture and flavor. I often bake the layers in advance, wrap them well, and freeze for up to 3 months – perfect for planning ahead for special occasions. Just thaw in the refrigerator overnight before assembling.
Solving Common Baking Issues
If your cake sinks in the middle, your oven temperature might be off – I recommend using an oven thermometer for accuracy. A dome that’s too high usually means too much leavening or overmixing. For cracked tops, your oven is likely too hot. If the cake sticks to the pan, make sure you’re properly preparing with parchment circles and a light coating of baking spray. For cupcakes that overflow, you’ve filled the liners too full – aim for 2/3 capacity. Dense texture usually means overmixing or expired leavening agents.
Frequently Asked Questions
Can I make the Ultimate Dark Chocolate Cake without coffee?
Yes! While coffee enhances the chocolate flavor, you can substitute hot water or hot chai tea for a different flavor profile. The cake won’t taste like coffee either way.
How do I know when the cake is done baking?
A toothpick inserted in the center should come out with a few moist crumbs (not wet batter). The cake should also spring back slightly when touched.
Can I make this cake in advance?
Absolutely! The layers actually improve with a day of rest. You can bake up to 3 days ahead or freeze layers for up to 3 months.
What’s the best cocoa powder to use?
Dutch-processed cocoa creates the richest flavor and darkest color, but regular unsweetened cocoa works well too. Avoid hot cocoa mix, which contains sugar and other additives.
Why is my Ultimate Dark Chocolate Cake dry?
Overbaking is usually the culprit. Check your cake 5 minutes before the recipe suggests. Also, measure flour by spooning into cups rather than scooping.
Final Thoughts
This Ultimate Dark Chocolate Cake has become my signature dessert for good reason – it never fails to impress and brings people together in that magical way that only chocolate can. The deep, complex flavor combined with that perfect moist texture creates something truly special. Whether you’re celebrating a milestone or simply need a chocolate fix, this recipe delivers every time. I’d love to see your creations on Pinterest if you give it a try!