

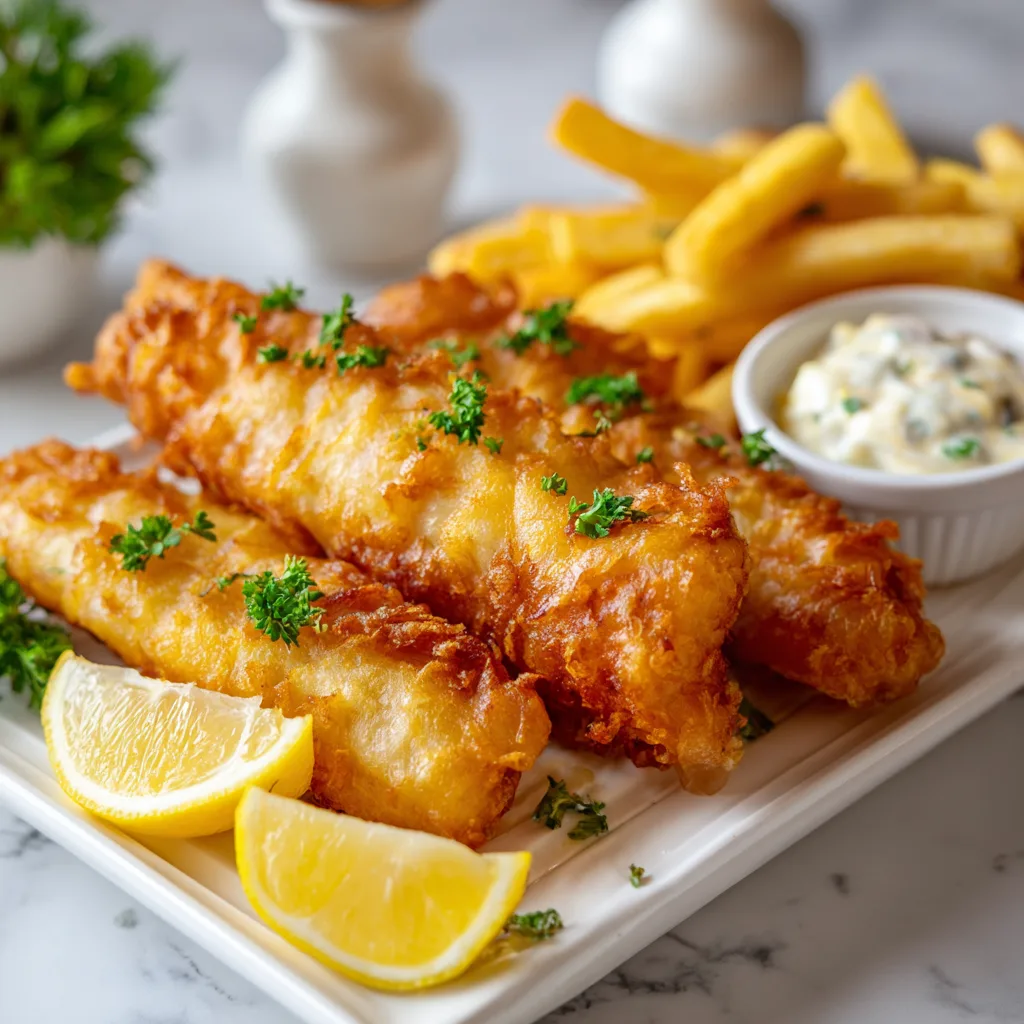
There’s something magical about Classic British Fish & Chips that transports me straight to a seaside holiday. That first bite through the crispy, golden batter into flaky white fish, followed by a handful of perfectly fried chips – it’s comfort food at its finest. I discovered my love for this dish during a rainy weekend in London, where the local chippy served newspaper-wrapped parcels that steamed with vinegary goodness. Today, I’m sharing how to create this iconic meal in your own kitchen, complete with that authentic crunch and flavor that makes British Fish & Chips so irresistible.
Recipe
Print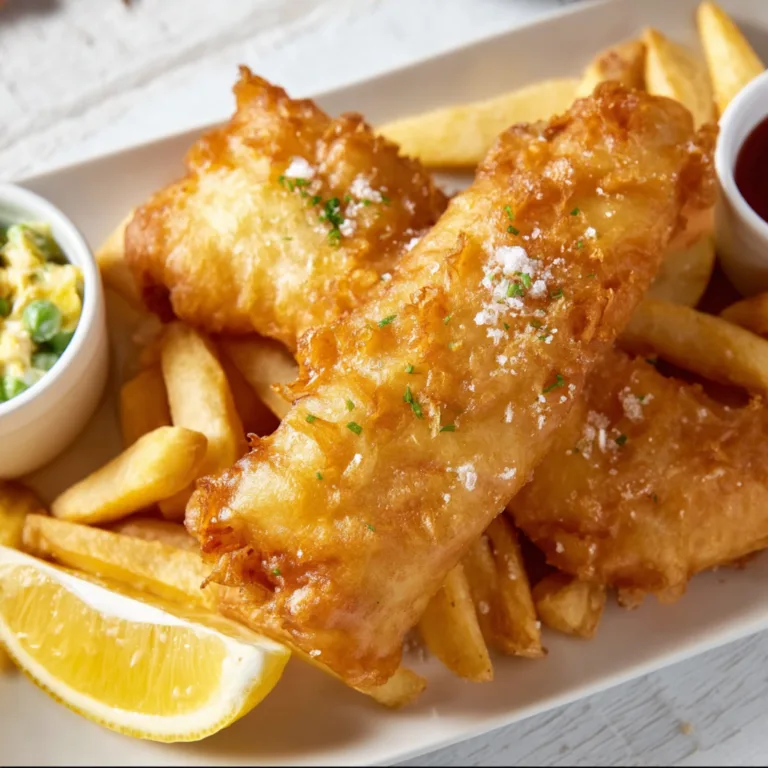
Classic British Fish & Chips
This classic British fish and chips recipe features crispy golden battered white fish and thick-cut fries. A traditional, pub-style meal that’s both comforting and downright delicious!
- Total Time: 45 minutes
- Yield: 4 servings
Ingredients
4 fillets of cod or haddock (about 6 oz each)
1 cup all-purpose flour (plus extra for dredging)
1/4 cup cornstarch
1 tsp baking powder
1 cup cold sparkling water (or beer)
1 tsp salt
1/2 tsp black pepper
1/2 tsp paprika (optional)
4 large russet potatoes, peeled and cut into thick fries
Oil for deep frying (vegetable or canola)
Optional: malt vinegar, tartar sauce, lemon wedges
Instructions
1. Soak cut potatoes in cold water for at least 30 minutes. Drain and pat dry.
2. Heat oil in a deep fryer or large pot to 350°F (175°C).
3. In a large bowl, whisk together flour, cornstarch, baking powder, salt, pepper, and paprika. Slowly whisk in cold sparkling water until a smooth batter forms.
4. Dredge fish lightly in flour, then dip into batter to coat evenly.
5. Fry fish in hot oil for 5–7 minutes or until golden brown and cooked through. Remove and drain on a paper towel-lined rack.
6. Fry chips in batches for 5–6 minutes until tender. Remove, increase oil to 375°F (190°C), then refry until golden and crispy.
7. Serve fish and chips hot with lemon wedges, tartar sauce, or malt vinegar.
Notes
Keep the batter cold for crispier results.
Double-frying the chips gives them that signature crispy texture.
Serve immediately for best texture—this dish doesn’t store well.
- Prep Time: 20 minutes
- Cook Time: 25 minutes
- Category: Dinner
- Method: Deep Frying
- Cuisine: British
Why You’ll Love This Classic British Fish & Chips
The Perfect Crispy-to-Fluffy Ratio
The secret to authentic fish and chips lies in the contrasting textures. The batter should shatter like glass when you bite into it, revealing steamy, tender fish inside. I’ve tested countless batters and found that using cold fizzy water creates those magical air bubbles that make the coating extraordinarily light. For the chips, a double-fry method transforms ordinary potatoes into golden planks with fluffy centers. The first fry at a lower temperature cooks them through, while the second at a higher heat creates that crispy exterior that makes you close your eyes in pure bliss with every bite.
A Taste of British Tradition
There’s something deeply nostalgic about this meal, even if you’ve never set foot in England. The combination of fresh cod or haddock in beer batter, sprinkled with salt and splashed with malt vinegar, connects you to generations of British tradition. I love how the slightly sweet, malty flavor of the batter complements the delicate fish. The chips should be thick-cut – none of those skinny fries here! – allowing them to stay fluffy inside while developing a satisfying crunch outside. Add a side of mushy peas, and you’re experiencing a true British classic that has stood the test of time.
Essential Tips & Tricks
Selecting and Preparing Your Ingredients
Starting with the right fish makes all the difference. Cod and haddock are traditional choices, but any firm white fish works well. Look for thick fillets with a fresh, ocean scent – never fishy! Pat them completely dry before battering to ensure proper adhesion. For potatoes, Russets or Maris Pipers are ideal due to their starch content. Cut them into 1/2-inch thick batons and soak in cold water for at least 30 minutes to remove excess starch. This simple step creates chips that are crispy outside and fluffy inside, just like those served at the best seaside chip shops.
Mastering the Frying Process
Temperature control is absolutely crucial when frying. Use a thermometer and maintain your oil between 325°F-350°F for chips and 375°F for fish. Fry in small batches to avoid temperature drops that lead to greasy results. I learned the hard way that overcrowding the pan is a recipe for soggy disaster! For the batter, keep it cold until the last possible moment – I even set my mixing bowl in an ice bath. Work quickly when dipping and frying to preserve those air bubbles. Remember to let excess batter drip off before carefully lowering each fillet into the oil, away from you to prevent splashes.
Serving Ideas & Creative Variations
Traditional Accompaniments
The classic way to serve fish and chips includes traditional sides that enhance the experience. Malt vinegar is non-negotiable – sprinkle it liberally over both fish and chips for that authentic tang. Tartar sauce made with capers, gherkins, and fresh herbs adds creamy contrast to the crispy textures. Mushy peas might sound strange if you’re uninitiated, but this bright green side dish provides a sweet counterpoint that balances the meal perfectly. For an extra-authentic touch, wrap portions in parchment paper (traditional newspaper isn’t food-safe!) and serve with lemon wedges for squeezing. This presentation always reminds me of seaside holidays.
Modern Twists on the Classic
While I adore traditional fish and chips, there’s room for delicious variations. Try panko breadcrumbs mixed into the batter for extra crunch, or add curry powder for a nod to another British favorite. For a lighter version, air-frying works surprisingly well – spray the battered fish with oil before cooking at 390°F. Sweet potato chips offer a nutritious alternative with caramelized edges. For dipping, experiment beyond tartar sauce with sriracha mayo, garlic aioli, or malt vinegar-spiked ketchup. My family loves a “chip shop platter” with battered fish alongside onion rings, pickled eggs, and curry sauce for dipping everything.
Storage & Troubleshooting Guide
Keeping It Crispy
Fish and chips are best enjoyed immediately after cooking, but sometimes you need to store leftovers. To maintain maximum crispiness, cool completely before refrigerating in an airtight container with paper towels to absorb moisture. Reheat in a 375°F oven on a wire rack (never microwave!) for 10-15 minutes until hot and crisp again. If you need to keep the fish warm while finishing the chips, place it on a wire rack in a low oven (200°F). For make-ahead options, you can prepare the batter and cut the potatoes in advance, but the actual frying should always be done just before serving.
Fixing Common Problems
Even experienced cooks encounter challenges with this dish. If your batter slides off the fish, ensure the fillets are completely dry and try dusting with flour before dipping. For soggy batter, check your oil temperature – it must be hot enough to seal the coating immediately. If chips turn out limp instead of crispy, they likely weren’t dried properly after soaking or were fried at too low a temperature. Remember that overcrowding the fryer is the enemy of crispiness! For batter that’s too thick, gradually add more liquid; if too thin, whisk in additional flour. Always taste-test your batter before using – it should be seasoned well.
Frequently Asked Questions
What’s the best fish for authentic British Fish & Chips?
Cod and haddock are traditional choices, but any firm white fish works. Look for thick, fresh fillets that hold together well when cooked. Pollock and hake are excellent budget-friendly alternatives.
Can I make this without a deep fryer?
Absolutely! A deep, heavy-bottomed pot works perfectly. Use a thermometer to monitor oil temperature and maintain a depth of at least 3 inches of oil for proper cooking.
How do I achieve that super crispy batter?
The secret is cold ingredients and carbonation. Use ice-cold beer or fizzy water in your batter, and don’t overmix. Keep the batter chilled until the moment you dip the fish.
What oil is best for Classic British Fish & Chips?
Neutral oils with high smoke points work best. Vegetable, canola, or peanut oil are excellent choices. Some traditional shops use beef tallow for authentic flavor.
Can I prepare any components ahead of time?
You can cut potatoes and store them in water (refrigerated) for up to 24 hours. The batter can be made 1-2 hours ahead but might need a quick whisk before using.
Final Thoughts
Creating Classic British Fish & Chips at home connects you to a beloved culinary tradition while letting you control quality and ingredients. The crackling sound as you bite through that golden batter, the tender flake of fresh fish, and the comforting heft of proper chips – it’s an experience worth mastering. Don’t be intimidated by the frying process; with practice, you’ll develop an intuition for perfect timing and temperature. Share your creations on Pinterest and tag me in your crispy, golden successes. There’s nothing quite like serving up this British classic to appreciative friends and family!