

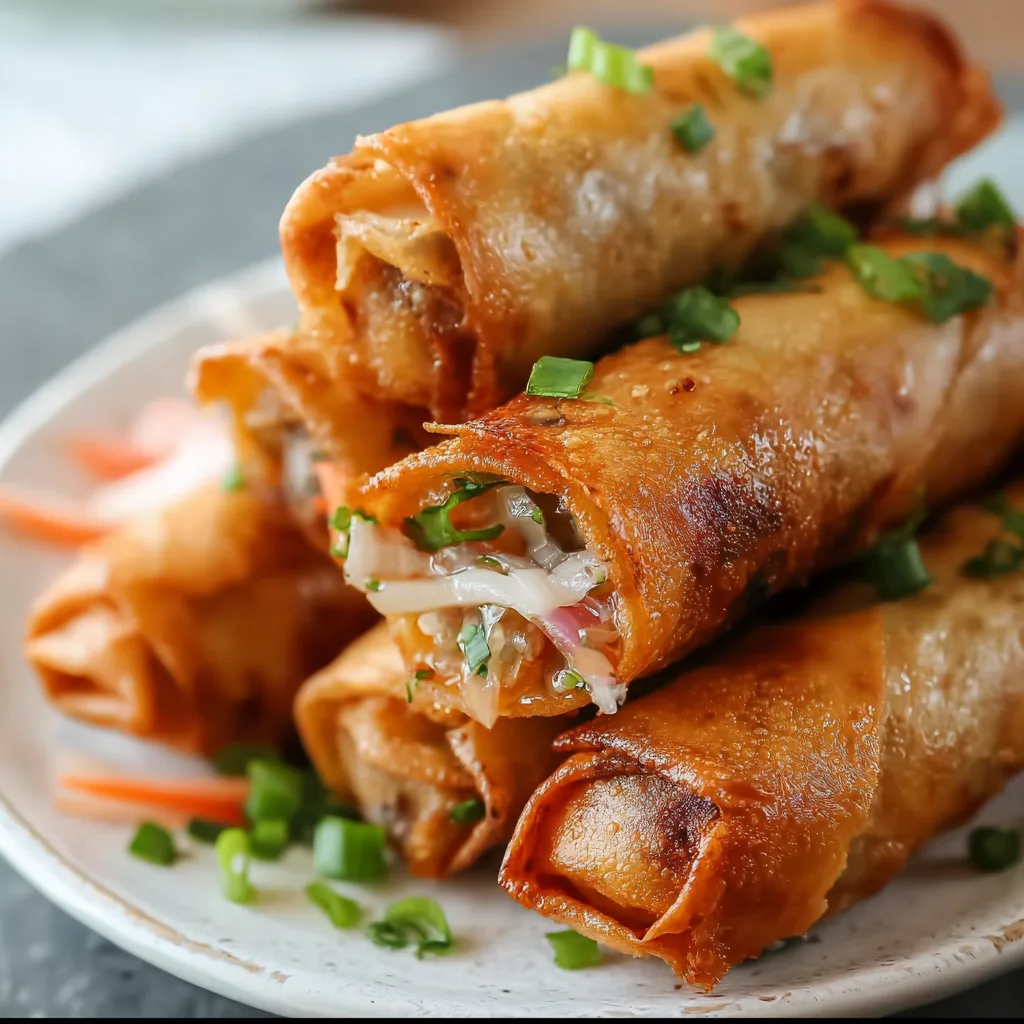
Filipino Lumpia has been my absolute comfort food obsession since I first tasted these crispy, savory rolls at my neighbor’s family gathering. The delicate crunch of the wrapper giving way to that perfectly seasoned filling creates a moment of pure culinary bliss that’s hard to match. There’s something magical about the way these traditional Filipino spring rolls bring people together—whether you’re serving them as appetizers at a party or enjoying them as a cozy family dinner. I’ve spent years perfecting my technique, and I’m thrilled to share my secrets for creating authentic, mouthwatering lumpia that will transport your taste buds straight to the Philippines.
Recipe
Print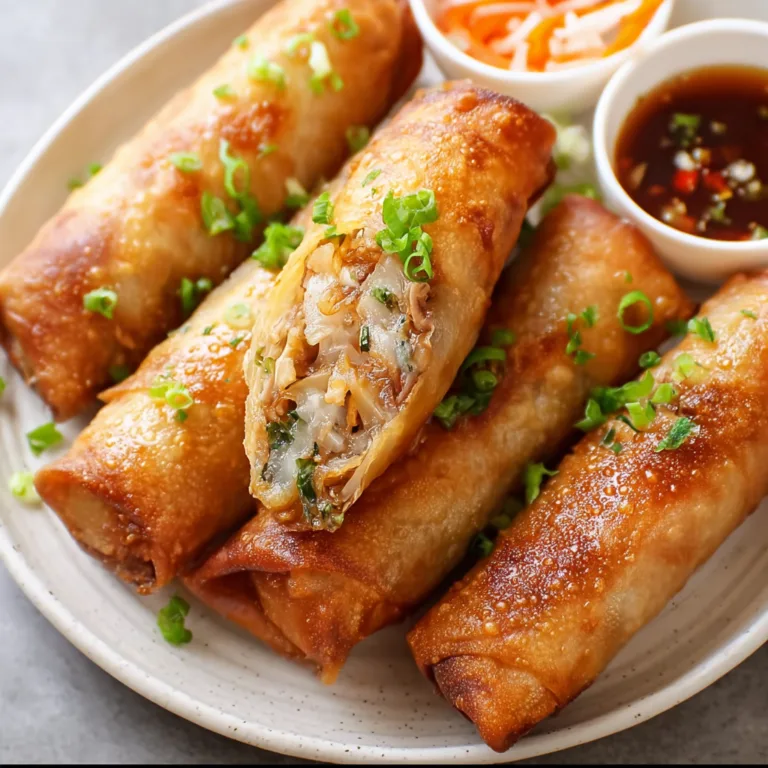
Authentic Filipino Lumpia Recipe
These Authentic Filipino Lumpia are crispy, golden spring rolls filled with savory ground pork, fresh vegetables, and classic Filipino seasonings. Perfect as an appetizer, snack, or party dish, these crunchy lumpia are incredibly flavorful and served with a delicious dipping sauce.
- Total Time: 35 minutes
- Yield: 20 lumpia
Ingredients
1 lb ground pork
1 cup finely shredded cabbage
1/2 cup grated carrots
1/4 cup finely chopped onion
2 cloves garlic, minced
2 tablespoons soy sauce
1 teaspoon sesame oil
1/2 teaspoon black pepper
20 lumpia wrappers
Vegetable oil for frying
For dipping sauce:
1/4 cup sweet chili sauce
1 tablespoon soy sauce
1 teaspoon rice vinegar
Instructions
1. In a large bowl combine ground pork, cabbage, carrots, onion and garlic.
2. Add soy sauce, sesame oil and black pepper.
3. Mix well until all ingredients are evenly combined.
4. Lay one lumpia wrapper on a clean surface.
5. Place about 2 tablespoons of filling near one corner of the wrapper.
6. Fold the sides inward and roll tightly like a small spring roll.
7. Seal the edge with a little water.
8. Repeat with the remaining wrappers and filling.
9. Heat vegetable oil in a deep skillet over medium heat.
10. Fry the lumpia in batches for about 4–5 minutes until golden brown and crispy.
11. Remove and place on paper towels to drain excess oil.
12. Mix sweet chili sauce, soy sauce and rice vinegar for the dipping sauce.
13. Serve the lumpia hot with dipping sauce.
Notes
Keep lumpia wrappers covered with a damp towel so they do not dry out.
Ground chicken or beef can be used instead of pork.
You can freeze uncooked lumpia for later use.
Serve with garlic vinegar or sweet chili sauce.
- Prep Time: 20 minutes
- Cook Time: 15 minutes
- Category: Appetizer
- Method: Frying
- Cuisine: Filipino
Why You’ll Love This Filipino Lumpia
Perfect Texture Combination
There’s something utterly satisfying about that first bite into a properly made lumpia—the way the wrapper shatters with a delicate crispness before giving way to the juicy, savory filling inside. I remember the first time I nailed the texture balance; my kitchen filled with the aromatic blend of garlic, onions, and seasoned meat as I frantically fried batch after batch. The secret lies in keeping your wrappers thin and your filling moist but not wet. When you achieve that perfect balance, each bite delivers that distinctive crunch-then-tender experience that makes lumpia so addictively good. The contrast between the crispy exterior and savory interior creates a textural paradise that keeps you reaching for “just one more.”
Versatile & Crowd-Pleasing
Filipino Lumpia has become my go-to recipe whenever I need to impress guests without spending hours in the kitchen. The beauty of these rolls is their universal appeal—I’ve never met anyone who didn’t love them! You can customize the filling to suit any dietary preference, swapping ground pork for chicken, beef, or even plant-based alternatives. The subtle blend of garlic, onions, and carrots creates a familiar yet exciting flavor profile that appeals to even picky eaters. What I love most is how they work for any occasion—elegant enough for dinner parties but casual enough for game days. Plus, they’re perfect for make-ahead meal prep, allowing you to fry them fresh just before serving for maximum impact.
Essential Tips & Tricks
Wrapper Wisdom
The wrapper technique makes or breaks your lumpia experience. I learned this the hard way after several batches of explosively leaky rolls! Always keep your lumpia wrappers covered with a damp cloth while working to prevent them from drying out and cracking. When rolling, less is more—overstuffing leads to disaster. I place about 1-2 tablespoons of filling on the lower third of each wrapper, fold the bottom edge over the filling, then fold in the sides before rolling upward.
Secure the final edge with a light brush of egg wash or water. For the crispiest results, make sure your wrappers have no tears and are sealed tightly. This technique creates that perfect cylindrical shape that cooks evenly and holds together during frying.
Oil Temperature Mastery
Maintaining the perfect oil temperature is crucial for achieving that golden-brown exterior without greasy results. After countless batches, I’ve found that 350°F (175°C) is the sweet spot. Too hot, and your lumpia will burn before cooking through; too cool, and they’ll absorb oil and become soggy. I always use a thermometer, but you can also test by dropping a small piece of wrapper in the oil—it should bubble immediately and float to the top. Work in small batches to avoid overcrowding, which drops the oil temperature dramatically. I like to arrange my finished lumpia on a cooling rack rather than paper towels, allowing excess oil to drip away while maintaining that perfect crispness we’re after.
Serving Ideas & Creative Variations
Dipping Sauce Delights
The right dipping sauce elevates Filipino Lumpia from delicious to absolutely unforgettable. My go-to is a simple sweet chili sauce, but I love experimenting with different flavor profiles. A tangy vinegar-garlic dip (mix rice vinegar, minced garlic, a touch of sugar, and red pepper flakes) offers a traditional Filipino approach that cuts through the richness perfectly. For something creamier, try mixing mayo with Sriracha and a squeeze of lime. I recently served a platter with three different dipping options, and guests couldn’t decide which they loved most! The sauce becomes an integral part of the experience, so don’t skip this step. Each dip creates a completely different flavor experience, allowing you to customize each bite according to your mood.
Fusion Fillings
While traditional pork lumpia will always have my heart, experimenting with fusion fillings has opened up endless possibilities. My recent obsession is a Thai-inspired version with ground chicken, lemongrass, ginger, and a hint of coconut milk. For vegetarian guests, I create a filling with finely chopped mushrooms, cabbage, carrots, and glass noodles that mimics the texture of the meat version surprisingly well. Sweet dessert lumpia filled with banana and brown sugar, then dusted with powdered sugar after frying, makes for an impressive finale to any meal. The basic technique remains the same, but these creative variations keep the concept fresh and exciting. Don’t be afraid to experiment with flavors from your own cultural background or favorite cuisines.
Storage & Troubleshooting Guide
Make-Ahead & Freezing Methods
Mastering the make-ahead strategy has revolutionized how I serve lumpia. You can prepare and roll them completely, then freeze uncooked lumpia in a single layer on a baking sheet until solid. Once frozen, transfer to freezer bags with parchment paper between layers. They’ll keep for up to three months! The beauty is you can fry them directly from frozen—just add an extra minute to the cooking time. For cooked leftovers (if you ever have any!), store in the refrigerator for 2-3 days and reheat in a 350°F oven for 10-15 minutes to restore crispness.
Avoid microwaving at all costs, as it creates a soggy disappointment rather than the crispy delight you’re craving. This approach has saved countless dinner parties when unexpected guests arrive.
Fixing Common Problems
Even experienced lumpia makers encounter issues, but most have simple troubleshooting solutions. If your wrappers tear while rolling, patch with a small piece of another wrapper using egg wash as “glue.” Lumpia that unravel during frying usually means they weren’t sealed properly—make sure to press the final edge firmly and consider using more egg wash as adhesive. If your filling seems too wet (causing steam and soggy wrappers), mix in a tablespoon of breadcrumbs to absorb excess moisture.
For lumpia that brown too quickly on the outside while remaining raw inside, your oil is likely too hot—lower the heat and be patient. Remember that perfect lumpia takes practice, so don’t be discouraged if your first batch isn’t perfect. Each attempt brings you closer to mastery.
Frequently Asked Questions
What’s the difference between Filipino Lumpia and Chinese spring rolls?
Filipino Lumpia typically has a thinner, crispier wrapper and a meat-heavy filling with fewer vegetables. The seasoning profile is also different, with Filipino Lumpia featuring more garlic and black pepper rather than five-spice powder.
Can I bake Filipino Lumpia instead of frying?
Yes! Brush them lightly with oil and bake at 425°F for 15-20 minutes, turning halfway. They won’t be quite as crispy as fried, but still delicious and much lower in oil.
How do I keep my lumpia crispy for a party?
Keep them warm in a 200°F oven on a wire rack (not stacked) for up to 1 hour. Avoid covering them, as trapped steam will soften the wrappers.
What’s the best meat for Filipino Lumpia?
Traditional Filipino Lumpia uses ground pork for its perfect fat-to-meat ratio, but ground chicken or beef work well too. For the most authentic flavor, a pork-beef mixture offers ideal richness.
Why are my lumpia wrappers tough after frying?
Tough wrappers usually result from frying at too low a temperature, causing them to absorb oil and cook too slowly. Make sure your oil is at 350°F for the perfect crispy texture.
Final Thoughts
There’s something deeply satisfying about mastering Filipino Lumpia—that moment when the wrapper crackles perfectly and the filling is seasoned just right feels like a culinary victory. I hope these tips help you create your own lumpia memories, whether for a quiet family dinner or a bustling holiday gathering. The beauty of this recipe lies in its adaptability and the joy it brings to those who share it.
Don’t be intimidated by the rolling technique; with practice, it becomes second nature. Your kitchen will soon be filled with the irresistible aroma of these golden treasures, and trust me—once you start making lumpia, you’ll always have friends eager to visit! Find more inspiration for your next cooking adventure at Pinterest.