


Creamy Fruit Salad Rollups have become my absolute summertime obsession! Picture this: tender tortillas wrapped around a luscious cream cheese filling, studded with fresh, juicy fruit pieces that burst with sweetness in every bite. The first time I made these for my niece’s birthday brunch, they disappeared faster than I could say “seconds, please!” There’s something magical about the way the creamy filling melts against the soft tortilla, creating the perfect vehicle for those vibrant fruit flavors. Whether you’re hosting a casual get-together or need a quick breakfast on-the-go, these rollups bring a refreshing twist to your typical fruit salad. They remind me of those perfect summer mornings on my grandma’s porch—simple, sweet, and utterly satisfying. Ready to bring some fruity magic to your kitchen?
Recipe
Print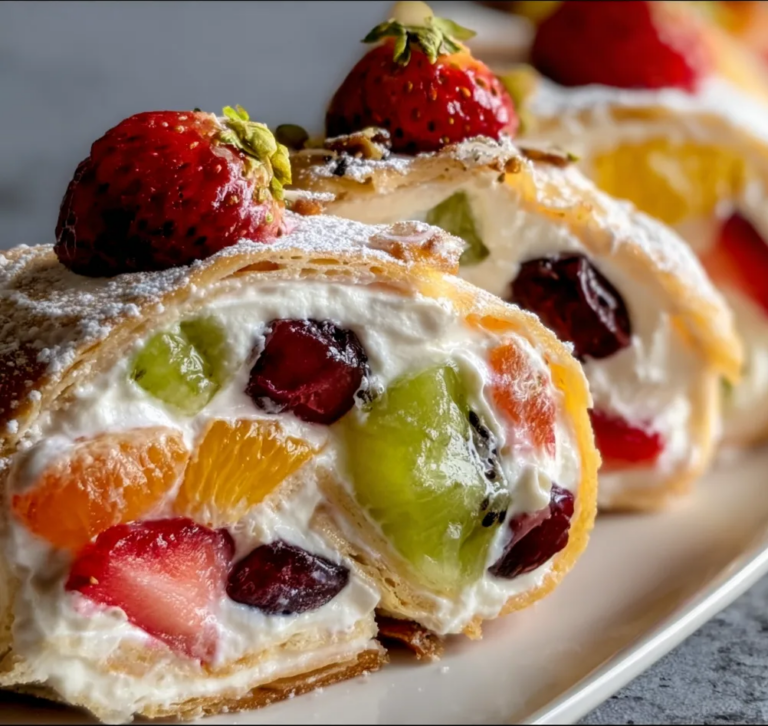
Creamy Fruit Salad Rollups Recipe
Creamy Fruit Salad Rollups are easy, sweet, and delicious with soft tortillas filled with creamy cheesecake-style fruit salad and fresh berries for a fun no-bake treat.
- Total Time: 45 minutes
- Yield: 4 rollups
Ingredients
4 large flour tortillas
4 oz cream cheese, softened
1/2 cup vanilla Greek yogurt
2 tbsp honey
1 tsp vanilla extract
1 cup strawberries, diced
1 cup grapes, halved
1/2 cup mandarin oranges, drained
1/2 cup pineapple tidbits, drained
1/2 cup mini marshmallows
1/4 cup shredded coconut, optional
Instructions
1. In a large bowl, beat cream cheese until smooth.
2. Add Greek yogurt, honey, and vanilla extract, then mix until creamy.
3. Fold in strawberries, grapes, mandarin oranges, pineapple, mini marshmallows, and coconut.
4. Spread the creamy fruit mixture evenly over each tortilla.
5. Roll tortillas tightly into wraps.
6. Chill for 20–30 minutes to firm up.
7. Slice into pinwheels or serve as whole rollups.
8. Serve cold and enjoy.
Notes
Drain canned fruit well to prevent soggy wraps.
Use soft, fresh tortillas so they roll easily.
Add bananas right before serving to avoid browning.
Chill before slicing for cleaner pinwheels.
Store covered in the fridge for up to 2 days.
- Prep Time: 15 minutes
- Cook Time: 0 minutes
- Category: Dessert
- Method: No-Cook
- Cuisine: American
- Diet: Vegetarian
Why You’ll Love These Creamy Fruit Salad Rollups
Perfect Balance of Flavors and Textures
There’s something absolutely enchanting about the textural contrast in these rollups that keeps you coming back for more. The soft, pliable tortilla wraps around that velvety cream cheese mixture, creating this delightful cushion for the fresh fruit pieces. I love how the juicy strawberries and blueberries pop against the tangy cream cheese, while hints of honey add just the right touch of sweetness. The first time I served these at a baby shower, my friend’s mother-in-law (who famously dislikes “fussy food”) asked for the recipe! That’s when I knew these rollups had that magical quality of being sophisticated enough for special occasions yet simple enough to win over even the pickiest eaters.
Quick and Convenient Make-Ahead Option
As someone who values both sleep and hosting, I’ve fallen hard for recipes that let me prep ahead without sacrificing quality. These creamy fruit rollups are my secret weapon for busy mornings! You can assemble them the night before, wrap tightly in plastic, and they’ll be perfectly chilled and ready to slice by morning. The cream cheese mixture actually sets up beautifully overnight, making the rollups even easier to cut into those pretty pinwheels. Last month when my sister’s family stayed over, I prepared these before bed and woke up to a ready-made breakfast that looked like I’d been up since dawn. The kids thought I was some kind of breakfast fairy, and honestly, I didn’t correct them!
Essential Tips & Tricks
Mastering the Perfect Filling Consistency
Getting that dreamy, spreadable texture for your cream cheese filling makes all the difference between good rollups and incredible ones. Start with room temperature cream cheese—this is non-negotiable! Cold cream cheese will tear your tortillas and create lumpy filling. I learned this the hard way at my first attempt (kitchen disaster stories, anyone?). Whip the cream cheese with a splash of vanilla and honey until it’s fluffy and cloud-like before folding in your fruit. For extra creaminess, I sometimes add a tablespoon of Greek yogurt or a whisper of heavy cream. This creates that silky texture that spreads like a dream and holds your fruit pieces perfectly suspended within each bite, rather than having them tumble out when you take a bite.
Fruit Selection and Preparation Secrets
The magic of these rollups lies in choosing and preparing your fruit properly. Opt for firm, ripe fruit that won’t release too much moisture into your filling. Berries should be fresh and patted completely dry after washing—I lay mine on paper towels while I prepare the cream cheese mixture. For fruits like strawberries and peaches, dice them into small, uniform pieces (about 1/4-inch) so they distribute evenly. Bananas work wonderfully but need a splash of lemon juice to prevent browning. My personal favorite combination is strawberries, blueberries and kiwi—the colors are gorgeous together, and they complement the sweet-tart balance of my Snickerdoodle Cobbler perfectly. The key is variety in both flavor and texture!
Serving Ideas & Creative Variations
Elegant Presentation for Special Occasions
Transform these humble rollups into showstoppers with thoughtful presentation! For brunch gatherings, I arrange the colorful pinwheels in a spiral pattern on a white serving platter, then tuck fresh mint leaves between pieces for a pop of green. Drizzle with a thin stream of honey and scatter a few edible flowers for that “wow” factor. When I hosted my book club, I served these on individual small plates with a tiny jar of honey-vanilla yogurt dip alongside—everyone raved about the presentation! For kids’ parties, thread 3-4 pieces onto colorful paper straws for easy grabbing. The beauty of these rollups is that they’re naturally gorgeous with their swirls of cream and fruit, so even minimal styling makes them look like you spent hours on presentation.
Sweet and Savory Twist Options
Don’t limit yourself to just sweet versions—these rollups are incredibly versatile! For a breakfast-meets-lunch option, try adding a thin layer of natural nut butter beneath the cream cheese layer. The protein boost makes them more substantial, and the nutty flavor works beautifully with fruits like apples and bananas. For a more sophisticated flavor profile, fold fresh herbs into your cream cheese—basil with strawberries or mint with watermelon creates an unexpected but delightful combination, similar to my Black-Eyed Pea Salad that balances sweet and savory notes. You can even go fully savory with cucumber, dill, and a touch of lemon zest for a tea sandwich alternative. I’ve served these at everything from baby showers to poker nights—they’re that adaptable!
Storage & Troubleshooting Guide
Keeping Rollups Fresh and Preventing Sogginess
Nothing ruins these delightful treats faster than soggy tortillas! To keep them perfectly fresh, wrap the whole unsliced roll tightly in plastic wrap, ensuring all air is pressed out. This creates a barrier that prevents moisture from the filling from softening the tortilla too much. If making more than 4 hours ahead, place a paper towel around the plastic-wrapped roll to absorb any excess moisture. For sliced rollups, store them in a single layer in an airtight container with parchment paper between layers. I’ve found that adding a small piece of paper towel to the container helps absorb humidity. My neighbor taught me this trick after I brought some slightly soggy rollups to her garden party—it’s been a game-changer for maintaining that perfect texture!
Troubleshooting Common Issues
Even experienced cooks encounter challenges! If your filling is too runny, pop it in the refrigerator for 15-20 minutes to firm up before spreading. For filling that keeps squeezing out the sides when rolling, you’re likely using too much—a thin, even layer works best. If your tortillas crack when rolling, they’re probably too cold or too dry; warm them briefly in the microwave under a damp paper towel for 10 seconds. For slices that won’t hold their shape, refrigerate the whole roll for at least 30 minutes before cutting. When I was rushing to make these for my daughter’s dance recital, I skipped the chilling step and ended up with messy (though still delicious) pinwheels. That extra patience makes all the difference in presentation!
Frequently Asked Questions
Can I use frozen fruit for Creamy Fruit Salad Rollups?
Fresh fruit works best, but if using frozen, thaw completely and drain thoroughly on paper towels to remove excess moisture. Pat dry before adding to your cream cheese mixture to prevent soggy rollups.
What’s the best tortilla type to use?
Flour tortillas in the 8-inch size provide the perfect balance of flexibility and structure. Look for the “soft taco” size, and choose ones labeled “burrito style” for extra pliability.
Can I make these dairy-free?
Absolutely! Substitute the cream cheese with dairy-free cream cheese alternatives. Coconut yogurt mixed with a bit of lemon juice creates a similar tangy-sweet base that works beautifully with fruit.
How far in advance can I prepare these?
These rollups can be made up to 24 hours in advance. For best results, store the uncut rolls wrapped tightly in plastic in the refrigerator and slice just before serving.
Why are my rollups falling apart when I cut them?
Chilling is crucial! Refrigerate your assembled rolls for at least 30 minutes before slicing. Use a sharp serrated knife and a gentle sawing motion rather than pressing down.
Final Thoughts
These Creamy Fruit Salad Rollups have become my go-to for everything from lazy Sunday brunches to elegant baby showers. There’s something magical about transforming simple ingredients into these beautiful pinwheels that never fails to bring smiles. What I love most is their versatility—they’re equally at home on a paper plate at a backyard picnic or arranged elegantly on fine china for a special occasion. The combination of creamy, sweet, and fresh flavors creates that perfect bite that feels both indulgent and light. Whether you’re a seasoned cook or just starting out, these rollups offer that rare combination of impressive results with minimal effort. I hope they bring as much joy to your table as they have to mine! For more inspiration, check out my collection at Pinterest.