

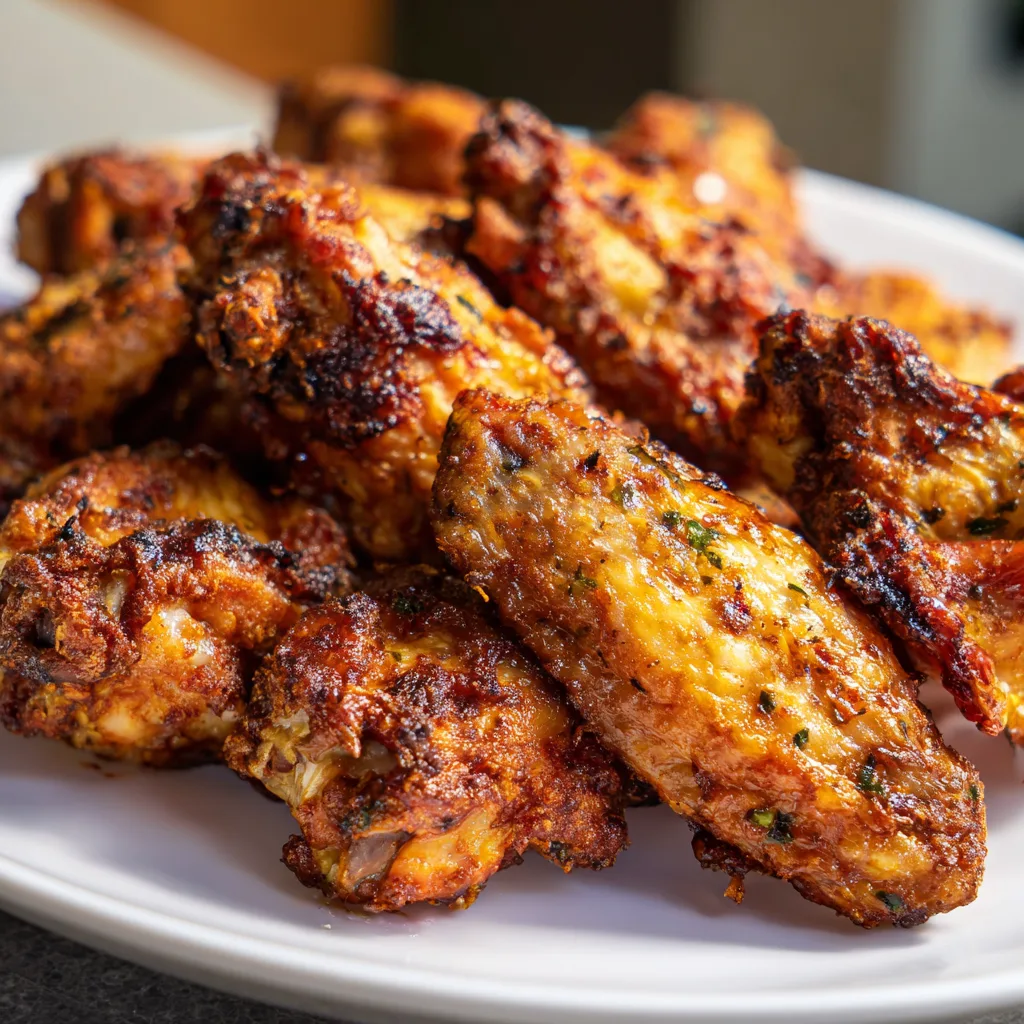
Crispy Baked Chicken Wings have transformed my weekend gatherings forever. That perfect crunch without deep frying? It’s nothing short of kitchen magic. The first time I served these at a family get-together, my brother-in-law (who considers himself a wing connoisseur) couldn’t believe they weren’t fried. The secret lies in a few simple techniques that deliver that irresistible golden exterior while keeping the inside juicy and tender. Let me show you how to create wings that’ll have everyone reaching for seconds at Mug Meal Magic.
Recipe
Print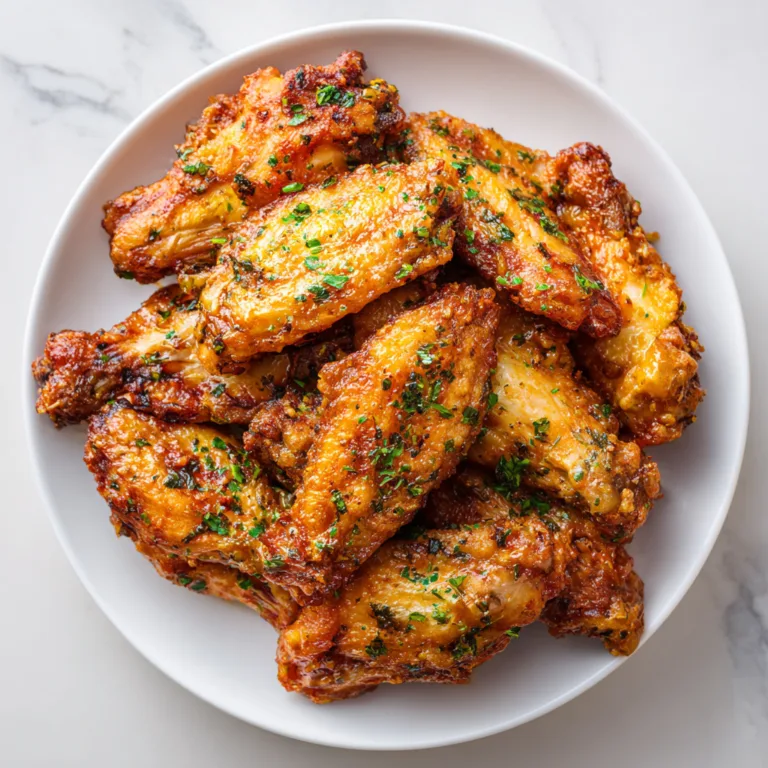
Crispy Baked Chicken Wings Recipe | Easy & Healthy Wings at Home
This Crispy Baked Chicken Wings Recipe delivers the ultimate crunch without deep frying! Perfectly seasoned and oven-baked to golden perfection — these easy, healthy wings are perfect for game day or any time you’re craving something delicious and guilt-free.
- Total Time: 55 minutes
- Yield: 4 servings
Ingredients
2 pounds chicken wings (split at joints, tips removed)
1 tablespoon baking powder (aluminum-free)
1 teaspoon salt
1 teaspoon garlic powder
1 teaspoon paprika
1/2 teaspoon black pepper
1/2 teaspoon onion powder
1 tablespoon olive oil
Optional: your favorite sauce (buffalo, BBQ, honey garlic, or lemon pepper)
Instructions
1. Preheat oven to 425°F (220°C). Line a large baking sheet with foil and place a wire rack on top. Spray lightly with nonstick cooking spray.
2. Pat chicken wings completely dry with paper towels — this step is key for crispiness.
3. In a large bowl, combine baking powder, salt, garlic powder, paprika, black pepper, and onion powder.
4. Add wings and toss until evenly coated. Drizzle with olive oil and toss again.
5. Arrange wings in a single layer on the rack, leaving space between each one.
6. Bake for 40–45 minutes, flipping halfway through, until wings are golden brown and crispy.
7. Optional: Toss baked wings in your favorite sauce or serve plain with a dipping sauce like ranch or blue cheese.
Notes
For extra crispiness, broil for 2–3 minutes after baking.
Make them saucy! Toss in buffalo, BBQ, or garlic Parmesan sauce after baking.
Use baking *powder*, not baking soda — it helps draw out moisture for crispy skin.
Air fryer method: Cook at 400°F for 18–20 minutes, flipping halfway.
- Prep Time: 10 minutes
- Cook Time: 45 minutes
- Category: Appetizer
- Method: Baked
- Cuisine: American
Why You’ll Love These Crispy Baked Chicken Wings
Perfect Texture Without Deep Frying
There’s something deeply satisfying about biting into a perfectly crispy wing that crackles under your teeth before revealing tender, juicy meat underneath. The beauty of this baked method is achieving that restaurant-quality crunch without the mess and calories of deep frying. I’ve spent years perfecting this technique, and the secret lies in thoroughly patting the wings dry before baking and using a light coating of baking powder (not soda!) mixed with spices. This creates a chemical reaction that draws moisture to the surface, where it can evaporate, leaving that golden, crispy exterior we all crave.
Healthier But Just As Delicious
Let’s be honest – traditional deep-fried wings are delicious but leave you feeling heavy afterward. These baked wings deliver all the flavor and crunch without the excess oil. With about 50% less fat than their fried counterparts, you can enjoy these guilt-free wings while still satisfying those cravings. I serve these at every game day gathering, and nobody misses the fried version! The high oven temperature creates a beautiful caramelization on the outside while rendering the fat from the skin, giving you that perfect crispy texture that holds up even when tossed in sauce.
Essential Tips & Tricks
The Secret to Maximum Crispiness
The path to truly crispy wings starts before they even hit the oven. Pat them completely dry with paper towels – I mean really dry, like you’re giving them a gentle exfoliation treatment. This step is non-negotiable! Then, the game-changer: a light dusting of baking powder mixed with your seasonings. The science is fascinating – baking powder raises the skin’s pH level, helping proteins break down more efficiently and creating micro-bubbles that deliver that satisfying crunch. For even better results, place the seasoned wings on a wire rack in the refrigerator for 1-2 hours before baking to draw out additional moisture.
Temperature and Timing Mastery
The perfect baking method involves a two-temperature approach. Start with 30 minutes at 250°F, which helps render the fat from the skin, then crank it up to 425°F for another 40-50 minutes until golden brown and crispy. This method mimics the effect of deep frying but in your oven! Line your baking sheet with foil and place a wire rack on top – this elevation allows hot air to circulate all around the wings, similar to what happens with our Garlic Butter Steak with Parmesan Cream Sauce. Never overcrowd the pan; wings need personal space to crisp properly.
Serving Ideas & Creative Variations
Sauces and Dips That Elevate
While perfectly crispy wings can stand alone with just salt and pepper, the right sauce pairing takes them to new heights. Classic buffalo is always a winner, but don’t stop there! I love offering a DIY sauce bar with options like honey garlic, sweet chili, lemon pepper, and parmesan garlic. For creamy dips, nothing beats a cooling blue cheese or ranch. Pro tip: toss half your wings in sauce and leave the other half dry with sauce on the side – this preserves the crispiness for those who prefer to dip rather than coat. This approach works beautifully with other proteins too, like in our Crispy Bang Bang Chicken.
Complete Your Wing Experience
Wings deserve worthy companions on the plate. Instead of the standard celery and carrot sticks, try roasted sweet potato wedges or crispy smashed potatoes for a more substantial meal. A tangy coleslaw provides the perfect contrast to rich, spicy wings. For a fun presentation, serve wings in paper-lined baskets with dipping sauces in small ramekins. Don’t forget the essentials: plenty of napkins, wet wipes, and even disposable gloves for the truly sauce-dedicated guests. I always set out small bowls for discarded bones to keep the eating area tidy.
Storage & Troubleshooting Guide
Keeping Wings Crispy for Later
The challenge with any crispy food is maintaining that texture during storage and reheating. If you have leftovers (though this rarely happens at my house!), let them cool completely before storing in an airtight container lined with paper towels to absorb excess moisture. Refrigerate for up to 3 days. The magic of these baked wings is they reheat beautifully! Avoid the microwave, which will make them soggy. Instead, place them on a wire rack in a 375°F oven for 10-15 minutes until heated through and re-crisped. The skin will regain much of its original crackly texture.
Solving Common Wing Problems
If your wings aren’t crisping properly, a few culprits might be to blame. First, check if you’re overcrowding the pan – wings need space for air circulation. Second, ensure your oven temperature is accurate; an oven thermometer is a worthy investment. If wings are browning too quickly but aren’t crisp, lower the temperature and extend the cooking time. For wings that are crisp but dry inside, try brining them before baking (soak in saltwater for 2-3 hours, then dry thoroughly). Remember that size matters – larger wings need more time, so adjust accordingly for those jumbo pieces.
Frequently Asked Questions
Can I make crispy baked chicken wings ahead of time?
Yes! Bake them fully, let cool, then refrigerate. Reheat on a wire rack at 375°F for 10-15 minutes until crispy again. They’ll taste nearly as fresh as the first time.
What’s the difference between baking powder and baking soda for wings?
Always use baking powder, not soda! Baking powder has a milder pH that helps crisp the skin without the metallic taste baking soda would leave.
How do I keep my wings from sticking to the rack?
Spray your wire rack with non-stick cooking spray before placing wings on it. Alternatively, lightly brush the rack with oil using a pastry brush.
Why aren’t my wings getting crispy enough?
Ensure you’ve thoroughly dried the wings, used baking powder, and aren’t overcrowding the pan. Your oven may also run cooler than indicated—try increasing the temperature slightly.
Can I use frozen wings for crispy baked chicken wings?
Thaw completely first, then pat very dry. Frozen wings release too much moisture during baking, preventing proper crisping.
Final Thoughts
These Crispy Baked Chicken Wings have become my signature dish for good reason. They deliver that perfect crunch without the deep fryer, making them both healthier and easier to prepare. I love watching friends’ faces light up with that first bite—the moment of surprise when they realize these weren’t fried. Whether you’re hosting game day, a casual gathering, or just treating yourself to something special, these wings hit all the right notes. Find more delicious recipes on Pinterest and discover your next favorite dish!