

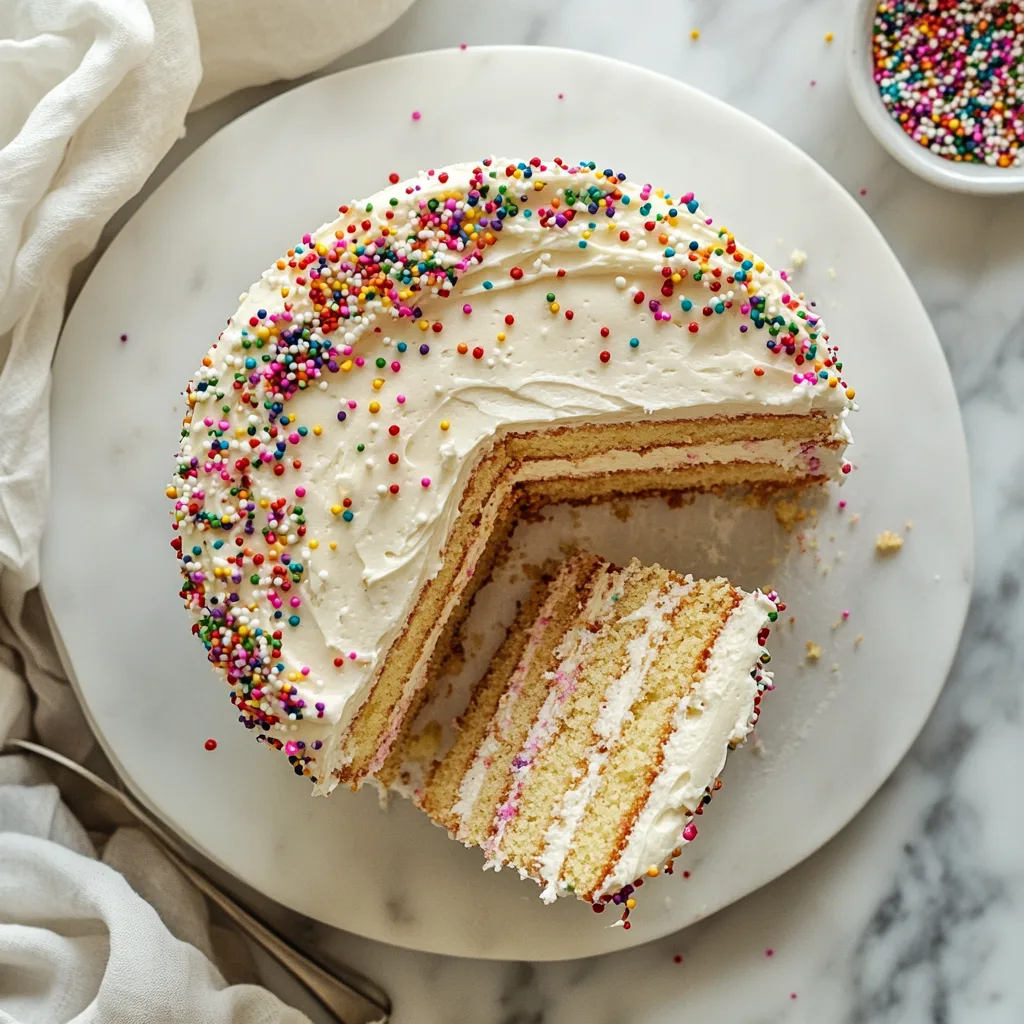
This Gluten-Free Vanilla Layer Cake with Buttercream Frosting is my absolute pride and joy in the kitchen. I’ve spent years perfecting this recipe, testing countless flour blends until I found the perfect combination that creates a tender, moist cake that nobody would guess is gluten-free. The vanilla-scented layers pair beautifully with silky buttercream frosting, creating a dessert that’s worthy of any celebration. Whether you’re baking for someone with celiac disease or simply exploring gluten-free options, this cake delivers pure joy in every bite.
Table of Contents
Recipe
Print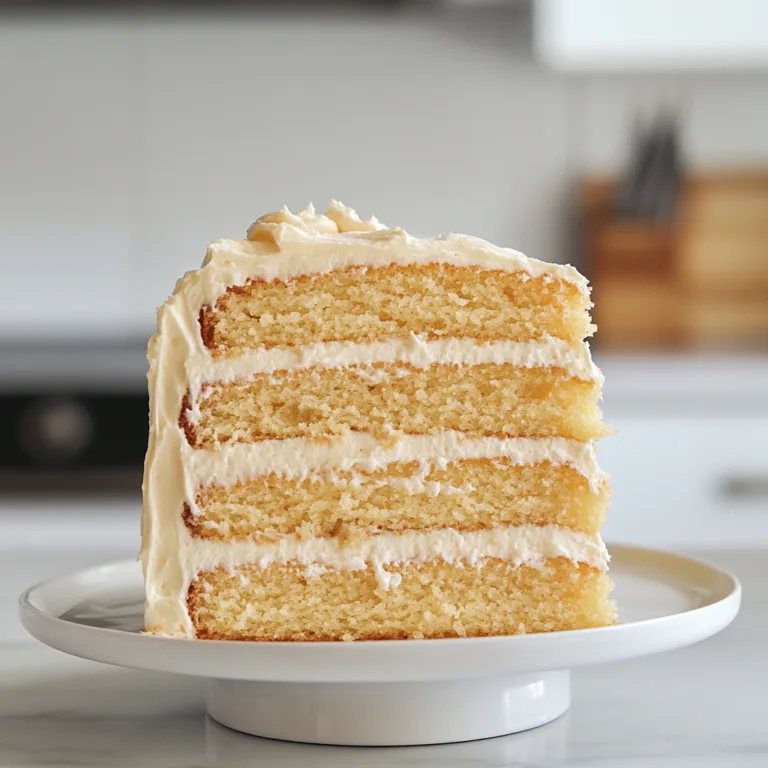
Gluten-Free Vanilla Layer Cake with Buttercream Frosting | Moist & Delicious Recipe
This gluten-free vanilla layer cake is moist, tender, and full of classic buttery flavor. Paired with smooth, creamy vanilla buttercream frosting, it’s the perfect celebration cake for birthdays, holidays, or any special occasion!
- Total Time: 50 minutes
- Yield: 10–12 servings
Ingredients
FOR THE CAKE:
2½ cups gluten-free 1:1 all-purpose flour blend
1½ cups granulated sugar
1 tbsp baking powder
½ tsp salt
1 cup unsalted butter, softened
4 large eggs, room temperature
1 cup milk (or almond milk)
2 tsp vanilla extract
FOR THE BUTTERCREAM FROSTING:
1 cup unsalted butter, softened
4 cups powdered sugar
2–4 tbsp milk or cream
1½ tsp vanilla extract
Pinch of salt
Instructions
1. Preheat oven to 350°F (175°C). Grease and line two 8-inch round cake pans with parchment paper.
2. Whisk gluten-free flour, baking powder, sugar, and salt in a mixing bowl.
3. Add softened butter and beat on low until the mixture resembles coarse crumbs.
4. Add eggs, milk, and vanilla extract. Beat until smooth and creamy—do not overmix.
5. Divide batter evenly between the cake pans and smooth the tops.
6. Bake 26–32 minutes, or until a toothpick inserted into the center comes out clean.
7. Cool cakes in pans 10 minutes, then remove to wire racks to cool completely.
8.
9. MAKE THE BUTTERCREAM:
10. Beat softened butter until smooth and creamy.
11. Gradually add powdered sugar, then milk, vanilla, and a pinch of salt until fluffy and spreadable.
12. Level cake layers if needed, then frost the first cake layer, stack the second one, and frost the top and sides.
13. Chill 20–30 minutes before slicing for the neatest cuts.
Notes
Use a gluten-free 1:1 flour blend with xanthan gum for the best texture.
Add a splash of almond extract for bakery-style flavor.
To keep layers extra moist, brush cooled cakes with a little milk or simple syrup before frosting.
Cake freezes beautifully—wrap tightly and freeze up to 2 months.
- Prep Time: 20 minutes
- Cook Time: 30 minutes
- Category: Dessert
- Method: Baked
- Cuisine: American
Why You’ll Love This Gluten-Free Vanilla Layer Cake with Buttercream Frosting
Perfect Texture & Flavor Balance
The secret to this cake’s incredible texture lies in the specific blend of gluten-free flours I’ve developed through countless test batches. Unlike many gluten-free cakes that can be dry or crumbly, this one stays wonderfully moist for days. The vanilla flavor shines through with a delicate sweetness that isn’t overwhelming. I’ve added a touch of almond extract that enhances the vanilla without competing with it. The buttercream frosting provides the perfect creamy counterpoint to the light, tender crumb of the cake layers. When my gluten-eating friends can’t tell the difference, I know I’ve created something special!
Foolproof Recipe for Any Skill Level
Even if you’ve never baked a gluten-free cake before, this recipe is designed to build your confidence. I’ve included precise measurements and clear instructions that eliminate guesswork. The batter comes together easily without specialized equipment—just a couple of mixing bowls and a whisk will do! The frosting whips up into silky perfection with minimal effort. I remember the first time my niece (who’s only 12) made this cake by herself for her mom’s birthday. The look of pride on her face when everyone raved about it was absolutely priceless. This recipe creates those special memory-making moments.
Essential Tips & Tricks
Mastering Gluten-Free Flour Blends
The foundation of any great gluten-free cake is the flour blend. I recommend using a high-quality store-bought blend that contains xanthan gum, which helps mimic the structure gluten provides. If your blend doesn’t include xanthan gum, add ¾ teaspoon to the dry ingredients. Room temperature ingredients are absolutely essential—cold eggs or butter will create a dense cake. For the best vanilla flavor, splurge on pure vanilla extract rather than imitation. If you’re looking for another delicious gluten-free treat, my Gluten-Free Brownies with Fudgy Centers are a reader favorite!
Perfecting Your Frosting Technique
The key to silky buttercream is starting with properly softened butter—it should yield to gentle pressure but still hold its shape. Beat it for a full 3-4 minutes before adding any other ingredients; this creates the airy texture we’re looking for. Add the powdered sugar gradually, about ½ cup at a time, to prevent a sugar cloud explosion (learned that lesson the hard way!). For the smoothest frosting, sift your powdered sugar to remove any lumps. A splash of heavy cream creates that professional bakery-style finish. If your frosting becomes too soft while working, pop it in the refrigerator for 10 minutes to firm up.
Serving Ideas & Creative Variations
Elegant Presentation Options
Transform this classic cake into a showstopping centerpiece with simple decorating techniques. Fresh flowers (make sure they’re food-safe) arranged on top create an effortlessly elegant look. For a more whimsical approach, decorate with fresh berries, edible gold leaf, or colorful sprinkles. I love creating a naked cake look by applying a thin layer of frosting that lets the cake layers peek through—perfect for rustic celebrations! For a festive holiday version, try adapting techniques from my Hot Chocolate Poke Cake with Whipped Marshmallow Frosting to add seasonal flair.
Flavor Variations to Explore
While vanilla is timeless, this versatile base recipe welcomes creative adaptations. Add the zest of one lemon or orange to the batter for a citrus twist. For chocolate lovers, replace 3 tablespoons of the gluten-free flour with cocoa powder. Almond enthusiasts can increase the almond extract to ½ teaspoon and add ½ cup of toasted sliced almonds between layers. The buttercream is equally adaptable—try adding 2 tablespoons of freeze-dried strawberry powder for a naturally pink strawberry frosting, or fold in ½ cup of strained raspberry preserves for a fruity accent.
Storage & Troubleshooting Guide
Proper Storage for Maximum Freshness
To maintain the cake’s moisture and flavor, proper storage is essential. Once frosted, the cake can be left at room temperature in a cake keeper for up to 2 days. For longer storage, refrigerate for up to 5 days, but always bring slices to room temperature before serving to experience the full flavor and texture. The unfrosted cake layers can be wrapped tightly in plastic wrap and frozen for up to 3 months. The buttercream can also be frozen separately in an airtight container. I often make the components ahead for stress-free assembly on special occasions.
Troubleshooting Common Issues
If your cake sinks in the middle, your oven temperature might be too high or the cake was underbaked. Invest in an oven thermometer for accuracy. Dense, gummy texture usually means overmixing—stop as soon as the ingredients are combined. If your frosting separates or looks curdled, it’s likely too cold; let it warm slightly and beat again until smooth. For crumbs in your frosting, apply a thin “crumb coat” first, chill for 15 minutes, then add the final layer of frosting. Remember that gluten-free cakes are more delicate than traditional ones, so handle with care when removing from pans.
Frequently Asked Questions
Can I make this Gluten-Free Vanilla Layer Cake dairy-free as well?
Yes! Substitute the butter with plant-based butter sticks (not spread) in both cake and frosting. Replace milk with almond or oat milk. The texture may be slightly different but still delicious.
How far in advance can I make this cake?
You can bake the layers up to 3 days ahead and store wrapped in the refrigerator, or freeze for up to 3 months. Assemble and frost the day before or the day of serving.
Why did my cake turn out dry?
Gluten-free cakes can dry out if overbaked. Always check 5 minutes before the recipe time ends, and remove when a toothpick comes out with a few moist crumbs.
Can I use this recipe for cupcakes instead?
Absolutely! This recipe yields about 24 cupcakes. Bake at the same temperature for 18-22 minutes and reduce the frosting by 25%.
What’s the best way to ensure even cake layers?
Use a digital kitchen scale to divide batter equally between pans. For perfectly flat tops, use cake strips soaked in water around the pans before baking.
Final Thoughts
This Gluten-Free Vanilla Layer Cake with Buttercream Frosting has become my signature celebration dessert—the one friends and family request by name. The joy on people’s faces when they taste it makes all the recipe testing worthwhile. I’d love to see your creations if you make this cake! Tag me on Pinterest with your photos. Remember that gluten-free baking isn’t about limitations but about creating something truly special that everyone can enjoy together. Happy baking!