

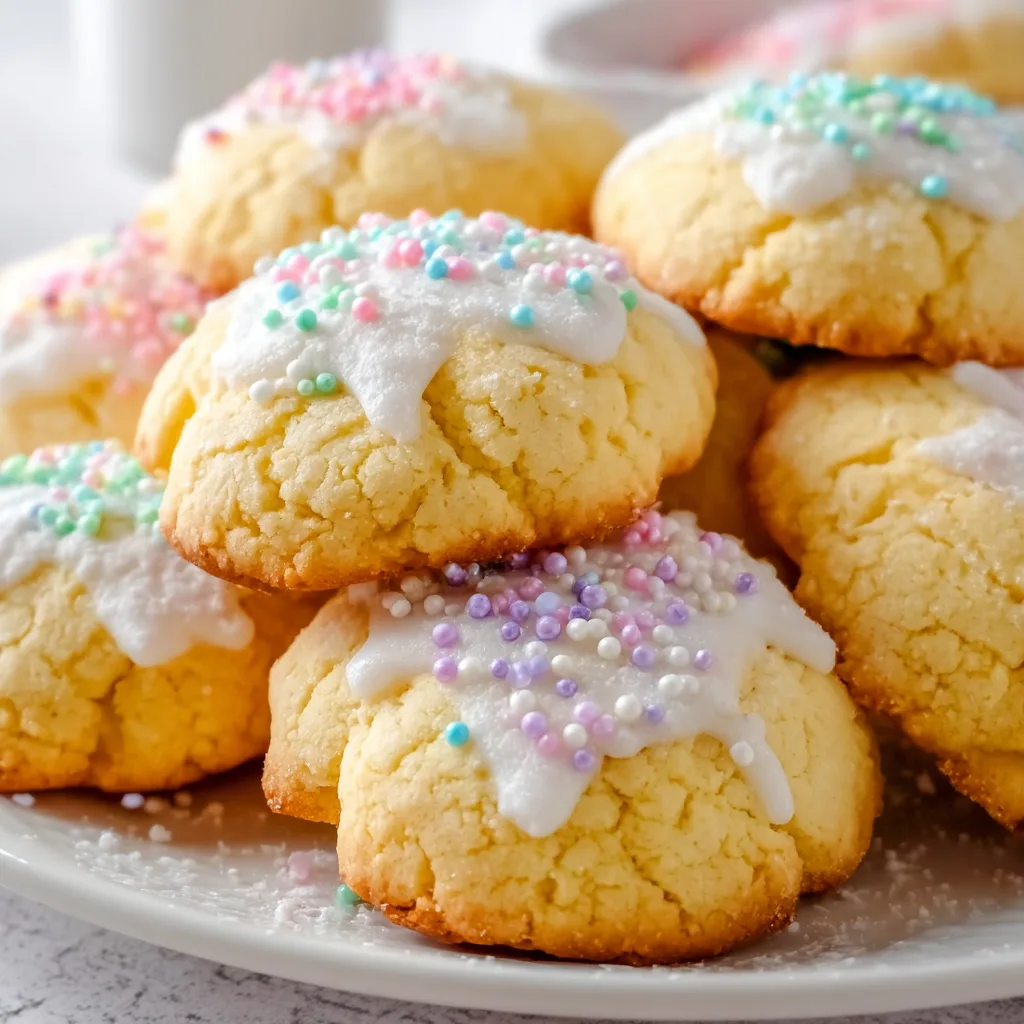
These Italian Easter Cookies bring a burst of springtime joy to any table! With their delicate anise flavor and colorful sprinkles, these traditional treats (known as “taralli dolci di Pasqua” in Italy) have been part of my family’s Easter celebration for generations. I still remember standing on a step stool in my grandmother’s kitchen, eagerly waiting to add rainbow nonpareils to the glossy icing. The sweet aroma of anise and vanilla would fill the entire house, signaling that Easter was truly on its way. These cookies strike the perfect balance between soft and tender with just enough sweetness to complement your morning coffee. Whether you’re honoring tradition or starting a new one, these festive little cookies are sure to become a seasonal favorite.
Recipe
Print
Traditional Italian Easter Cookies Recipe
Traditional Italian Easter Cookies are soft, lightly sweet, and festive with a tender vanilla dough, simple glaze, and colorful sprinkles for an authentic holiday treat.
- Total Time: 32 minutes
- Yield: 30 cookies
Ingredients
3 cups all-purpose flour
2 tsp baking powder
1/2 tsp salt
1/2 cup unsalted butter, softened
3/4 cup granulated sugar
3 large eggs
1 tsp vanilla extract
1/2 tsp almond extract
1/4 cup milk
2 cups powdered sugar
3 tbsp milk, for glaze
1/2 tsp vanilla extract, for glaze
Colorful sprinkles, for topping
Instructions
1. Preheat oven to 350°F and line baking sheets with parchment paper.
2. In a bowl, whisk flour, baking powder, and salt.
3. In a large bowl, beat butter and sugar until light and creamy.
4. Add eggs one at a time, mixing well after each addition.
5. Mix in vanilla extract, almond extract, and milk.
6. Gradually add dry ingredients and mix until a soft dough forms.
7. Scoop and roll dough into balls or twist into small knots.
8. Place cookies on prepared baking sheets.
9. Bake for 10–12 minutes until bottoms are lightly golden.
10. Cool cookies completely.
11. Whisk powdered sugar, milk, and vanilla until smooth.
12. Dip tops of cookies into glaze.
13. Add colorful sprinkles before glaze sets.
14. Let cookies dry before serving.
Notes
Do not overbake; cookies should stay soft and tender.
Use almond extract for classic Italian bakery flavor.
Add lemon zest for a bright spring variation.
Let glaze set fully before storing.
Store in an airtight container for up to 5 days.
- Prep Time: 20 minutes
- Cook Time: 12 minutes
- Category: Dessert
- Method: Baking
- Cuisine: Italian
- Diet: Vegetarian
Why You’ll Love These Italian Easter Cookies
Perfect Texture & Flavor Balance
These cookies have that magical texture – not too soft, not too crisp, but wonderfully tender with a slight resistance when you bite into them. The anise flavor is subtle and sophisticated, providing just enough licorice-like essence without overwhelming your palate. I’ve carefully balanced the sweetness so the cookie itself isn’t too sugary, allowing the glaze to provide that perfect sweet finish. What makes these truly special is how the flavors develop and deepen overnight, making them even more delicious the next day. The slight citrus notes from lemon zest brighten everything up, creating a cookie that feels both traditional and fresh.
Easy to Customize for Everyone
One of the greatest joys of making Italian Easter cookies is how wonderfully adaptable they are. Don’t love anise? Swap it for almond or vanilla extract for a more familiar flavor profile. The traditional shape is a twisted ring, but you can form them into simple knots, figure eights, or even letters for a personalized touch. The decoration options are endless too – pastel sprinkles for spring, chocolate drizzle for the chocolate lovers, or colored sugar for extra sparkle. I’ve made these with my nieces who love adding their own creative touch with different colored icings and sprinkle combinations. These cookies welcome both tradition and innovation.
Essential Tips & Tricks
Perfecting the Dough Consistency
Getting the right dough texture is crucial for these cookies. You want it firm enough to roll into ropes but still pliable and smooth. If your dough feels too sticky, resist the urge to add too much extra flour – just a tablespoon at a time until it feels right. Chilling the dough for 30 minutes makes it much easier to handle. The magic moment comes when the dough no longer sticks to your hands but still feels slightly tacky. When rolling the ropes, use a gentle touch with even pressure to maintain consistent thickness. I’ve found that working on a very lightly floured surface gives the best results – too much flour can dry out your sourdough discard cinnamon quick bread or these delicate cookies.
Mastering the Icing Technique
The glossy icing is what makes these cookies truly special, so don’t rush this step! The perfect consistency should be thick enough to coat the back of a spoon but still flow smoothly. If it’s too thick, add a few drops of milk; if too thin, add more powdered sugar. For the easiest application, dip the top of each cookie into the icing and let the excess drip off. Work quickly to add sprinkles before the icing sets – I usually ice 4-5 cookies at a time, then add decorations. For a professional finish, place the freshly iced cookies on a wire rack over parchment paper to catch drips. The icing will develop a slight crust as it dries, creating that characteristic sheen.
Serving Ideas & Creative Variations
Festive Easter Presentations
Create a stunning display by arranging these cookies in a spiral pattern on a cake stand, mixing different colored sprinkles for a rainbow effect. For Easter brunch, I like to place a small bundle of cookies tied with pastel ribbon at each place setting as an edible favor. They pair beautifully with espresso, cappuccino, or even a glass of sweet dessert wine like Vin Santo. For a truly special presentation, arrange them in a nest-like formation on a platter with chocolate eggs nestled among them. These cookies also make wonderful gifts – package them in cellophane bags tied with ribbon or in vintage tins lined with colorful tissue paper for a holiday-worthy presentation that friends and family will treasure.
Modern Twists on Tradition
While I respect tradition, I also love creative adaptations that keep these cookies fresh and exciting. Try adding orange or lemon zest to the dough for a citrusy variation, or fold in mini chocolate chips for a modern twist. For a more sophisticated flavor, replace the anise with cardamom and add crushed pistachios to the sprinkles. I’ve experimented with dipping half the cookie in melted chocolate after the icing has set for an elegant two-tone effect. For special dietary needs, these can be made with gluten-free flour blends (just add a teaspoon of xanthan gum) or with alternative sweeteners in the dough. The joy of these cookies is how they welcome both tradition and innovation.
Storage & Troubleshooting Guide
Optimal Storage Methods
These cookies have impressive longevity when stored properly. Keep them in an airtight container at room temperature, placing parchment paper between layers to prevent sticking. They’ll stay fresh for up to 10 days this way, though the texture is best within the first week. For longer storage, freeze undecorated cookies for up to 3 months in freezer-safe containers with parchment between layers. Thaw at room temperature before icing. I’ve found that metal tins actually work better than plastic containers for maintaining texture. If you live in a humid climate, add a slice of bread to the container to absorb excess moisture and keep the cookies from becoming too soft.
Solving Common Cookie Problems
If your cookies crack during baking, your oven is likely too hot – reduce the temperature by 25°F and use an oven thermometer to ensure accuracy. Cookies spreading too much? The butter was probably too soft; chill the shaped cookies for 15 minutes before baking. For icing troubles, if it’s hardening before you can add sprinkles, work in smaller batches or add a tiny bit of corn syrup to slow setting time. If your cookies are too dry, you likely added too much flour – next time, measure using the spoon-and-level method rather than scooping directly with the measuring cup. For cookies that are too pale, brush with an egg wash before baking for a golden finish.
Frequently Asked Questions
Can I make Italian Easter Cookies without anise flavoring?
Absolutely! Substitute vanilla, almond, or even orange extract in equal amounts. Lemon extract works beautifully too, especially when paired with a bit of fresh zest in the dough.
How far in advance can I make these cookies?
You can make the cookies up to 3 days before decorating. Store them in an airtight container, then ice and decorate the day you plan to serve or gift them.
Why did my Italian Easter Cookies turn out hard?
Overbaking is the most common culprit. They should be just barely golden on the bottom. Also, measure your flour carefully—too much will result in dry, hard cookies.
Can I freeze these cookies after they’re decorated?
It’s possible but not ideal. The icing may become sticky when thawed. Better to freeze undecorated cookies, then thaw and decorate when needed.
What’s the best way to ship these cookies as gifts?
Pack them in a sturdy tin with parchment between layers. Fill empty spaces with crumpled parchment to prevent movement, and ship via expedited service to maintain freshness.
Final Thoughts
These Italian Easter Cookies represent so much more than just a sweet treat—they’re a connection to tradition, family, and celebration. I find myself making them even outside of Easter season when I need a reminder of those special moments gathered around my grandmother’s kitchen island, all of us with sprinkles stuck to our fingers and laughter filling the room. The beauty of these cookies lies in their simplicity and the joy they bring to both the baker and those lucky enough to receive them. Whether you follow the recipe exactly or add your own personal touch, these Italian Easter Cookies will fill your home with wonderful aromas and your heart with warm memories. Find more seasonal inspiration on my Pinterest board for your next baking adventure!