

Table of Contents
Recipe
Print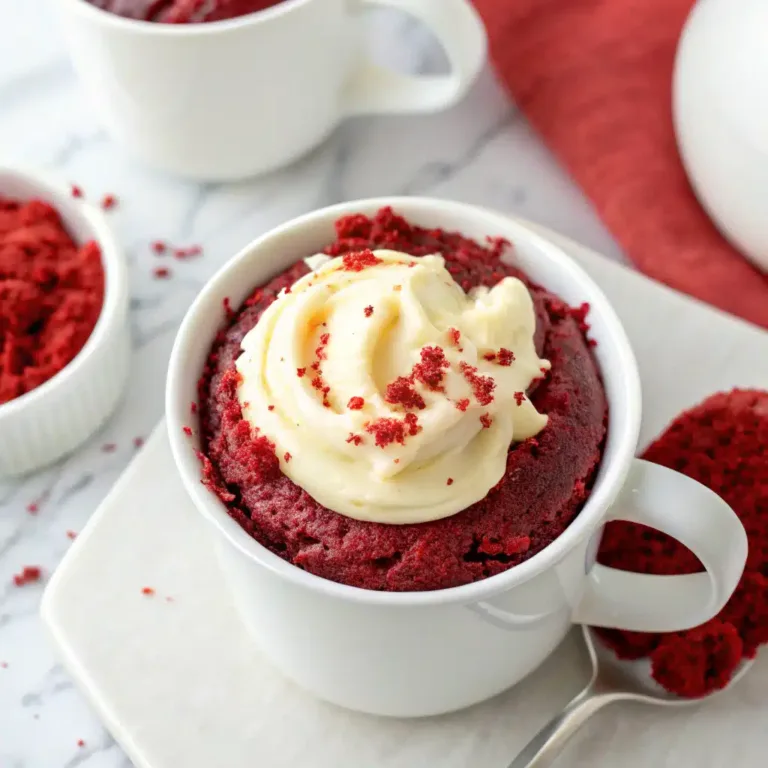
Microwave Red Velvet Mug Cake: 7 Quick Tips
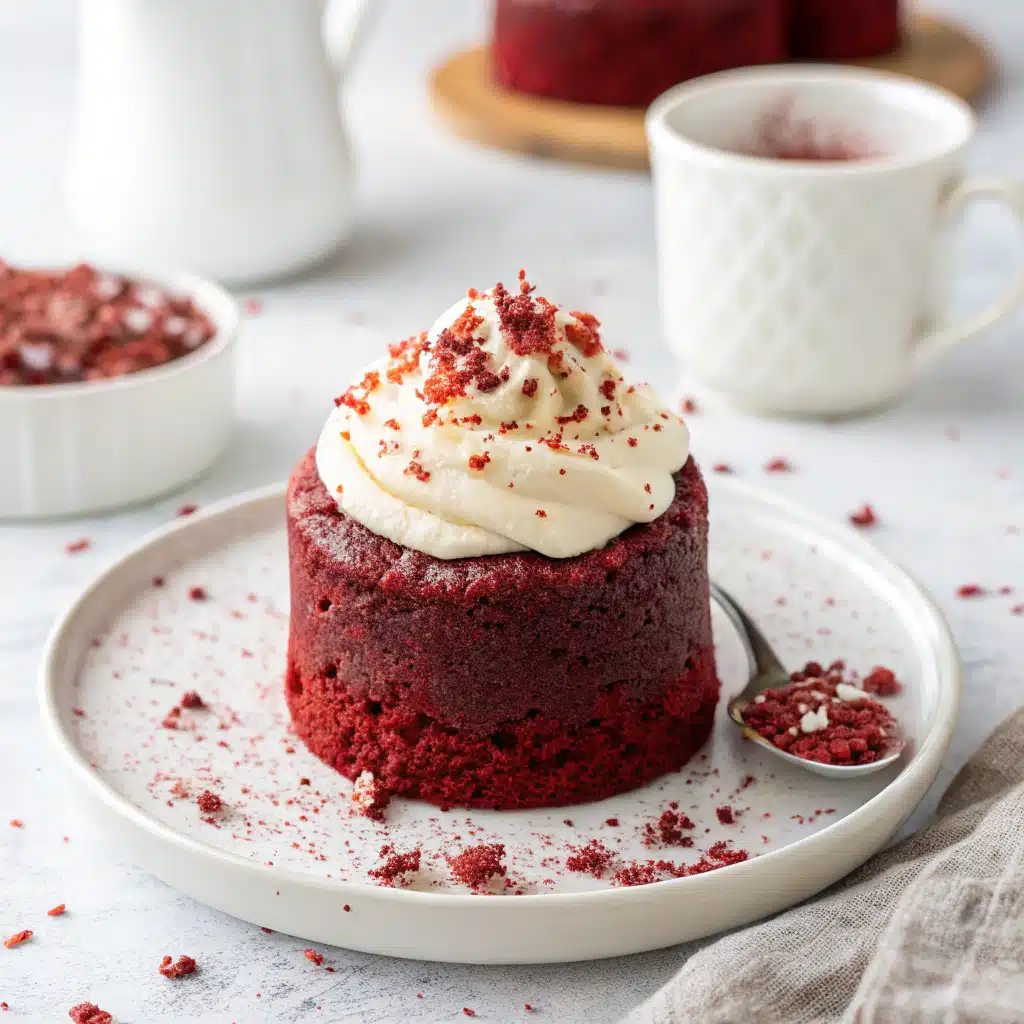
A plush, cocoa-kissed Microwave Red Velvet Mug Cake with classic tang and optional cream cheese frosting—ready in about 90 seconds for instant dessert bliss.
- Total Time: PT7M
- Yield: 1 serving
Ingredients
4 tbsp (30g) all-purpose flour
2 tbsp (25g) granulated sugar
1 tbsp (5g) unsweetened cocoa powder
1/4 tsp baking powder Pinch of fine sea salt
3 tbsp (45ml) milk, or buttermilk
1 tbsp (15ml) neutral oil (canola or vegetable)
1 tbsp (15g) sour cream or plain yogurt
1/4 tsp pure vanilla extract
1/2 tsp white vinegar (for classic red velvet tang)
1/2 tsp red gel food coloring (or 1–1.5 tsp liquid)
Optional: 1 tbsp mini chocolate chips
Optional Cream Cheese Frosting: 1 tbsp (15g) cream cheese,
1 tbsp (8g) powdered sugar, 1–2 tsp milk
Instructions
1. Use a 12-ounce, microwave-safe mug. Lightly grease the inside with a dab of oil or butter for easy release.
2. Whisk dry ingredients in the mug: flour, sugar, cocoa powder, baking powder, and a pinch of salt until no streaks remain.
3. Add wet ingredients: milk, oil, sour cream (or yogurt), vanilla, and vinegar. Stir until a smooth batter forms.
4. Mix in the red food coloring until the batter is vividly red. Fold in mini chocolate chips if using.
5. Microwave on High for 60–90 seconds (based on a 1000W microwave). The top should look set but slightly glossy; it will finish with carryover heat.
6. Rest 1–2 minutes to set the crumb and cool slightly. The cake continues cooking as it stands.
7. For optional cream cheese frosting: Mash cream cheese with powdered sugar and 1–2 tsp milk until creamy. Dollop or swirl over the warm cake.
Notes
Use a standard-weight 12-oz mug for best rise. Start with 60 seconds and add 10–15 second bursts to avoid overbaking. Gel color keeps batter vivid without thinning. For dairy-free, use plant milk and vegan cream cheese.
- Prep Time: PT5M
- Cook Time: PT1M30S
- Category: Dessert
- Method: Microwave
- Cuisine: American
My Midnight Mug Cake Moment (Keyword: Microwave Red Velvet Mug Cake)
The Story Behind My Red Velvet Cravings
It started like most of my mug cake recipes do—on a rainy Portland night, around 11 PM. I was curled up with a rom-com and hit with a craving for something warm, sweet, and just a little bit fancy. Red velvet cake was calling my name, but there was no way I was baking a whole one at that hour. I peeked into my pantry: cocoa powder, flour, vinegar, and food coloring—just enough for a microwave red velvet mug cake. I stirred the batter right in my favorite oversized mug, hit 90 seconds on the microwave, and crossed my fingers.
What came out was pure magic. Fluffy but rich, with that subtle cocoa edge and a kiss of tang from the buttermilk (or in my case, a vinegar + milk hack). It wasn’t bakery-perfect, but it was deeply satisfying—and fast. Since then, I’ve made it dozens of times, and every batch taught me something new. If you’ve ever doubted microwave cakes, this one will change your mind. It’s small-batch comfort food that delivers, with no preheating, no mess, and no regrets.
Why the Microwave Red Velvet Mug Cake Works
There’s a reason this cake hits so hard. It’s all about balance. Red velvet isn’t just a dyed chocolate cake—it’s a lightly cocoa’d treat with a creamy texture, mild tang, and slightly crisp edges when done right. The microwave speeds things up but can zap moisture fast. That’s where the quick tips come in—because nailing the texture, rise, and flavor in under two minutes means understanding how your mug, microwave wattage, and ingredients play together.
If you’re wondering why your mug cake sometimes turns out chewy or dry, you’re not alone. Trust me: with the right tweaks, your next microwave red velvet mug cake can taste like it came from a bakery. Well, almost.
Secret to Soft, Rich Mug Cakes (
Tip #1: Use a Tall, Wide Mug
This seems minor, but the right mug makes or breaks your red velvet mug cake in the microwave. You want something at least 12 oz with tall sides and a flat base. Why? A narrow or short mug causes overflow, while wide-bottomed mugs help heat distribute more evenly. The result? No soggy centers or dry edges.
Ceramic mugs work best since they heat evenly and retain warmth without zapping moisture. Glass mugs cool too fast. Avoid plastic—it doesn’t cook the batter consistently and can leach chemicals under heat.
Bonus tip: grease the mug with oil or nonstick spray to prevent sticking and help the cake rise smoothly.
Tip #2: Don’t Skip the Vinegar + Buttermilk Combo
Red velvet isn’t just about color. That signature “red velvet” flavor? It comes from the tangy lift of buttermilk and vinegar, which react with baking soda to make your cake airy and tender. Even in a mug, this chemistry still matters. If you don’t have buttermilk, stir together 3 tablespoons of milk with ¼ teaspoon of white vinegar or lemon juice. Let it sit for 5 minutes—it’ll curdle slightly. That’s your buttermilk hack.
Microwaves cook from the outside in, and acidic batters help activate the rise quickly without turning gummy. You’ll notice your microwave red velvet mug cake puff up like magic, with a soft crumb that melts in your mouth.
Timing & Technique for Mug Cake Success
Tip #3: Know Your Microwave Wattage
One of the biggest culprits behind a dry or rubbery red velvet mug cake microwave recipe is using the wrong cook time. Most mug cake recipes assume your microwave runs at 900–1000 watts. If yours is higher, the cake may cook too fast and dry out. Lower? It might stay gooey or raw in the center.
Check the label inside your microwave door or your manual. Once you know your wattage, you can adjust. For 1200 watts, reduce time by 10–15 seconds. For 700 watts, increase time slightly and test in 15-second bursts.
Always undercook slightly on the first try—mug cakes continue to cook from residual heat after the microwave stops.
Tip #4: Stir Dry, Then Add Wet
Here’s a simple step that changes everything: mix your dry ingredients separately in the mug before adding wet ones. This prevents clumps of cocoa or baking soda and ensures your cake rises evenly.
Red velvet batter needs to be smooth but not overmixed. Once the wet ingredients hit, stir just until combined—usually around 10–15 seconds. Overmixing pops all the air bubbles and gives you a dense, chewy sponge instead of a soft, fluffy one.
Internal link suggestion: If you’re experimenting with flavors, this tip also works beautifully for mug cakes like this white chocolate raspberry mug cake that rely on delicate texture and balance.
Finishing Touches That Make It Bakery-Worthy
Tip #5: Don’t Overcook (It Keeps Cooking After)
The biggest mistake? Walking away. Microwaves don’t wait. One extra 15-second blast can turn your easy red velvet mug cake in the microwave into a sponge brick.
The cake should look just set on top but still slightly shiny in the center—like a brownie that’s not quite done. Let it sit for 1–2 minutes. The residual heat will finish cooking it to a soft, fluffy texture. If the top is dry, you’ve gone too long.
Use a spoon to check the edges—if they pull clean from the mug, you’re good. Soft, slightly gooey centers are a win in mug cake land.
Tip #6: Add a Sweet Boost With Mix-Ins
Want that bakery feel? Try these irresistible mix-ins before microwaving:
- White chocolate chips (classic with red velvet)
- Cream cheese dollops (for that signature tang)
- Crushed Oreos (for texture and surprise)
- A spoon of Nutella in the center (lava cake style)
These not only enhance flavor but help retain moisture—especially useful if your cake turns out a touch dry. Keep mix-ins under 2 tablespoons total to avoid overflow.
If you love surprises in your cake center, check out this snickerdoodle mug cake with a gooey center—it uses the same layering trick to hide a burst of cinnamon sugar beneath the surface.
Tip #7: Top It Right After Heating
Timing is everything. As soon as your mug cake is done, add toppings while it’s still hot so they melt just right. Here’s what works:
- A small scoop of vanilla or cream cheese frosting
- Whipped cream + sprinkles
- Greek yogurt drizzle for tang
- Powdered sugar for a simple finish
Want it extra indulgent? Spread a bit of cream cheese frosting across the top, then sprinkle with crushed red velvet cookie crumbs or mini marshmallows.
7 Quick Tips
| Tip | Quick Summary |
|---|---|
| 1. Use a Tall, Wide Mug | Prevents overflow and promotes even cooking |
| 2. Don’t Skip Vinegar + Buttermilk | Adds tang and helps the cake rise properly |
| 3. Know Your Microwave Wattage | Adjust timing for moist texture |
| 4. Stir Dry First | Avoids clumps and overmixing |
| 5. Don’t Overcook | Let it rest; microwave continues cooking |
| 6. Add Mix-Ins | Boost flavor, moisture, and texture |
| 7. Top It Warm | Frosting, whipped cream, or drizzle melt beautifully |
FAQs
Can I make Microwave Red Velvet Mug Cake without food coloring? Yes. The flavor stays the same; skip the dye or swap in beet powder for a natural hue.
Why is my microwave mug cake rubbery? Overcooking. Start at 60 seconds and cook in short bursts; let it rest 1–2 minutes to set.
Can I use self-rising flour? Yes. Omit the baking powder and pinch of salt; keep all other ingredients the same.
How do I scale this for two? Mix two separate batches in two mugs and cook one at a time for consistent rise and texture.
Conclusion
A Microwave Red Velvet Mug Cake gives you bakery-level satisfaction in a fraction of the time—no preheating, no sink full of dishes, just plush crumb and cocoa-vanilla tang on demand. With simple pantry ingredients, a smart acid balance, and gel color for vivid results, you get that signature red velvet experience in minutes.
Use the timing guide, avoid overbaking, and crown it with a fast cream cheese frosting for a tiny, irresistible celebration. Whether it’s a last-minute Valentine dessert, a movie-night treat, or a quick weeknight pick-me-up, this microwave mug cake delivers velvety comfort whenever a craving strikes. Save this recipe, share it with a friend, and keep a clean mug ready—you’ll be making it again soon.