

No-Bake Eggnog Cheesecake Bars have become my absolute holiday salvation! When December rolls around and my kitchen transforms into gift-wrapping central, these creamy, spiced squares deliver all the festive flavor without monopolizing my oven. I stumbled upon this recipe three Christmases ago during a power outage (talk about holiday drama!), and it’s been my secret weapon ever since. The silky eggnog-infused filling sits atop a buttery graham cracker crust, creating that perfect balance of creamy and crunchy that makes you close your eyes with each bite. What makes these bars truly magical is how they capture the essence of traditional eggnog in a convenient, sliceable form that’s perfect for holiday gatherings or midnight snacking sessions by the Christmas tree.

Table of Contents
Recipe
Print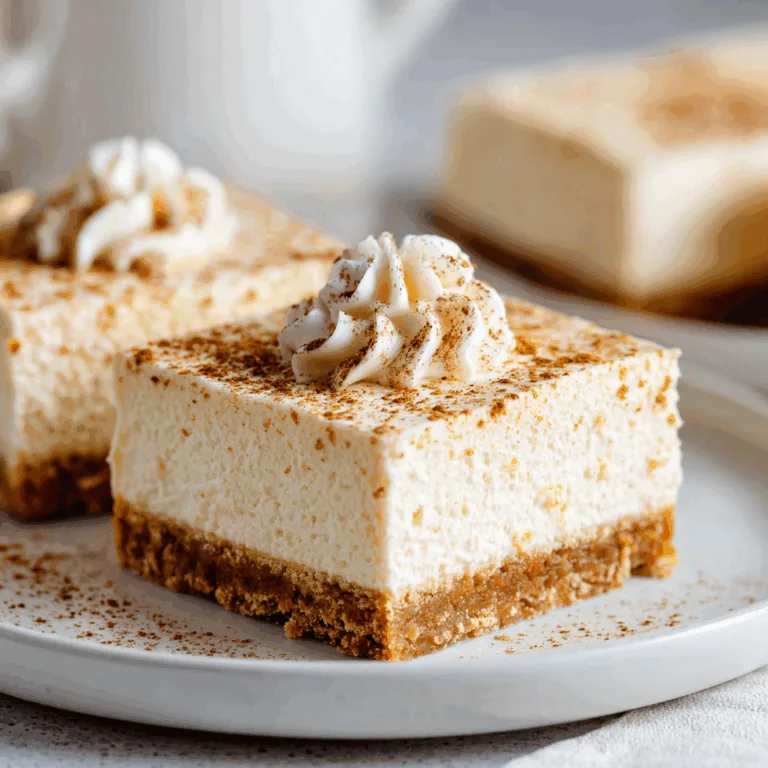
Delicious No-Bake Eggnog Cheesecake Bars Recipe – Easy & Creamy Dessert
These No-Bake Eggnog Cheesecake Bars are silky, spiced, and perfect for the holidays. With a buttery graham cracker crust and creamy eggnog filling, this festive dessert sets in the fridge—no oven required!
- Total Time: 4 hours (chill time included)
- Yield: 9 bars
Ingredients
For the crust:
2 cups graham cracker crumbs
1/2 cup unsalted butter, melted
2 tablespoons brown sugar
For the filling:
16 oz cream cheese, softened
3/4 cup eggnog
1/2 cup granulated sugar
1 teaspoon vanilla extract
1/4 teaspoon ground nutmeg
1 envelope unflavored gelatin (or 1 tablespoon)
2 tablespoons cold water
1 cup whipped topping or whipped cream
Instructions
1. Mix graham cracker crumbs, melted butter, and brown sugar in a bowl.
2. Press into a parchment-lined 8×8 pan and chill in the fridge while making filling.
3. In a small bowl, sprinkle gelatin over cold water and let bloom for 5 minutes.
4. In a saucepan, warm eggnog until hot but not boiling.
5. Stir in bloomed gelatin until fully dissolved. Let cool slightly.
6. In a large bowl, beat cream cheese, sugar, vanilla, and nutmeg until smooth.
7. Gradually mix in cooled eggnog mixture.
8. Fold in whipped topping until combined.
9. Spread filling over chilled crust and smooth the top.
10. Refrigerate at least 4 hours or overnight until set.
11. Slice into bars and serve with whipped cream or extra nutmeg on top.
Notes
Use full-fat eggnog for the best texture.
Bars can be made up to 2 days in advance.
Crust can be swapped for gingersnaps or vanilla wafers for variation.
- Prep Time: 20 minutes
- Cook Time: 0 minutes
- Category: Dessert
- Method: No-Bake
- Cuisine: American
- Diet: Vegetarian
Why You’ll Love This No-Bake Eggnog Cheesecake Bars
Perfect Holiday Time-Saver
When holiday chaos descends and your oven is working overtime, these No-Bake Eggnog Cheesecake Bars come to the rescue! I remember last Christmas when my sister announced her surprise visit just hours before arriving. With my oven already committed to a ham and three side dishes, I needed a dessert solution fast. These bars saved the day! Since they require zero oven time, you can prepare them while juggling other holiday cooking responsibilities.
The hands-on time is minimal—about 15 minutes to prepare the crust and filling—then your refrigerator does all the heavy lifting. The bars need about 4-6 hours to set properly, but I usually make them the night before to ensure they’re perfectly firm. This make-ahead feature makes them ideal for busy holiday entertaining when you need to cross dessert off your to-do list early.
Rich Eggnog Flavor Without the Fuss
The brilliant thing about these bars is how they capture that distinctive eggnog flavor without actually requiring you to make eggnog from scratch. The filling combines cream cheese, store-bought eggnog, and a careful blend of nutmeg, cinnamon, and vanilla that creates that authentic holiday taste we all crave.
I’ve served these bars to self-proclaimed “eggnog skeptics” who were completely won over. My friend Mark, who normally avoids eggnog like the plague, took one bite and immediately asked for the recipe. The cream cheese mellows the sometimes overpowering eggnog flavor, creating a balanced dessert that appeals to everyone at your holiday table. The texture is silky-smooth with just the right amount of density—not too heavy after a big meal, but substantial enough to feel like a proper dessert.
Essential Tips & Tricks
Achieving the Perfect Texture
The secret to velvety-smooth No-Bake Eggnog Cheesecake Bars lies in a few critical techniques. First, ensure your cream cheese is completely softened to room temperature—I’m talking properly soft, not just sitting out for ten minutes! Cold cream cheese will leave you with a lumpy filling that no amount of mixing can fix. I learned this the hard way during a rushed attempt that resulted in tiny cream cheese lumps throughout my otherwise beautiful bars.
Another game-changer is using full-fat ingredients. I once tried making these with reduced-fat cream cheese and light eggnog, hoping for a “healthier” holiday treat. The result? A filling that never properly set and had an oddly grainy texture. The fat content is essential for that luxurious mouthfeel we all crave. For an extra-smooth result, try beating your cream cheese alone first until completely smooth, then gradually add other ingredients. This method creates a silky texture similar to what you’ll find in our No-Bake Ube Coconut Cheesecake Bars recipe.
Perfecting the Crust
A sturdy, flavorful crust is the foundation of exceptional cheesecake bars. For the graham cracker base, aim for ultra-fine crumbs—larger pieces can cause the crust to crumble when slicing. I use a food processor, but a sealed plastic bag and rolling pin work wonderfully too (plus, it’s great stress relief during the holiday season!).
The key to a crust that holds together is proper compression. After mixing your crumbs with melted butter, press the mixture firmly into your pan. I recommend using the flat bottom of a measuring cup to apply even pressure across the entire surface. For a festive twist, try adding 1/4 teaspoon of freshly grated nutmeg to your crust mixture—it beautifully complements the eggnog flavor profile and adds another dimension to your bars.
When preparing your pan, don’t skip lining it with parchment paper with overhang on the sides. This simple step makes removing and slicing your cheesecake bars infinitely easier, similar to the technique we use in our popular 5-Minute Hot Cocoa Dip recipe when preparing the serving dish.
Serving Ideas & Creative Variations
Festive Presentation Techniques
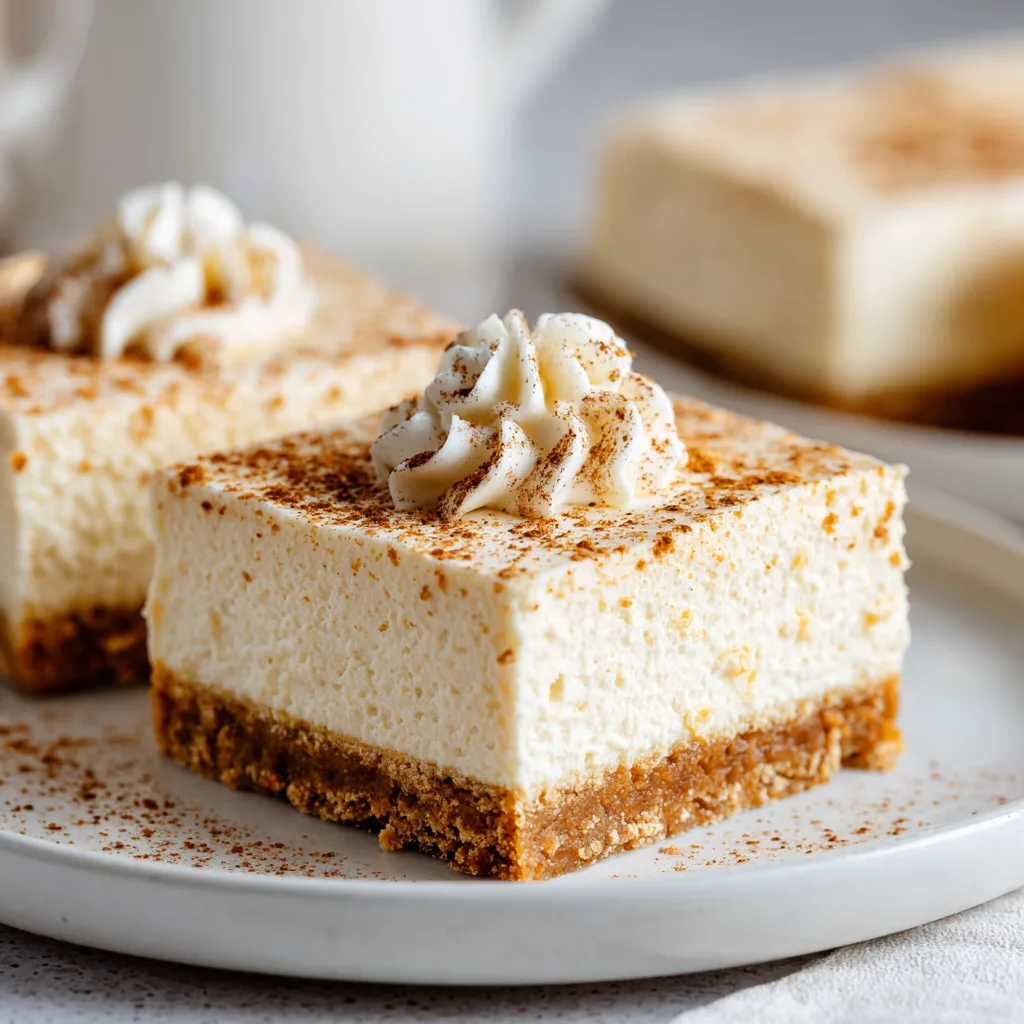
Transform these No-Bake Eggnog Cheesecake Bars from delicious to showstopping with thoughtful presentation. For holiday gatherings, I like to cut them into precise squares (a hot knife wiped clean between cuts works wonders) and arrange them on a tiered serving platter dusted with cinnamon. Each bar can be garnished with a tiny gingerbread cookie, a chocolate curl, or even a miniature candy cane for that perfect Instagram-worthy moment.
For a more elegant approach, try serving slightly larger portions on individual dessert plates with a drizzle of caramel sauce and a sprinkle of crushed gingersnap cookies. The contrast of colors and textures makes each serving look professionally plated. I’ve even created a dessert bar station where guests can add their own toppings—whipped cream, chocolate shavings, crushed peppermint, and various sauces. This interactive approach was a huge hit at my holiday open house last year!
If you’re gifting these bars, consider investing in some festive mini bakery boxes. Layer the bars between sheets of parchment paper, tie with a ribbon, and attach a handwritten tag. They make thoughtful hostess gifts or sweet surprises for neighbors, similar to how I package my Slow Cooker Candied Pecans for holiday gift-giving.
Flavor Twists and Add-Ins
While traditional eggnog flavor is heavenly, experimenting with variations keeps this recipe exciting year after year. My personal favorite twist is adding a white chocolate layer on top—simply melt 6 ounces of white chocolate with 2 tablespoons of heavy cream, spread over the set cheesecake, and chill until firm. The additional layer adds a beautiful visual element and complements the eggnog perfectly.
For a boozy adult version, add 2 tablespoons of rum or bourbon to your filling mixture. The alcohol enhances the authentic eggnog flavor while adding sophistication. Just remember to label these as “adults only” if serving at a family gathering! A chocolate variation works wonderfully too—add 1/4 cup of cocoa powder to your filling for chocolate-eggnog bars that disappear in minutes.
If you love texture contrasts, consider folding in some unexpected add-ins. Crushed gingersnap cookies, toasted pecans, or even chewy dried cranberries create interesting bursts of flavor and texture. These creative approaches keep the basic recipe fresh and exciting, making it versatile enough to serve multiple times throughout the holiday season. You can find more inspiration for creative holiday desserts on our Pinterest board where I’m constantly pinning new ideas!
Storage & Troubleshooting Guide
Proper Storage for Maximum Freshness
Storing these No-Bake Eggnog Cheesecake Bars properly ensures they maintain their delicious flavor and perfect texture. After serving, cover any remaining bars tightly with plastic wrap or transfer them to an airtight container. They’ll keep beautifully in the refrigerator for up to 5 days, though in my house they rarely last beyond day two!
For longer storage, these bars freeze exceptionally well. Cut them into individual portions, wrap each piece in plastic wrap, then place in a freezer-safe container or zip-top bag. This method prevents freezer burn and allows you to thaw only what you need. When properly stored, they maintain quality in the freezer for up to 2 months. To thaw, simply transfer frozen bars to the refrigerator overnight. I don’t recommend microwaving to speed up thawing as this can cause the filling to become too soft and lose its structure.
One pro tip I’ve learned: if you’re planning to freeze these, slightly under-garnish them. Add fresh whipped cream, chocolate shavings, or other delicate toppings after thawing for the freshest presentation. This small detail makes previously frozen bars look and taste freshly made.
Fixing Common Issues
Even experienced bakers occasionally encounter challenges with no-bake cheesecakes. If your filling isn’t setting properly, the most common culprit is insufficient chilling time. These bars need a minimum of 4 hours in the refrigerator, but overnight is ideal. If you’re in a hurry, 30 minutes in the freezer followed by refrigeration can help speed things up, but don’t freeze them solid.
Another common issue is a filling that’s too soft or runny. This typically happens when there’s too much liquid in your mixture. If your eggnog is particularly thin, try reducing the amount by 2 tablespoons and adding an extra tablespoon of powdered sugar to compensate. Additionally, make sure you’re using block cream cheese (not the spreadable kind in tubs), as the latter contains additives that prevent proper setting.
For a crust that crumbles when slicing, the fix is simple: next time, add an extra tablespoon of melted butter to your graham cracker mixture and chill the crust for 20 minutes before adding the filling. This extra step creates a more cohesive base that slices cleanly. If you’re struggling with clean cuts, dip your knife in hot water and wipe it dry between slices for picture-perfect portions every time.
Frequently Asked Questions
Can I make No-Bake Eggnog Cheesecake Bars without store-bought eggnog?
Yes, you can! While store-bought eggnog makes this recipe quick and convenient, you can create a homemade substitute by combining 1 cup heavy cream, 1/4 cup sugar, 2 teaspoons vanilla extract, 1/2 teaspoon nutmeg, and 1/4 teaspoon cinnamon. Whisk until sugar dissolves, then use as directed. The flavor profile will be slightly different but equally delicious.
How far in advance can I make these cheesecake bars?
These No-Bake Eggnog Cheesecake Bars can be made up to 3 days ahead of when you plan to serve them. Store them covered in the refrigerator until needed. For the freshest presentation, add any whipped cream or delicate garnishes just before serving.
Can I use a different type of cookie for the crust?
Absolutely! While graham crackers create a classic base, gingersnaps make an amazing spiced crust that complements the eggnog flavor beautifully. Vanilla wafers or even speculoos cookies work wonderfully too. Just ensure you maintain the same ratio of cookie crumbs to butter for proper structure.
Why did my filling not set properly?
If your filling remains too soft after adequate chilling time, there are several possible causes: your cream cheese might have been too warm when mixing, you may have overbeaten the mixture incorporating too much air, or your eggnog might have had a high liquid content. Next time, try using less eggnog or adding 1 tablespoon of unflavored gelatin bloomed in 2 tablespoons of cold water.
Are No-Bake Eggnog Cheesecake Bars safe for pregnant women?
If you’re using commercial eggnog that’s been pasteurized (most store-bought versions are), these bars are generally considered safe during pregnancy. However, if you’re making homemade eggnog with raw eggs or adding alcohol to the recipe, it would be best to offer an alternative dessert option for pregnant guests. Always consult with a healthcare provider for specific dietary concerns.
Final Thoughts
My kitchen has seen countless holiday desserts come and go over the years, but these No-Bake Eggnog Cheesecake Bars have earned their place as a permanent tradition. There’s something magical about the way they capture the essence of the season—rich, creamy, perfectly spiced—while being incredibly practical for our busiest time of year. I love watching guests’ faces light up when they take their first bite, that moment of surprise when they realize just how much flavor is packed into each square.
Whether you’re an eggnog enthusiast or just someone looking for a stress-free holiday dessert, these bars deliver on all fronts. The fact that they can be prepared ahead and require zero oven time makes them particularly precious during the holiday cooking marathon. I’ve shared this recipe with friends and family across the country, and it’s heartwarming to think of all these No-Bake Eggnog Cheesecake Bars appearing on holiday tables, creating their own traditions. So grab that carton of eggnog, unwrap your cream cheese, and get ready to create a dessert that might just become your new holiday signature!