

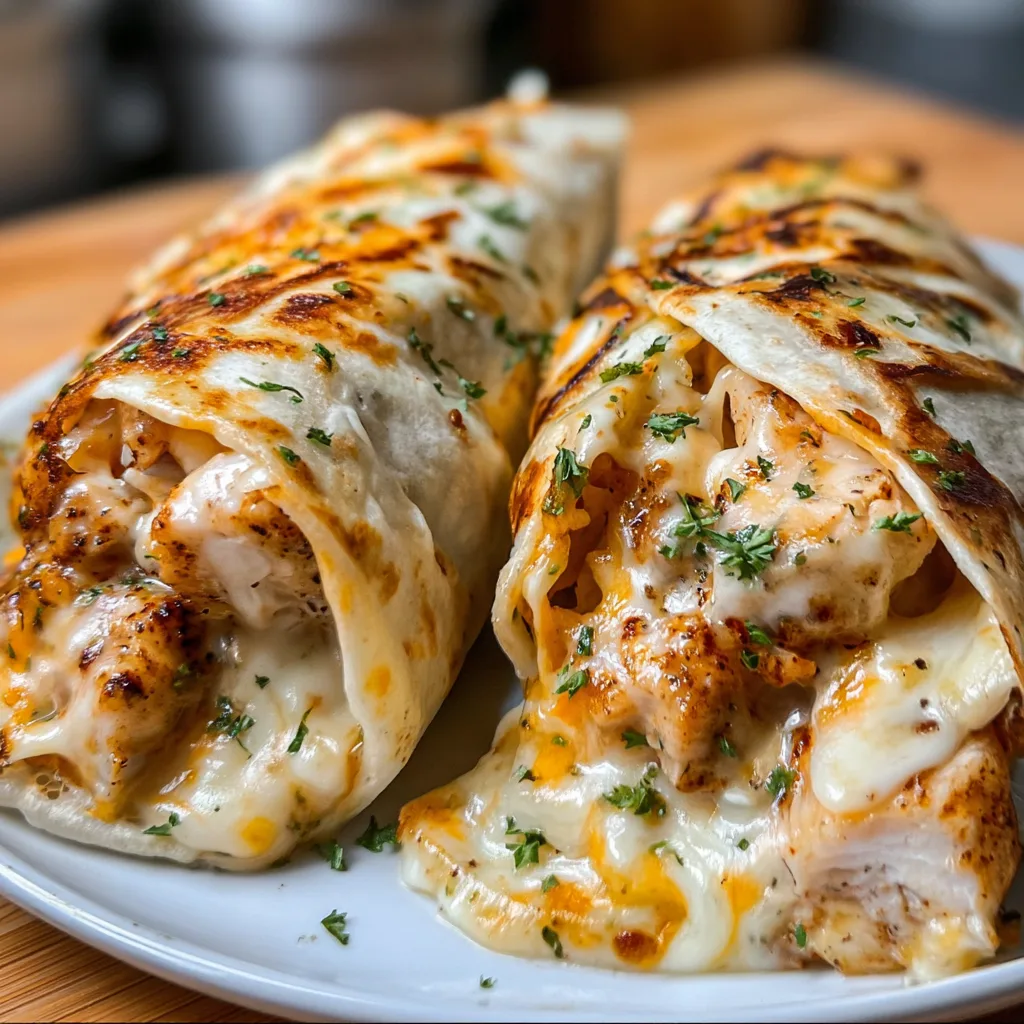
These Ooey-Gooey Cheesy Garlic Chicken Wraps are what comfort food dreams are made of. I first created this recipe on a chilly autumn evening when nothing but melty cheese and tender chicken would satisfy my cravings. The way the garlic-infused butter mingles with three kinds of cheese while hugging perfectly seasoned chicken breast pieces is simply magical. There’s something about that first bite – when the cheese stretches in long, Instagram-worthy pulls – that makes me close my eyes and sigh with pure contentment. If you’ve been searching for a quick weeknight dinner that feels like a warm hug, you’ve found it right here.
Recipe
Print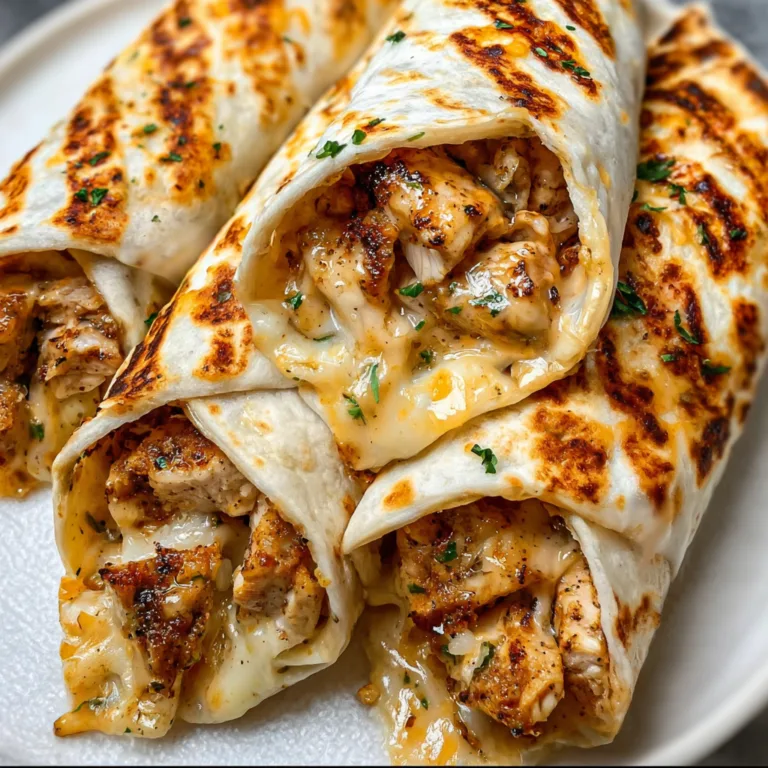
Ooey-Gooey Cheesy Garlic Chicken Wraps Recipe
These Ooey-Gooey Cheesy Garlic Chicken Wraps are packed with juicy seasoned chicken, melty cheese, and rich garlic flavor all wrapped in a warm tortilla. This quick and easy recipe is perfect for a satisfying lunch or dinner that’s loaded with flavor and ready in minutes.
- Total Time: 20 minutes
- Yield: 4 wraps
Ingredients
2 cups cooked chicken, shredded or diced
4 large flour tortillas
1 tablespoon olive oil
2 tablespoons butter
3 cloves garlic, minced
1 teaspoon garlic powder
1/2 teaspoon paprika
1/2 teaspoon salt
1/4 teaspoon black pepper
1 cup shredded mozzarella cheese
1/2 cup shredded cheddar cheese
Optional:
1/4 cup cream cheese
Fresh parsley
Ranch or garlic sauce for dipping
Instructions
1. Heat olive oil in a skillet over medium heat.
2. Add cooked chicken and season with garlic powder, paprika, salt, and pepper.
3. Cook for 3–4 minutes until heated through. Remove from skillet and set aside.
4. In the same skillet, melt butter and sauté minced garlic for 30 seconds until fragrant.
5. Return chicken to the skillet and toss to coat in the garlic butter.
6. Lay tortillas flat and spread cream cheese if using.
7. Add a portion of the garlic chicken to each tortilla.
8. Sprinkle mozzarella and cheddar cheese evenly over the chicken.
9. Fold the tortillas into wraps.
10. Place wraps in a skillet or panini press and cook for 2–3 minutes per side until golden brown and cheese is melted.
11. Remove from heat and let cool slightly.
12. Slice in half, garnish with parsley, and serve with dipping sauce.
Notes
Use rotisserie chicken for quick preparation.
Do not overfill wraps to prevent tearing.
Cook on medium heat to melt cheese without burning tortillas.
Serve immediately for best gooey texture.
- Prep Time: 10 minutes
- Cook Time: 10 minutes
- Category: Lunch
- Method: Stovetop
- Cuisine: American
Why You’ll Love These Ooey-Gooey Cheesy Garlic Chicken Wraps
Perfect Balance of Flavors and Textures
These wraps hit all the right notes with their perfect flavor harmony. The savory garlic butter creates a rich foundation that elevates ordinary chicken to extraordinary levels. I’ve carefully balanced the sharp tang of cheddar with the creaminess of mozzarella and the subtle nuttiness of Parmesan. What makes these truly special is the textural contrast – the slightly crispy exterior of the toasted wrap giving way to that molten cheese center. The fresh herbs add bright pops of flavor that cut through the richness, making each bite complex yet comforting. Trust me when I say these wraps will make your taste buds do a happy dance!
Quick and Convenient Meal Solution
As someone who juggles work deadlines and family commitments, I deeply appreciate recipes that deliver maximum flavor with minimum fuss. These wraps come together in just 25 minutes from start to finish – perfect for those evenings when cooking feels like one task too many. You can prep components ahead of time (the marinated chicken keeps beautifully for up to two days in the fridge), and the assembly is simple enough that even kitchen novices can master it. I often make a double batch of the garlic butter to keep on hand for busy weeknights, which cuts the prep time even further. These wraps have rescued countless dinner emergencies in my household!
Essential Tips & Tricks
Mastering the Cheese Melt
The secret to achieving that perfect Instagram-worthy cheese pull lies in the layering technique. Start with a thin spread of the garlic butter directly on the wrap, followed by a light sprinkle of mozzarella. Add your chicken, then top with the remaining cheese blend. This method creates pockets of melty goodness throughout rather than one overwhelming layer. Another game-changer is allowing your cheese to come to room temperature before assembly – cold cheese simply doesn’t melt as beautifully. For an extra touch of decadence, try brushing the outside with a bit more garlic butter before toasting for a golden, crispy exterior that will make you weak at the knees.
Chicken Preparation Secrets
The difference between a good wrap and an exceptional one often comes down to how you prepare the chicken. I always opt for brining my chicken breasts for just 15 minutes in a simple salt solution before cooking – this ensures juicy, tender meat every time. When cooking, resist the urge to constantly flip or move the chicken; let it develop a golden crust on medium-high heat before turning. For maximum flavor infusion, slice your cooked chicken and toss it directly in a tablespoon of the garlic butter while still hot. This allows the meat to absorb all those aromatic compounds, creating depth of flavor that permeates every bite rather than just sitting on the surface.
Serving Ideas & Creative Variations
Perfect Pairings for a Complete Meal
These wraps shine brightest when paired with complementary sides that balance their richness. My family’s favorite combination includes a crisp green salad with a bright vinaigrette – the acidity cuts through the cheese beautifully. For heartier appetites, sweet potato fries with a sprinkle of Parmesan offer a wonderful textural contrast. In summer months, I serve these alongside grilled corn on the cob brushed with a touch of the same garlic butter used in the wraps. For an impressive spread that’s still easy to pull off, add a simple Tuscan-inspired soup and watch your dinner guests swoon. The versatility of these wraps means they work equally well for casual weeknight dinners or more elevated gatherings.
Exciting Flavor Variations to Try
While the classic recipe is perfection, I love experimenting with different flavor profiles to keep things interesting. For a Mediterranean twist, add chopped sun-dried tomatoes, olives, and crumbled feta to the cheese blend. Feeling spicy? Incorporate diced jalapeños and pepper jack cheese for a southwestern kick that’ll wake up your taste buds. My personal favorite variation includes caramelized onions and a drizzle of balsamic glaze – the sweet-savory combination is absolutely divine. For those who prefer a lighter option, try using rotisserie chicken and adding fresh spinach leaves before rolling. The heat from the wrap will gently wilt the greens, adding nutrition without sacrificing that comfort food feeling.
Storage & Troubleshooting Guide
Proper Storage for Maximum Freshness
To maintain that perfect texture and flavor, proper storage is crucial. If you have leftover assembled but uncooked wraps, wrap them individually in parchment paper, then plastic wrap, and refrigerate for up to 24 hours. For cooked leftovers, allow them to cool completely before storing in an airtight container – this prevents condensation that could make your wraps soggy. When reheating, avoid the microwave which can make the tortilla tough. Instead, warm them in a dry skillet over medium-low heat or in a 325°F oven until heated through. The cheese will re-melt beautifully without compromising the wrap’s integrity.
For meal prep enthusiasts, you can freeze the assembled uncooked wraps for up to one month – just add an extra minute to the cooking time.
Solving Common Preparation Challenges
Even experienced cooks occasionally encounter issues, but most wrap problems have simple solutions. If your wraps are leaking cheese during cooking, you likely overfilled them or didn’t fold tightly enough. The fix? Use slightly less filling and master the “burrito fold” technique – fold in the sides, then roll from the bottom up, tucking as you go. Dealing with tough chicken? It was likely overcooked; next time, remove it from heat when it reaches 160°F and let carryover cooking finish the job. If your wraps are browning too quickly before the cheese fully melts, lower your heat and cover the pan for 30 seconds to create steam that will help melt the cheese without burning the exterior.
Remember that perfect wraps come with practice, so don’t be discouraged if your first attempt isn’t magazine-worthy!
Frequently Asked Questions
Can I make these Ooey-Gooey Cheesy Garlic Chicken Wraps ahead of time?
Yes! Prepare the chicken and garlic butter up to 2 days ahead. Assemble wraps up to 24 hours before cooking, storing them wrapped in the refrigerator. Just add 1-2 minutes to cooking time when ready to serve.
What’s the best cheese to use for maximum meltiness?
A combination works best: mozzarella for stretch, cheddar for flavor, and a touch of Parmesan for depth. Make sure to grate your own cheese rather than using pre-shredded, which contains anti-caking agents that prevent proper melting.
Can I make these wraps gluten-free?
Absolutely! Simply substitute your favorite gluten-free tortillas or wraps. The filling ingredients are naturally gluten-free, but always double-check your seasonings and butter for hidden gluten.
How do I prevent my wraps from getting soggy?
Toast your wraps lightly before adding fillings and avoid watery ingredients. If using vegetables, sauté them briefly to remove excess moisture. Serve immediately after cooking for best texture.
What’s the secret to perfectly crispy Ooey-Gooey Cheesy Garlic Chicken Wraps?
Cook them in a dry skillet over medium heat, pressing gently with a spatula. The key is patience—let them cook undisturbed for 2-3 minutes per side until golden and crisp.
Final Thoughts
These Ooey-Gooey Cheesy Garlic Chicken Wraps have become a staple in my recipe rotation for good reason. They strike that perfect balance between indulgent comfort food and practical weeknight cooking that we’re all searching for. I love seeing the looks of pure joy when I serve these to friends and family – that moment when the cheese stretches between the plate and their bite is priceless. Whether you’re cooking for picky eaters, entertaining guests, or simply treating yourself after a long day, these wraps deliver satisfaction in every bite. I’d love to see your creations if you try this recipe – tag me on Pinterest so I can celebrate your cheesy success!