

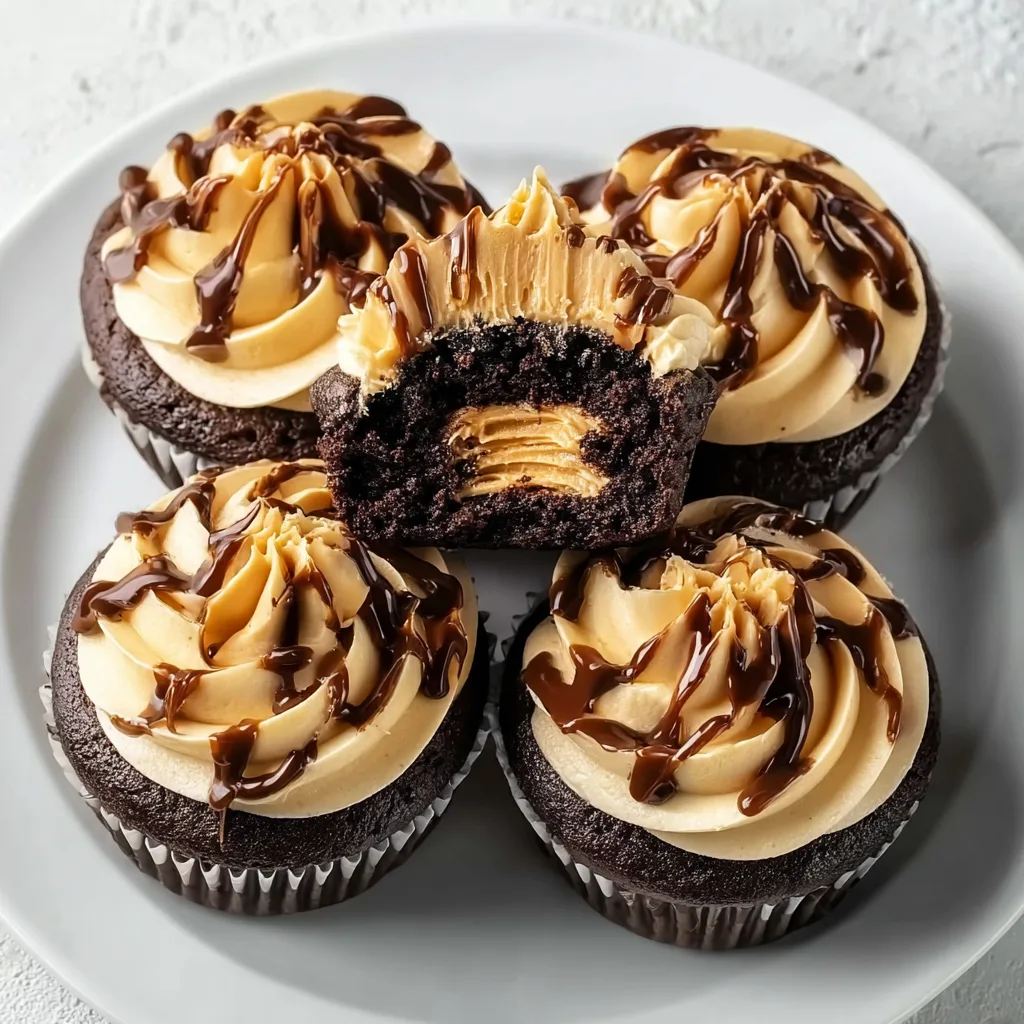
The aroma of Peanut Butter Chocolate Cupcakes wafting through my kitchen on a Sunday afternoon might be one of life’s perfect little moments. There’s something magical about the way these two flavors dance together—rich, velvety chocolate embracing creamy, nutty peanut butter in every bite. I’ve spent years perfecting this recipe, and let me tell you, these cupcakes have become my secret weapon for turning ordinary gatherings into memorable celebrations. Whether you’re baking for a special occasion or simply craving something indulgent, these cupcakes deliver that perfect balance of decadence and comfort that will have everyone asking for seconds.
Recipe
Print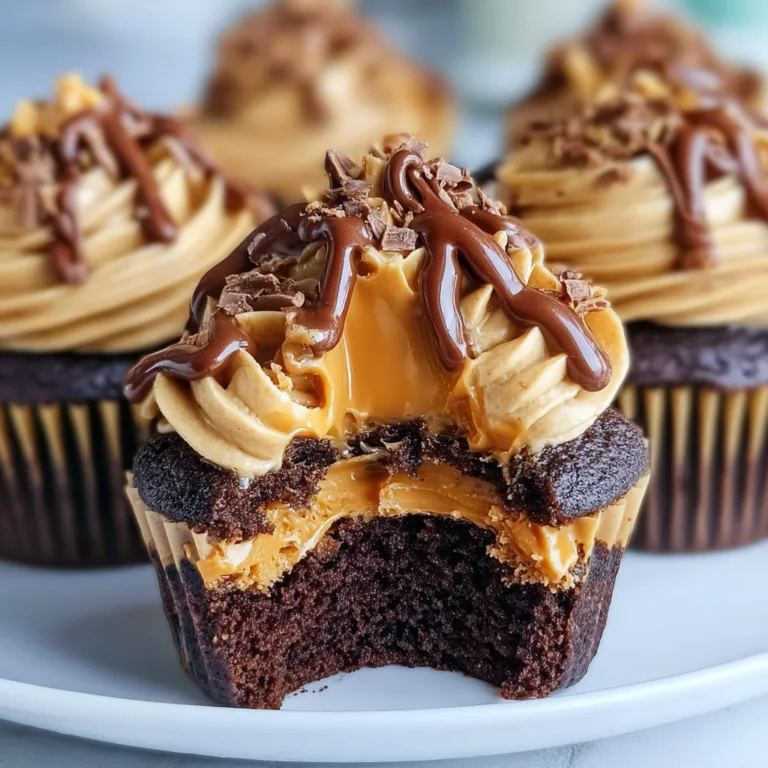
Delicious Peanut Butter Chocolate Cupcakes Recipe | Moist & Easy to Make
Delicious Peanut Butter Chocolate Cupcakes are rich, moist, and packed with the perfect balance of chocolate and creamy peanut butter. Easy to make and bakery-worthy, these cupcakes are a guaranteed hit for parties, birthdays, or anytime dessert cravings strike.
- Total Time: 35 minutes
- Yield: 12 cupcakes
Ingredients
For the cupcakes:
1 cup all-purpose flour
1/2 cup cocoa powder
1 tsp baking soda
1/4 tsp salt
1 cup granulated sugar
1/2 cup vegetable oil
1/2 cup milk
1 large egg
1 tsp vanilla extract
1/2 cup creamy peanut butter
For the frosting:
1/2 cup unsalted butter, softened
1/2 cup creamy peanut butter
1½ cups powdered sugar
2–3 tbsp milk
1/2 tsp vanilla extract
Optional topping:
Chocolate chips
Chopped peanut butter cups
Instructions
1. Preheat oven to 350°F (175°C) and line a cupcake pan with liners.
2. In a bowl, whisk flour, cocoa powder, baking soda, salt, and sugar.
3. Add oil, milk, egg, vanilla, and peanut butter. Mix until smooth.
4. Divide batter evenly among cupcake liners.
5. Bake for 18–20 minutes until a toothpick inserted comes out clean.
6. Let cupcakes cool completely.
7. For frosting, beat butter and peanut butter until creamy.
8. Gradually add powdered sugar, vanilla, and milk until smooth and fluffy.
9. Frost cooled cupcakes and add toppings if desired.
10. Serve and enjoy.
Notes
• Do not overbake for ultra-moist cupcakes.
• Use creamy peanut butter for smooth frosting.
• Store in an airtight container for up to 3 days.
- Prep Time: 15 minutes
- Cook Time: 20 minutes
- Category: Dessert
- Method: Baking
- Cuisine: American
- Diet: Vegetarian
Why You’ll Love These Peanut Butter Chocolate Cupcakes
Perfect Flavor Harmony
There’s a reason peanut butter and chocolate is a classic combination that never goes out of style. The deep cocoa notes in these cupcakes create the perfect canvas for the creamy peanut butter frosting to shine. I still remember the first time I nailed this recipe—my husband’s eyes widened as he took that first bite, declaring it was like a sophisticated Reese’s cup in cupcake form. The chocolate cake itself is incredibly moist with a tender crumb that practically melts in your mouth, while the peanut butter frosting adds just the right amount of saltiness to balance the sweet. It’s this perfect harmony of flavors that makes these cupcakes absolutely irresistible.
Simple Yet Impressive
Don’t let their gourmet taste fool you—these cupcakes are surprisingly simple to make. The straightforward process means even novice bakers can create something spectacular. I’ve brought these to countless potlucks and birthday celebrations, and they always steal the show despite requiring less effort than many fancier desserts. The batter comes together in just one bowl (fewer dishes is always a win in my book!), and the frosting whips up in minutes. Yet the end result looks like something from a professional bakery, especially when topped with a drizzle of melted chocolate or a mini peanut butter cup. These cupcakes prove that impressive doesn’t have to mean complicated.
Essential Tips & Tricks
Ingredient Quality Matters
When it comes to these cupcakes, using high-quality ingredients makes all the difference. Splurge on good cocoa powder—I prefer Dutch-processed for its deeper flavor and color. For the peanut butter frosting, natural peanut butter can separate and create texture issues, so stick with commercial creamy varieties like Jif or Skippy. Room temperature ingredients are non-negotiable here; cold butter or eggs can lead to uneven mixing and affect the cupcakes’ texture. I learned this lesson the hard way when I rushed through a batch for my daughter’s school event! The temperature of your ingredients directly impacts how they incorporate, so plan ahead and let everything sit out for about an hour before baking.
Perfect Frosting Technique
Creating that bakery-worthy swirl of peanut butter frosting is easier than you might think with the right approach. The consistency secret is adding heavy cream one tablespoon at a time until you reach that perfect pipeable texture—not too stiff, not too soft. I recommend chilling the frosting for 15-20 minutes before piping, which helps it hold its shape beautifully. For an extra-special touch, try using a large star tip for dramatic height and visual appeal. If you’re new to piping, practice on a plate first before committing to your cupcakes. The temperature matters here too—frosting that’s too warm will droop, while frosting that’s too cold will be difficult to pipe smoothly.
Serving Ideas & Creative Variations
Presentation Wow-Factors
Elevate these already-delicious cupcakes with presentation touches that will make them truly memorable. Create a dessert tablescape by arranging cupcakes at varying heights using cake stands and inverted bowls covered with pretty linens. For individual serving impact, try placing each cupcake in a colorful liner inside a small mason jar—this not only looks adorable but makes them portable for picnics or gifts. I love adding edible gold dust to the frosting for special occasions; last New Year’s Eve, these sparkly cupcakes became the talk of our neighborhood gathering.
For a rustic-chic look, serve them on a wooden board with scattered cinnamon sticks and star anise. The visual appeal of these cupcakes can be enhanced with minimal effort but maximum impact.
Flavor Twist Options
While the classic version is divine, don’t be afraid to experiment with exciting variations. Adding banana puree to the batter (about 1/4 cup) creates a subtle fruity undertone that complements both chocolate and peanut butter beautifully. For a grown-up version, try mixing 2 tablespoons of bourbon into the frosting—the slight boozy kick is absolutely transformative. Coffee lovers can add 1 teaspoon of espresso powder to the batter, intensifying the chocolate flavor without tasting like coffee. My personal favorite variation includes a hidden caramel center—simply press a soft caramel candy into each cupcake before baking. The unexpected surprises in these creative variations keep this recipe exciting even after you’ve made it dozens of times.
Storage & Troubleshooting Guide
Keeping Cupcakes Fresh
Proper storage is crucial for maintaining the perfect texture and flavor of these cupcakes. For maximum freshness, store unfrosted cupcakes at room temperature in an airtight container for up to 3 days. Once frosted, they should be refrigerated but brought back to room temperature before serving—cold dulls the flavors. If you need to make them ahead, freeze unfrosted cupcakes in a single layer until solid, then transfer to freezer bags for up to 2 months. The peanut butter frosting can be refrigerated separately for up to a week. I discovered a game-changing tip: placing a slice of bread in the container with your cupcakes helps keep them moist by releasing humidity.
The storage method you choose significantly impacts how long these treats maintain their just-baked quality.
Common Problems Solved
Even experienced bakers encounter issues sometimes, but most cupcake problems have simple solutions. If your cupcakes are sinking in the middle, your oven is likely too hot—invest in an oven thermometer for accuracy. Dry cupcakes usually mean they’ve been overbaked; start checking 2 minutes before the recipe suggests. For frosting that’s too runny, refrigerate it for 20 minutes, then beat again—adding more powdered sugar can make it too sweet. If your frosting is too stiff, add cream one teaspoon at a time.
I once salvaged a batch of cupcakes that didn’t rise properly by turning them into cake pops—a happy accident that my kids now request regularly! The troubleshooting process is part of becoming a better baker, so don’t get discouraged.
Frequently Asked Questions
Can I make these Peanut Butter Chocolate Cupcakes gluten-free?
Yes! Replace all-purpose flour with a 1:1 gluten-free baking blend. Add 1/4 teaspoon xanthan gum if your blend doesn’t include it. The texture will be slightly different but still delicious.
How far in advance can I make these cupcakes?
Unfrosted cupcakes can be made 1-2 days ahead and stored in an airtight container. Frost them the day of serving for the best presentation and flavor.
Can I use natural peanut butter in the frosting?
I don’t recommend it. Natural peanut butter separates and creates a grainy texture. Stick with commercial brands like Jif or Skippy for smooth, stable frosting.
What’s the best way to transport these cupcakes to an event?
Invest in a cupcake carrier with individual wells. If you don’t have one, place cupcakes in a box with tall sides and insert toothpicks between them to prevent frosting from smudging.
How can I make the chocolate flavor more intense?
Add 1 teaspoon of espresso powder to the batter—it enhances chocolate flavor without adding coffee taste. Using Dutch-processed cocoa also creates a deeper chocolate profile.
Final Thoughts
These Peanut Butter Chocolate Cupcakes have become more than just a recipe in my household—they’re part of our family traditions. From birthday celebrations to comfort baking on rainy afternoons, they never disappoint. The magic happens in that perfect balance: a tender chocolate crumb paired with creamy peanut butter frosting that creates something greater than the sum of its parts. I hope you’ll give these cupcakes a special place in your baking repertoire and make them your own. For more inspiration, check out my Pinterest collection where I share all my favorite baking adventures. Happy baking, friends!