

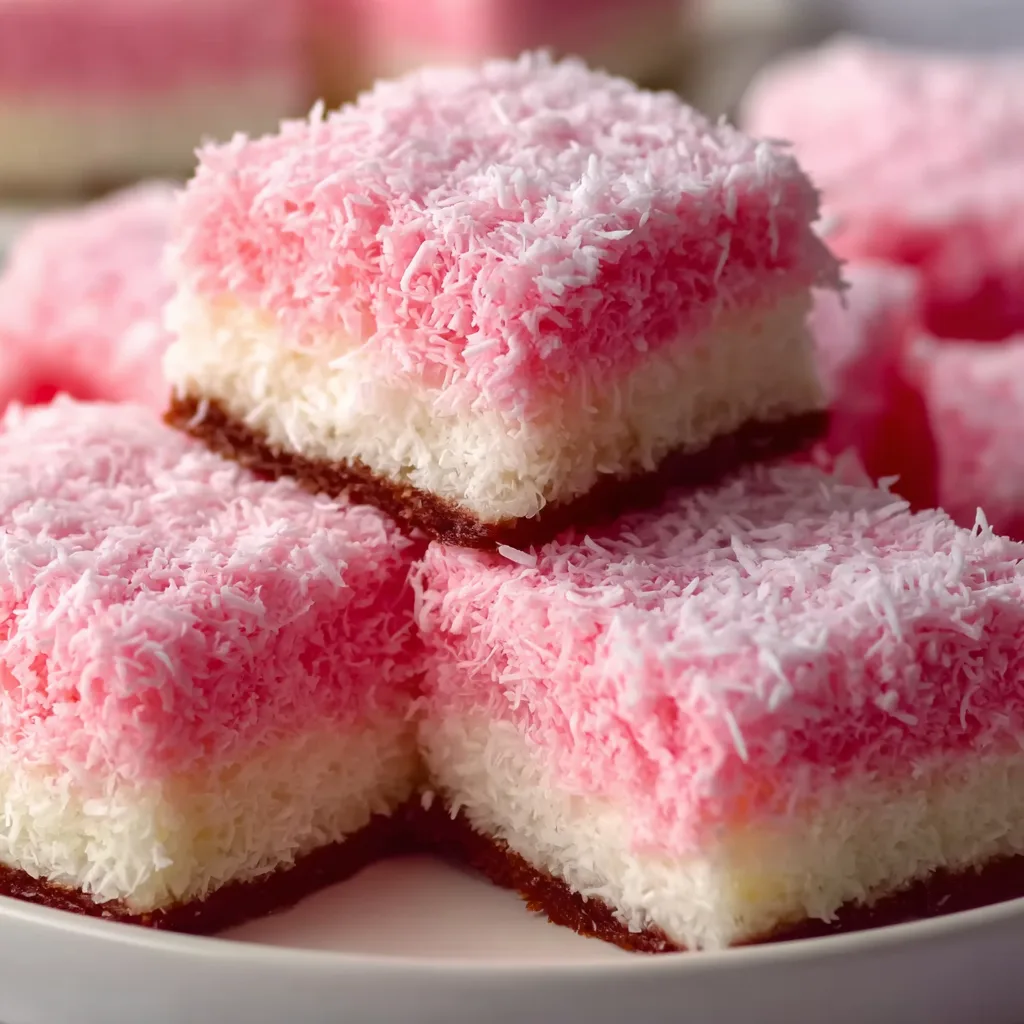
Pink Coconut Snowball Cake Bars have completely stolen my heart this winter season! These delightful treats combine the nostalgic charm of classic snowball cakes with the convenience of easy-to-serve bars. The first time I made these for my niece’s birthday, the room fell silent as everyone took their first bite – then erupted into a chorus of “mmms” and “wows.” With their vibrant pink color, tender cake layers, and coconut coating, these bars create an irresistible sensory experience that’s perfect for special occasions or brightening an ordinary Tuesday afternoon.
Recipe
Print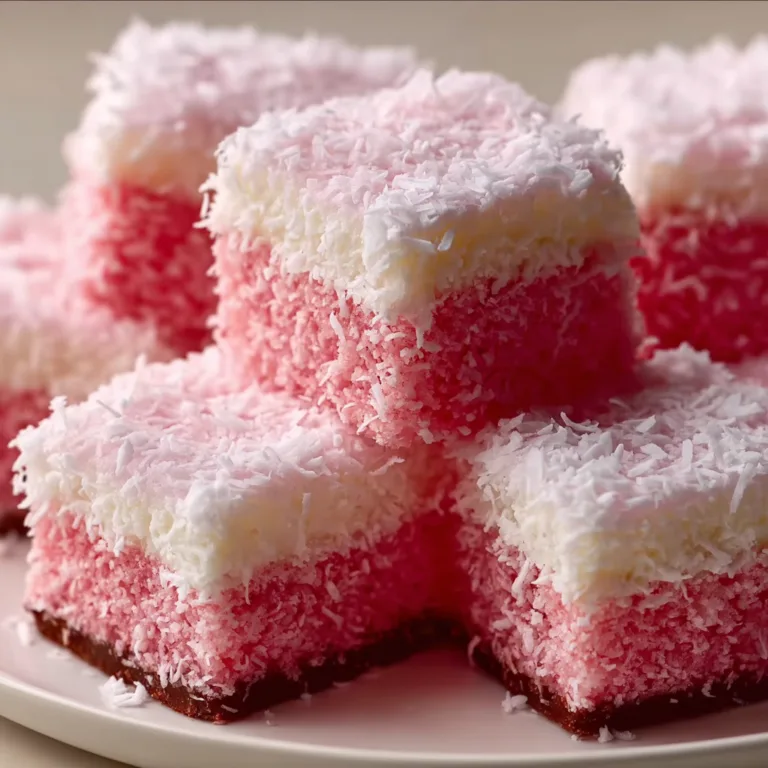
Delicious Pink Coconut Snowball Cake Bars Recipe
These Pink Coconut Snowball Cake Bars are the ultimate nostalgic dessert—moist vanilla cake layered with fluffy marshmallow topping and coated in sweet pink coconut. They’re easy to slice, fun to eat, and perfect for parties, holidays, or whenever you crave a little retro charm!
- Total Time: 45 minutes
- Yield: 12 bars
Ingredients
1 box vanilla or white cake mix (plus ingredients on box)
1/2 cup sour cream (for extra moisture)
1 (7 oz) jar marshmallow creme
1/2 cup butter, softened
2 cups powdered sugar
1/2 tsp vanilla extract
2 cups shredded sweetened coconut
1–2 drops pink food coloring
Instructions
1. Preheat oven to 350°F (175°C). Grease and line a 9×13-inch baking pan.
2. Prepare cake mix according to box instructions, adding sour cream for extra moisture.
3. Pour into prepared pan and bake 25–30 minutes, or until a toothpick comes out clean.
4. Cool completely.
5. In a bowl, beat together marshmallow creme, softened butter, powdered sugar, and vanilla until fluffy.
6. Spread evenly over cooled cake.
7. In a zip bag, toss coconut with pink food coloring until evenly tinted.
8. Sprinkle coconut generously over the marshmallow layer. Press gently.
9. Chill for 30 minutes before slicing into bars. Store covered in the fridge.
Notes
Swap vanilla cake with strawberry for a fruity twist.
Use natural food coloring or beet powder for a dye-free version.
Bars keep best chilled and taste even better the next day.
- Prep Time: 15 minutes
- Cook Time: 30 minutes
- Category: Dessert
- Method: Baked
- Cuisine: American
- Diet: Vegetarian
Why You’ll Love These Pink Coconut Snowball Cake Bars
Perfect Balance of Flavors and Textures
These bars are a texture lover’s dream! The contrast between the moist, tender cake and the slightly crunchy coconut coating creates a delightful sensory experience with every bite. I’ve balanced the sweetness carefully so the coconut flavor shines without overwhelming your palate. The cream filling adds a silky smoothness that melts in your mouth, while the subtle hint of almond extract elevates the entire dessert. When my neighbor tried these for the first time, she closed her eyes and said they transported her back to childhood birthday parties – that’s the magic of these perfectly balanced little treats!
Make-Ahead Convenience for Any Occasion
One thing I adore about these Pink Coconut Snowball Cake Bars is their impressive versatility. You can prepare them up to three days in advance, which makes them perfect for busy holiday gatherings or planned celebrations. The flavors actually develop and deepen overnight in the refrigerator, making them taste even better the next day! I’ve brought these to baby showers, holiday parties, and summer picnics – they’re a hit year-round despite their snowy appearance. Their portable, no-fork-needed format makes them ideal for buffets or any gathering where people might be mingling while enjoying dessert.
Essential Tips & Tricks
Achieving the Perfect Pink Hue
Getting that dreamy pink color without an artificial taste requires some finesse. I recommend using gel food coloring rather than liquid drops – you’ll need less product and get a more vibrant color without affecting the texture. Start with just a tiny amount and build gradually; you can always add more but can’t take it away! For a natural alternative, try using freeze-dried strawberry powder or a few tablespoons of pureed beets. The key is adding your coloring agent to the wet ingredients first, ensuring it distributes evenly throughout the batter. My personal secret? A drop of rose water enhances both the pink hue and adds a subtle floral note.
Mastering the Coconut Coating Technique
The coconut coating is what transforms these from ordinary cake bars into spectacular snowballs! For best results, toast about half of your coconut flakes until lightly golden (about 5 minutes at 325°F), then mix with untoasted coconut. This creates depth of flavor and visual interest. When coating the bars, I find it easiest to work with chilled bars – they’re less likely to crumble. Place the bars on a wire rack over a baking sheet, then spoon the cream frosting over each bar, letting excess drip off. While the frosting is still tacky, use your hands to gently press coconut onto all sides. Work quickly but carefully – this part is messy but surprisingly satisfying!
Serving Ideas & Creative Variations
Seasonal Adaptations That Wow Guests
These versatile bars can be transformed seasonally with just a few tweaks! For spring, add lemon zest to the batter and a touch of yellow food coloring for sunny lemon snowballs. Summer calls for coconut extract and a splash of pineapple juice in the frosting for tropical vibes. Fall? Try adding cinnamon and nutmeg to the batter with a maple-infused frosting. Winter holidays shine with peppermint extract and crushed candy canes mixed into the coconut coating. I once made these for a Valentine’s Day party with a raspberry filling and deeper pink color – they disappeared faster than any other dessert! The basic recipe provides an excellent canvas for seasonal creativity while maintaining that signature snowball texture.
Presentation Tips for Maximum Impact
The visual appeal of these Pink Coconut Snowball Cake Bars creates an instant wow factor! For the most impressive presentation, arrange them on a tiered cake stand with fresh berries or edible flowers scattered between the layers. If serving at a party, try placing each bar in a colorful cupcake liner for easy grabbing. For a dessert table centerpiece, stack them in a pyramid shape with a light dusting of powdered sugar “snow.” I love adding a simple garnish like a tiny sprig of mint or a single raspberry on top of each bar. For children’s parties, insert a colorful paper straw or small flag into each bar – this practical touch adds height and makes them even more festive!
Storage & Troubleshooting Guide
Keeping Your Bars Fresh and Delicious
These Pink Coconut Snowball Cake Bars maintain their best texture when stored properly. Keep them in an airtight container in the refrigerator for up to 5 days, with parchment paper between layers to prevent sticking. If you need to store them longer, they freeze beautifully for up to 3 months! Just wrap each bar individually in plastic wrap, then place in a freezer-safe container. Thaw overnight in the refrigerator, then let sit at room temperature for 20 minutes before serving. I’ve found that the coconut coating acts as a protective layer, keeping the cake moist even after freezing. For maximum freshness, avoid storing them near foods with strong odors, as coconut can absorb other flavors.
Solving Common Baking Challenges
The most common issue with these bars is moisture balance. If your cake turns out dry, you likely overbaked it – next time, check 5 minutes before the suggested baking time. For bars that fall apart when cutting, refrigerate the cake for at least 2 hours before slicing. If your frosting is too runny, add powdered sugar 1 tablespoon at a time until it reaches spreading consistency. For frosting that’s too thick, add milk by the teaspoon. Having trouble getting the coconut to stick? Make sure your frosting hasn’t set too much – it needs to be tacky.
I once saved a batch with too-dry coconut by lightly misting the bars with simple syrup before applying the coconut – this clever trick helped everything adhere beautifully!
Frequently Asked Questions
Can I make Pink Coconut Snowball Cake Bars without food coloring?
Absolutely! Use 2-3 tablespoons of pureed strawberries or raspberries in the batter. You’ll get a natural pink hue plus subtle fruit flavor. Freeze-dried strawberry powder also works wonderfully.
How far in advance can I make these for a party?
You can prepare these bars up to 3 days ahead. Store them covered in the refrigerator, and they’ll actually develop deeper flavor as they sit.
Can I use sweetened or unsweetened coconut?
Either works! Sweetened coconut provides more moisture and sweetness, while unsweetened gives a more pronounced coconut flavor. I often use a combination of both.
Are these bars gluten-free?
The standard recipe isn’t gluten-free, but you can substitute a 1:1 gluten-free flour blend with excellent results. Just add 1/2 teaspoon xanthan gum if your blend doesn’t include it.
Can I make a larger batch of Pink Coconut Snowball Cake Bars for a crowd?
Yes! Double the recipe and bake in a 9×13 pan, adding 5-7 minutes to the baking time. Let cool completely before cutting into squares.
Final Thoughts
These Pink Coconut Snowball Cake Bars have become my signature dessert for good reason—they combine nostalgic flavors with a modern presentation that never fails to impress. The vibrant color, tender cake, and coconut coating create a multi-sensory treat that’s as delightful to look at as it is to eat. Whether you’re celebrating a special occasion or simply wanting to add a touch of sweetness to everyday life, these bars deliver both comfort and joy in equal measure. I hope you’ll try them and experience the magic of Pink Coconut Snowball Cake Bars for yourself! Find more of my favorite recipes on Pinterest.