

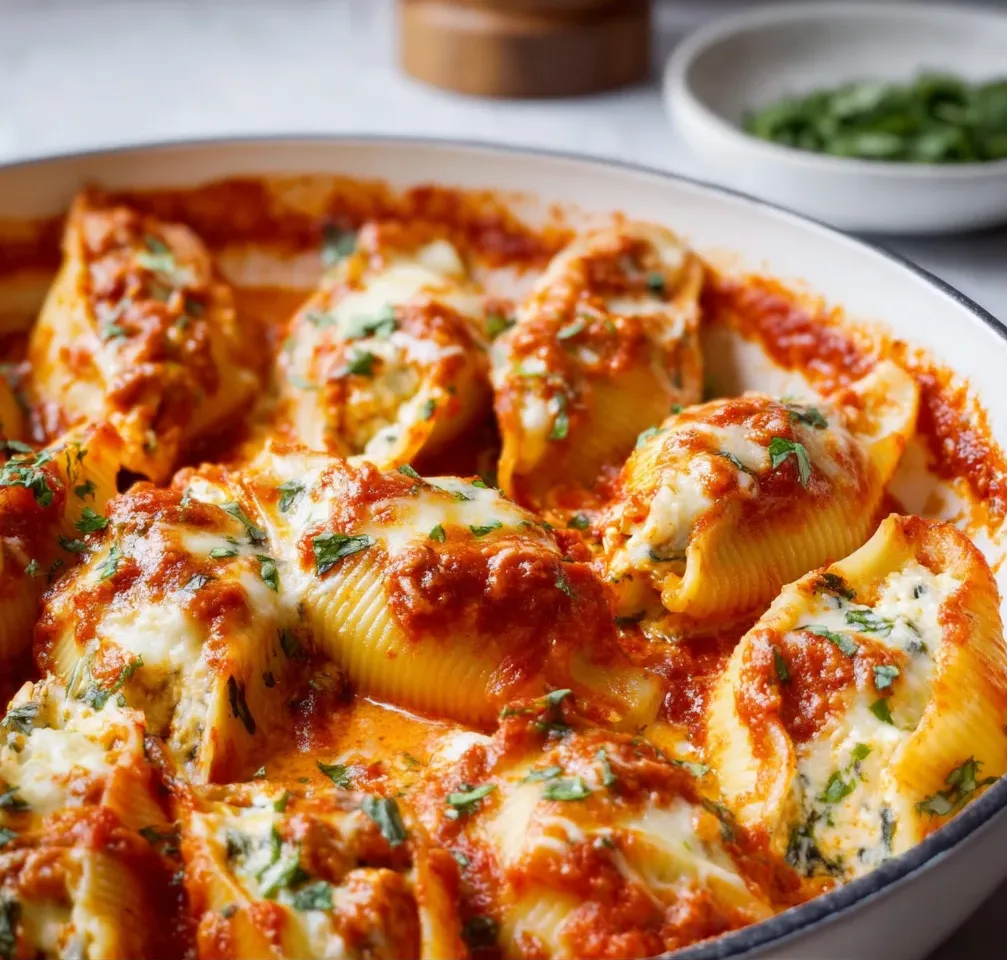
Ricotta Stuffed Shells have been my ultimate comfort food solution since I discovered them in my grandmother’s kitchen as a child. There’s something magical about those jumbo pasta shells cradling a creamy ricotta mixture, all blanketed in tangy marinara and melted cheese. The contrast between the tender pasta, fluffy cheese filling, and robust sauce creates a symphony of textures that makes this dish irresistible. Whether you’re feeding a hungry family or meal prepping for the week, these stuffed shells deliver that cozy Italian restaurant experience right at your kitchen table.
Recipe
Print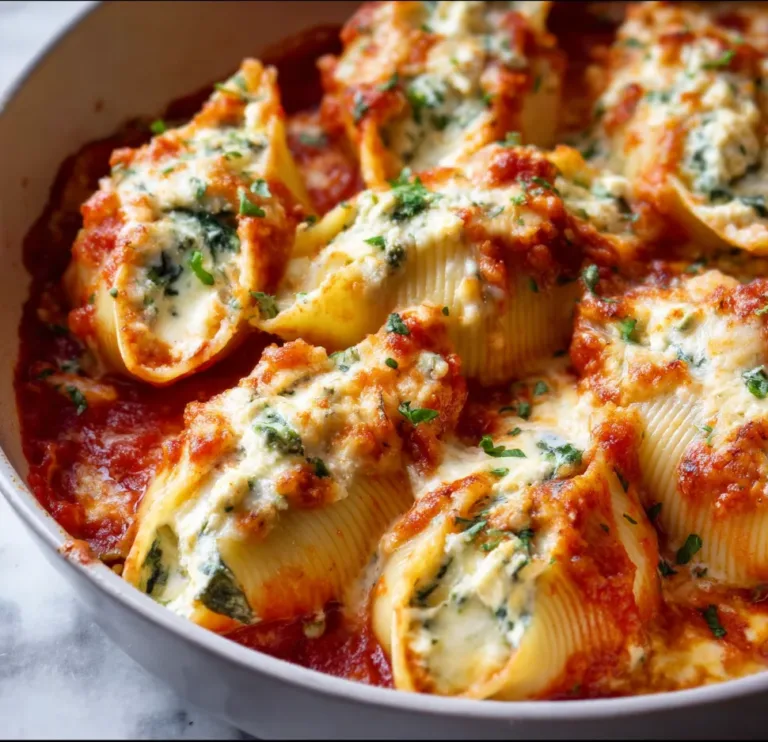
Creamy Ricotta Stuffed Shells Recipe | Easy Baked Pasta Dish
These creamy ricotta stuffed shells are baked with marinara, gooey mozzarella, and a rich ricotta-parmesan filling. A comforting, crowd-pleasing pasta dish that’s easy to prep and perfect for weeknights or gatherings.
- Total Time: 55 minutes
- Yield: 4–6 servings
Ingredients
20 jumbo pasta shells
3 cups marinara sauce (homemade or store-bought)
1 cup shredded mozzarella (for topping)
**Ricotta Filling:**
1 1/2 cups ricotta cheese
1/2 cup grated Parmesan
1 large egg
1/2 tsp garlic powder
1/2 tsp salt
1/4 tsp black pepper
1 tbsp chopped parsley or basil (optional)
1/2 cup shredded mozzarella (optional for inside filling)
Instructions
1. Preheat oven to 375°F (190°C). Lightly grease a 9×13-inch baking dish.
2. Cook jumbo shells according to package directions until al dente. Drain and rinse under cold water. Set aside.
3. In a mixing bowl, stir together ricotta, Parmesan, egg, garlic powder, salt, pepper, herbs, and optional mozzarella until well combined.
4. Spread 1 cup of marinara sauce on the bottom of the baking dish.
5. Fill each shell with 1–2 tablespoons of the ricotta mixture. Place stuffed shells seam-side up in the baking dish.
6. Pour remaining marinara over the shells and top with 1 cup mozzarella.
7. Cover with foil and bake for 25 minutes. Remove foil and bake 10 more minutes until bubbly and golden.
8. Let rest for 5 minutes before serving. Garnish with fresh basil or extra Parmesan.
Notes
• Great make-ahead dish: assemble and refrigerate up to 24 hours before baking.
• Freeze before baking for up to 2 months—thaw overnight in fridge before baking.
• Add spinach or cooked ground beef to the filling for a twist.
• Use your favorite marinara or try roasted garlic tomato sauce for extra flavor.
- Prep Time: 20 minutes
- Cook Time: 35 minutes
- Category: Main Dish
- Method: Baking
- Cuisine: Italian
- Diet: Vegetarian
Why You’ll Love These Ricotta Stuffed Shells
Perfect Make-Ahead Comfort Food
These ricotta stuffed shells are the ultimate meal prep champion. I often assemble them on Sunday afternoons while my kitchen fills with the aromatic blend of herbs and cheese. The beauty is you can refrigerate them for up to 48 hours before baking, making them perfect for busy weeknights when cooking from scratch feels impossible. The flavors actually deepen as they rest, creating an even more delicious result. Plus, they freeze beautifully—I’ve stashed unbaked trays for up to three months without sacrificing quality. There’s nothing quite like pulling a homemade meal from the freezer on those nights when cooking feels overwhelming.
Customizable for Any Dietary Need
What I adore about ricotta stuffed shells is their incredible adaptability. Need a vegetarian option? The classic cheese version already fits the bill! For dairy-free guests, plant-based ricotta alternatives work surprisingly well, especially when seasoned generously with fresh herbs. Gluten-free? Simply swap in your favorite gluten-free jumbo shells (they’re more available than ever these days). I’ve even made protein-packed versions by adding spinach, mushrooms, and ground turkey to the filling. The basic template—shells, creamy filling, sauce—remains constant while allowing endless personalization. This flexibility makes them perfect for feeding mixed groups with varying dietary needs.
Essential Tips & Tricks
Mastering the Perfect Filling
The secret to extraordinary ricotta stuffed shells lies in the filling texture. I learned through many batches that draining your ricotta is non-negotiable—excess moisture leads to runny filling that escapes the shells. Simply place it in a fine-mesh strainer lined with cheesecloth for 30 minutes before mixing. For flavor depth, I combine whole milk ricotta with sharp Parmesan and mozzarella, plus a whisper of nutmeg that adds mysterious warmth without announcing itself. Fresh herbs make all the difference; chopped basil and parsley brighten everything up. And don’t forget the egg—it binds everything together, ensuring your filling stays put when serving those beautiful shells onto waiting plates.
Shell Cooking and Assembly Secrets
Perfectly cooked pasta shells are the foundation of this dish, and the trick is to cook them until just shy of al dente—about 2 minutes less than the package directions. They’ll continue cooking in the oven, and this prevents them from becoming mushy. Cool them on a lightly oiled baking sheet to prevent sticking while you prepare the filling. When stuffing, a piping bag (or zip-top bag with the corner snipped off) makes the job infinitely easier than using spoons. For the sauce layer, similar to my garlic parmesan chicken bites with creamy rotini, start with sauce on the bottom of the dish to prevent sticking, then add more between and over the shells.
Serving Ideas & Creative Variations
Complementary Side Dishes
The best companions for ricotta stuffed shells are simple sides that balance the richness of the main dish. A crisp arugula salad dressed with lemon vinaigrette cuts through the creaminess beautifully. On chillier evenings, I serve garlic bread for sopping up extra sauce—sometimes homemade, sometimes store-bought with a brush of herb butter (no judgment!). Roasted vegetables like broccolini, asparagus, or brussels sprouts add color and nutritional balance. For wine pairing, a medium-bodied Italian red like Chianti complements without overwhelming. The key is keeping sides unfussy since the shells themselves are the star. Let them shine against a backdrop of simple, fresh accompaniments.
Creative Filling Variations
While classic ricotta filling is divine, experimenting with variations keeps this dish exciting in regular rotation. My seasonal adaptations have become family favorites. In summer, I fold in fresh corn kernels, basil, and lemon zest for brightness. Fall calls for roasted butternut squash puree mixed with sage and brown butter notes. For a sophisticated twist similar to my herbed ricotta stuffed chicken rolls, try incorporating caramelized onions, thyme, and a touch of white wine reduction. Seafood lovers might appreciate crab meat with a hint of lemon and tarragon. The possibilities are endless—just maintain the creamy ricotta base and ensure additional ingredients are relatively dry to prevent a watery filling.
Storage & Troubleshooting Guide
Proper Storage and Reheating
Leftover ricotta stuffed shells maintain their quality remarkably well when stored properly. Refrigerate leftovers in an airtight container within two hours of baking, where they’ll keep for up to 4 days. For reheating, the microwave works in a pinch (cover with a damp paper towel to prevent drying), but the oven preserves texture better. I cover the dish with foil and heat at 350°F until warmed through—usually 15-20 minutes. For freezing unbaked shells, arrange them in a freezer-safe dish without sauce, cover tightly, and freeze for up to 3 months. Thaw overnight in the refrigerator before adding sauce and baking as directed.
Troubleshooting Common Issues
Even experienced cooks encounter challenges with stuffed shells. If your shells tear easily during filling, they may be overcooked—next time, reduce boiling time by a minute or two. For filling that seems too wet or runny, add extra Parmesan cheese, which absorbs moisture while adding flavor. If your sauce separates or seems watery after baking, try reducing it on the stovetop before assembling, or add a tablespoon of tomato paste for body. Shells sticking to the pan usually means insufficient sauce underneath—always start with a generous layer on the bottom. For make-ahead versions that seem dry, add extra sauce before reheating to restore moisture and prevent the pasta from becoming tough.
Frequently Asked Questions
Can I make ricotta stuffed shells ahead of time?
Absolutely! Assemble them up to 2 days ahead and refrigerate unbaked. For longer storage, freeze unbaked shells without sauce for up to 3 months. Thaw overnight before adding sauce and baking.
What’s the best way to stuff the shells without breaking them?
Use a piping bag or zip-top bag with the corner snipped off. This gives you precise control and keeps the filling contained without putting pressure on delicate pasta.
Can I use cottage cheese instead of ricotta?
Yes, but drain it well and pulse briefly in a food processor for a smoother texture. The flavor will be slightly tangier than traditional ricotta stuffed shells.
How do I know when the shells are done baking?
They’re ready when the sauce bubbles around the edges and the cheese on top turns golden brown, usually 25-30 minutes at 375°F.
Can I add meat to the filling?
Definitely! Brown ground beef, turkey, or Italian sausage first, drain excess fat, and cool before mixing with the ricotta filling. This creates a heartier version.
Final Thoughts
Ricotta stuffed shells represent everything I love about home cooking—they’re comforting, adaptable, and bring people together around the table. The contrast between the tender pasta, creamy filling, and savory sauce creates a dish that feels special enough for company yet accessible for weeknight dinners. While they require a bit more effort than some recipes, the ability to make them ahead transforms them into a practical option for busy cooks. I hope you’ll try these shells in your kitchen and experience the same joy they’ve brought to mine. For more inspiration and variations, visit my Pinterest board where I’m constantly adding new ideas!