


This no-bake Easter Fudge is my absolute favorite spring treat—creamy, colorful, and completely irresistible! When the weather starts warming up and those pastel decorations appear, I find myself craving something sweet that doesn’t require heating up the kitchen. This fudge combines rich white chocolate with festive sprinkles and mini eggs for a treat that’s as beautiful as it is delicious. Perfect for Easter baskets, spring celebrations, or simply satisfying your sweet tooth while browsing spring recipes.
Recipe
Print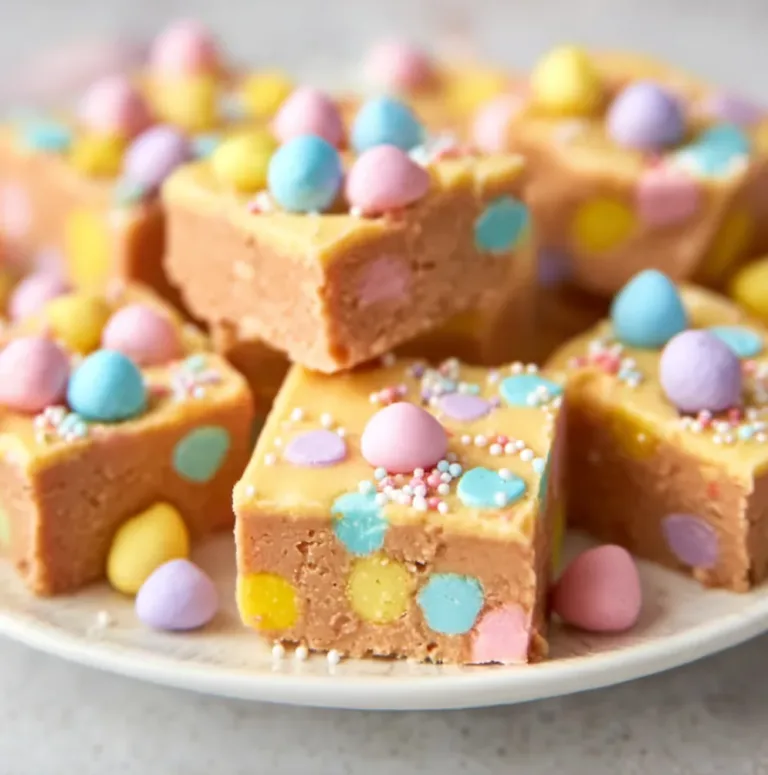
Easy No-Bake Easter Fudge Recipe
This Easy No-Bake Easter Fudge is rich, creamy, and packed with sweet chocolate flavor. Loaded with colorful Easter candies, it’s the perfect quick and festive treat with no oven required.
- Total Time: 2 hours 10 minutes
- Yield: 16 pieces
Ingredients
For the Fudge:
2 cups white chocolate chips
1 can (400 g) sweetened condensed milk
1 teaspoon vanilla extract
Mix-ins:
1 cup Cadbury mini eggs (crushed)
1/2 cup pastel sprinkles
Optional:
Food coloring (for swirls)
Instructions
1. Line a square baking dish with parchment paper.
2. In a microwave-safe bowl, combine white chocolate chips and sweetened condensed milk.
3. Microwave in 30-second intervals, stirring until smooth and melted.
4. Stir in vanilla extract.
5. Fold in crushed Cadbury eggs and sprinkles.
6. Optional: add a few drops of food coloring and swirl gently.
7. Pour the mixture into the prepared dish and spread evenly.
8. Chill in the refrigerator for at least 2 hours until set.
9. Cut into squares and serve.
Notes
Do not overheat chocolate to avoid burning.
Use gel food coloring for vibrant swirls.
Store in the fridge for best texture.
Perfect for gifting or Easter dessert tables.
- Prep Time: 10 minutes
- Cook Time: 0 minutes
- Category: Dessert
- Method: No-Bake
- Cuisine: American
- Diet: Vegetarian
Why You’ll Love This no-bake Easter Fudge
Quick and Easy Preparation
There’s something magical about recipes that deliver maximum impact with minimum effort. This no-bake Easter fudge comes together in just 15 minutes of active time, making it perfect for busy holiday preparations. I discovered this recipe years ago when I needed a last-minute treat for an Easter gathering. The simplicity stunned me—just melt, mix, and set! No candy thermometers, no precise temperature monitoring, and absolutely no stress. The hardest part is waiting for it to set in the refrigerator, but even that takes just a couple of hours. Trust me, your future self will thank you for choosing such an effortless holiday treat.
Customizable for Every Easter Celebration
The versatility of this fudge makes it a holiday staple in my home. You can easily adapt it to match any Easter theme or color scheme. Going for a sophisticated pastel palette? Use subtle spring-colored sprinkles and white chocolate mini eggs. Planning a vibrant children’s celebration? Amp up the rainbow sprinkles and add colorful candies. I’ve made this with everything from crushed Oreos to freeze-dried strawberries for a pop of natural color. The base recipe remains foolproof while allowing your creativity to shine. My nieces love helping decorate the top, making this a perfect family activity that creates both memories and delicious treats.
Essential Tips & Tricks
Choosing the Right Ingredients
The quality of your ingredients makes all the difference in this simple recipe. Use high-quality white chocolate chips or bars (with cocoa butter, not palm oil) for the creamiest texture and best flavor. I learned this lesson the hard way after using bargain chocolate that refused to melt properly! Sweetened condensed milk provides the perfect fudge consistency—don’t substitute with evaporated milk or the fudge won’t set. For extract, pure vanilla gives the cleanest flavor, though almond extract creates a lovely variation. The festive mix-ins are where you can play: pastel sprinkles, mini eggs, and even crushed snickerdoodle cookies add delightful texture and Easter charm.
Mastering the Melting Process
The secret to silky-smooth fudge lies in how you melt the chocolate. Always use a double boiler method or microwave in short intervals at 50% power. I once rushed this step and ended up with grainy, seized chocolate that couldn’t be saved! If using a microwave, stir thoroughly between each 30-second interval. The mixture should feel warm, not hot, and melt gradually. When adding sweetened condensed milk, fold gently rather than vigorously stirring, which can introduce air bubbles. For the creamiest results, make sure your mixing bowl and utensils are completely dry—even a drop of water can cause chocolate to seize. This gentle approach ensures your fudge has that professional, velvety texture that melts in your mouth.
Serving Ideas & Creative Variations
Elegant Easter Displays
Transform this simple fudge into a showstopping centerpiece for your Easter celebration. Cut it into egg shapes using cookie cutters, or create a “nest” presentation by arranging square pieces in a circle with chocolate eggs in the center. I love serving this on a rustic wooden board with fresh spring flowers nearby—the contrast makes the pastel colors pop beautifully. For an adults-only gathering, pair small fudge squares with champagne or prosecco; the bubbles cut through the sweetness perfectly. At my last Easter brunch, I created a dessert grazing board featuring this fudge alongside fresh berries, vanilla French beignets, and tiny chocolate bunnies. The combination of textures and complementary flavors had guests coming back for more.
Seasonal Flavor Twists
While the classic version is delightful, experimenting with seasonal flavors takes this fudge to new heights. For a spring twist, add 1-2 teaspoons of lemon zest and swap some sprinkles for crushed freeze-dried strawberries. The bright, citrusy notes perfectly complement the creamy white chocolate base. Another favorite variation includes a thin layer of raspberry jam swirled through the middle—the tartness balances the sweetness beautifully. For those who prefer more decadent options, try adding crushed cookies, chopped nuts, or even a peanut butter swirl. I’ve even made a “carrot cake” version with cinnamon, nutmeg, and tiny decorative carrots that had everyone asking for the recipe. These simple adjustments maintain the easy preparation while creating entirely new flavor experiences.
Storage & Troubleshooting Guide
Keeping Your Fudge Fresh
Proper storage ensures your no-bake Easter fudge stays perfectly fresh for days. Store cut pieces in an airtight container, separating layers with parchment paper to prevent sticking. At room temperature, it stays good for 3-4 days, but refrigeration extends this to 2 weeks. The fudge develops an even richer flavor after 24 hours, making it perfect for advance preparation. For longer storage, you can freeze it for up to 3 months—just wrap individual pieces in plastic wrap, then foil, before placing in a freezer bag.
I always make a double batch and freeze half for unexpected guests or late-night cravings! Allow frozen fudge to thaw in the refrigerator overnight rather than at room temperature for the best texture restoration.
Fixing Common Problems
Even experienced bakers encounter issues, but most fudge problems have simple solutions. If your fudge seems too soft or won’t set properly, it likely needs more time in the refrigerator—give it at least 4 hours, preferably overnight. For fudge that’s too firm or crumbly, you may have overheated the chocolate. Next time, melt more slowly and remove from heat while a few chips remain unmelted. If your decorative toppings sink into the fudge, try adding them in two stages—some mixed into the fudge and the rest sprinkled on top after it’s partially set (about 30 minutes in the refrigerator).
When white chocolate seizes and becomes grainy, unfortunately, it can’t be rescued for this recipe—but it makes delicious hot chocolate mix when combined with milk!
Frequently Asked Questions
Can I use milk chocolate instead of white chocolate for this no-bake Easter fudge?
Yes! Milk chocolate works beautifully, creating a traditional fudge flavor. Just reduce the sweetened condensed milk by about 2 tablespoons as milk chocolate is less firm than white chocolate when set.
How far in advance can I make this fudge?
You can prepare this fudge up to 2 weeks ahead if refrigerated in an airtight container. The flavors actually improve after 24 hours, making it perfect for advance preparation.
Why did my sprinkles bleed color into the white chocolate?
This happens when sprinkles are added while the chocolate is too hot. Let the mixture cool for 2-3 minutes before folding in colorful decorations, or use confetti sprinkles which are less prone to bleeding.
Can I make this recipe dairy-free?
Yes, use dairy-free white chocolate chips and coconut condensed milk as substitutes. The texture will be slightly different but still delicious with a subtle coconut undertone.
My fudge didn’t set properly. What went wrong?
Insufficient refrigeration is usually the culprit. Allow at least 4 hours, preferably overnight. Also check that you used sweetened condensed milk, not evaporated milk, which won’t provide the proper consistency.
Final Thoughts
This no-bake Easter fudge has become my springtime signature—the treat friends and family request year after year. There’s something special about creating a colorful, festive dessert that brings so much joy with so little effort. Whether you’re an experienced baker or someone looking for an easy holiday project, this recipe delivers both simplicity and satisfaction. The combination of creamy texture, sweet flavor, and cheerful appearance makes it impossible to resist. I hope this becomes a beloved addition to your own Easter traditions! For more seasonal inspiration, visit my Pinterest collection.