

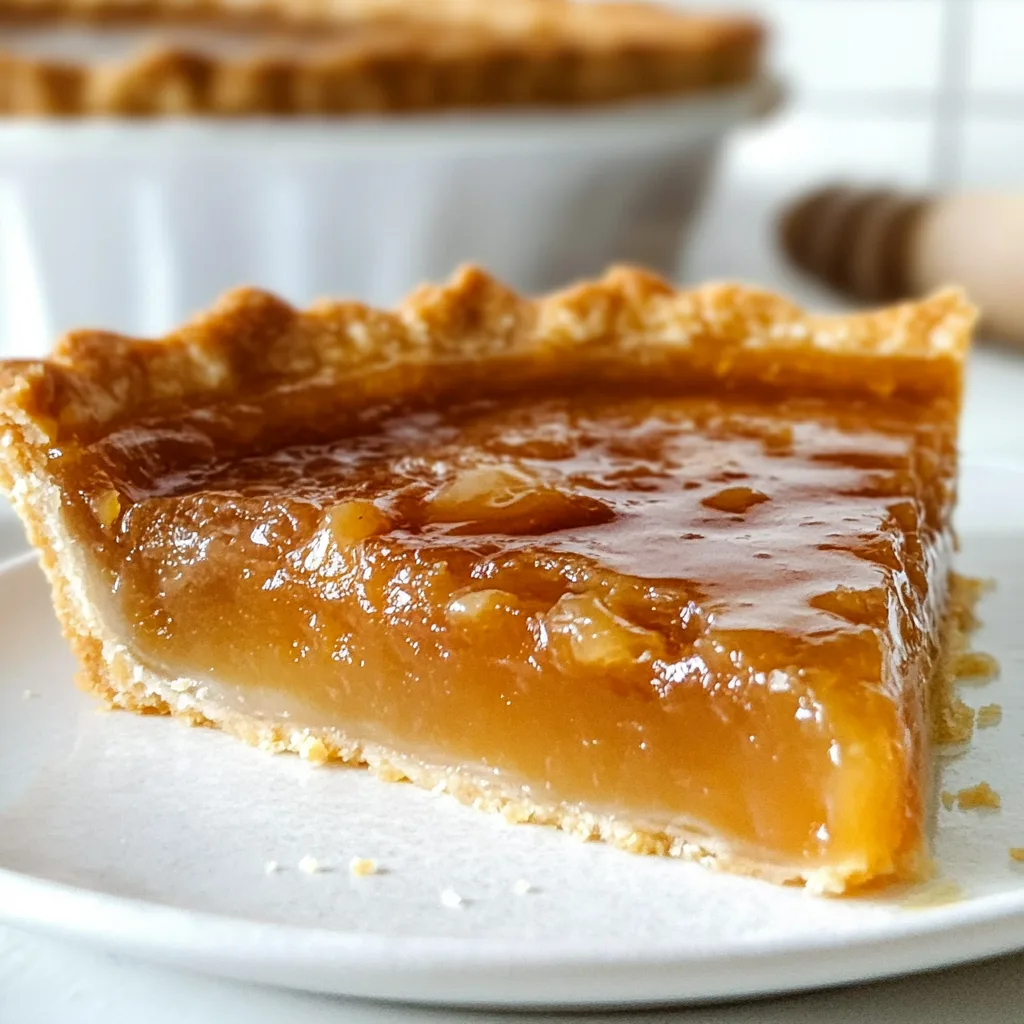
Burnt honey pie has become my absolute obsession this season. There’s something magical about the transformation that happens when honey caramelizes—it develops these deep, complex flavors that regular honey just doesn’t have. The first time I made this pie, my kitchen filled with the most intoxicating aroma that reminded me of cozy autumn evenings at my grandmother’s house. This recipe balances rich caramelized sweetness with a silky smooth custard that will make you close your eyes with each bite. Let me show you how to create this showstopper dessert that everyone will be talking about.
Table of Contents
Recipe
Print
Delicious Burnt Honey Pie Recipe | Perfectly Sweet & Caramelized Dessert
Burnt Honey Pie is a silky custard pie made with deeply caramelized honey for an earthy, sweet, and slightly smoky flavor. Baked in a buttery crust and finished with flaky salt, it’s a uniquely bold dessert perfect for special occasions.
- Total Time: 55 minutes (+2 hrs chilling)
- Yield: 8 slices
Ingredients
1 9-inch pie crust, par-baked
1/2 cup unsalted butter
3/4 cup honey
1/4 cup brown sugar
1/4 tsp sea salt
3 large eggs
1/2 cup heavy cream
1 tbsp apple cider vinegar
1 tsp vanilla extract
Flaky salt, for garnish (optional)
Instructions
1. Preheat oven to 350°F (175°C).
2. In a saucepan over medium heat, melt the butter and add honey.
3. Cook for 3–5 minutes until honey darkens in color and smells toasty, but not burned. Stir constantly.
4. Remove from heat. Whisk in brown sugar and salt.
5. Let mixture cool slightly, then whisk in eggs one at a time.
6. Add cream, vinegar, and vanilla. Stir until smooth.
7. Pour filling into par-baked pie crust.
8. Bake for 35–40 minutes, or until edges are set and center slightly jiggles.
9. Cool completely, then chill for at least 2 hours.
10. Sprinkle with flaky salt before serving, if desired.
Notes
Don’t walk away while burning the honey—it goes from perfect to scorched fast!
Make a graham cracker crust or almond crust for added depth.
Best served chilled with whipped cream or crème fraîche.
- Prep Time: 15 minutes
- Cook Time: 40 minutes
- Category: Dessert, Pie
- Method: Baking
- Cuisine: American
- Diet: Vegetarian
Why You’ll Love This Burnt Honey Pie
A Symphony of Flavors and Textures
This pie is all about contrasting elements working in perfect harmony. The burnt honey creates a sophisticated, almost butterscotch-like flavor that’s nothing like regular honey—it’s deeper, more complex, with subtle bitter notes that balance the sweetness beautifully. The custard filling is silky smooth against the buttery, flaky crust. I still remember the first time my neighbor tried it at our block party; her eyes widened with that unmistakable “wow” expression. The beauty of burnt honey is that it transforms an everyday ingredient into something extraordinary with just a few extra minutes of cooking time.
Make-Ahead Magic for Stress-Free Entertaining
One of my favorite things about this burnt honey pie is how beautifully it holds over time. The flavors actually develop and improve after a day in the refrigerator, making it the perfect dessert for busy hosts. I’ve made it up to three days before a dinner party, and it was absolutely perfect when served. The custard sets firmly enough to slice cleanly but remains creamy on the palate. When holiday season gets hectic, having a show-stopping dessert that can be prepared in advance is like finding gold. Plus, it travels well if you need to bring something to a potluck or family gathering.
Essential Tips & Tricks
Mastering the Burnt Honey Technique
The key moment in this recipe is knowing exactly when your honey has reached that perfect burnt stage. I watch for it to turn a deep amber color and release a slightly smoky aroma—this usually takes about 3-4 minutes over medium heat. Be patient and attentive; honey can go from perfectly caramelized to burnt beyond rescue in seconds. I keep a heatproof measuring cup ready with a splash of cream to stop the cooking process immediately. My first attempt resulted in honey that was barely golden (too light), while my second was bitter and acrid (too dark). Aim for that rich amber color that resembles a copper penny.
Achieving the Perfect Custard Consistency
The custard filling requires a gentle touch and proper temperature management. Always strain your mixture to ensure silky smoothness—even tiny bits of cooked egg can disrupt the texture. I learned this lesson the hard way at a holiday gathering when I skipped this step! For the ideal consistency, bake just until the center has a slight wobble, like firm Jell-O. The internal temperature should reach about 175°F. Overbaking leads to cracks and a grainy texture. Allow the pie to cool gradually—I leave it in the turned-off oven with the door cracked for 30 minutes before bringing it to room temperature.
Serving Ideas & Creative Variations
Seasonal Garnishes That Elevate Your Pie
The simple elegance of burnt honey pie makes it a perfect canvas for seasonal garnishes. In summer, I love topping it with fresh berries tossed in a bit of honey and lemon. For fall, thin apple slices caramelized with cinnamon create a beautiful pattern on top. Winter calls for a sprinkle of sea salt flakes and maybe a drizzle of extra burnt honey. My personal favorite is adding a dollop of lightly whipped cream infused with a touch of bourbon—it complements the caramelized flavors perfectly. The contrast of temperatures when you serve a cool slice with warm sauce creates an incredible sensory experience.
Flavor Twists on the Classic Recipe
While the classic burnt honey flavor is divine, there are several exciting variations worth exploring. Adding 2 tablespoons of lavender-infused cream brings a floral note that’s unexpected and delightful. For citrus lovers, fold in 1 tablespoon of orange or lemon zest to brighten the custard. I once added a splash of bourbon and a handful of toasted pecans for a Southern-inspired version that disappeared in minutes at a potluck. For a holiday twist, incorporate warming spices like cinnamon, nutmeg, and clove—just a quarter teaspoon of each will transform your pie into a festive treat.
Storage & Troubleshooting Guide
Proper Storage for Maximum Freshness
This burnt honey pie will maintain its perfect texture for up to 5 days when stored properly. Always let it cool completely before refrigerating, and cover it loosely with foil rather than plastic wrap, which can create condensation and make the crust soggy. The pie actually tastes better on day two as the flavors meld and develop overnight. If you need to freeze it, wrap individual slices tightly in plastic wrap and then foil—they’ll keep for up to 2 months. Thaw overnight in the refrigerator for the best texture restoration. I always label with the date, as even the most memorable desserts can get lost in a crowded freezer!
Fixing Common Pie Problems
If your custard develops small cracks, don’t panic! This is usually from overbaking or cooling too quickly. Simply top with whipped cream or a fruit arrangement to hide imperfections. For a filling that’s too loose, refrigerate longer—sometimes it just needs more time to set. If your crust is browning too quickly during baking, create a foil ring to protect the edges. And if your burnt honey tastes slightly bitter, balance it by increasing the vanilla in your custard by ¼ teaspoon. I once salvaged an overly dark honey by adding an extra tablespoon of regular honey to soften the bitter notes.
Frequently Asked Questions
What exactly is “burnt” honey?
Burnt honey is honey that’s been carefully caramelized until it develops complex, deeper flavors. It’s not actually burnt but cooked until it reaches a rich amber color with slightly bitter notes that balance its natural sweetness.
Can I make Burnt Honey Pie without a pre-baked crust?
No, a pre-baked (blind baked) crust is essential. The custard filling is too wet and would make an unbaked crust soggy. Always bake your crust first until lightly golden.
How do I know when my honey is properly “burnt”?
Watch for a deep amber color (like copper) and a slightly smoky aroma. It typically takes 3-4 minutes over medium heat. Have cream ready to stop the cooking process immediately.
Is this pie gluten-free?
The filling is naturally gluten-free, but you’ll need to use a gluten-free crust. I recommend a simple almond flour crust or a store-bought gluten-free option.
Can I make mini Burnt Honey Pies instead?
Absolutely! Use a muffin tin with removable bottoms or small tart pans. Reduce the baking time to about 15-20 minutes and watch carefully for the slight wobble in centers.
Final Thoughts
This burnt honey pie has become my signature dessert for good reason—it’s sophisticated yet comforting, complex yet approachable. The transformative process of caramelizing honey creates something truly special that will have everyone asking for your secret. I love watching people take their first bite and experience that moment of surprise when they taste how different burnt honey is from the regular version. Whether for a holiday gathering or a simple Sunday dinner, this pie brings a touch of magic to any table. Find more of my favorite dessert recipes on Pinterest where I’m always sharing seasonal inspirations.