

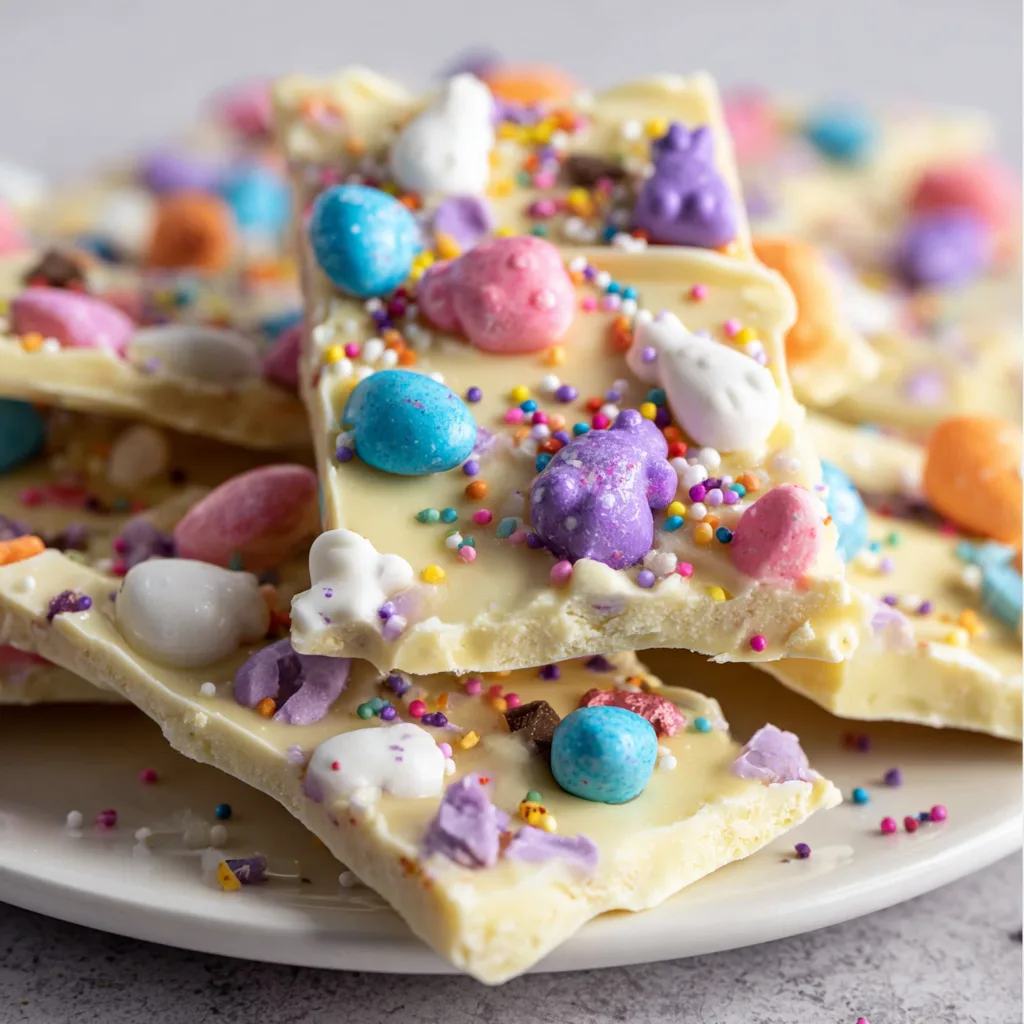
This Easter Bunny Bark is about to become your new holiday tradition! Imagine a sheet pan filled with swirled pastel chocolates, sprinkled with festive candies and topped with adorable bunny-shaped treats. I created this recipe last Easter when my niece came to visit, and the pure joy on her face as we broke apart the colorful slab of sweetness was absolutely priceless. It’s ridiculously simple to make but looks like you spent hours crafting it. The best part? You can customize it with whatever Easter candies make your heart happy. Let’s hop to it and create some chocolate magic that’s sure to make your Easter celebration extra special!
Recipe
Print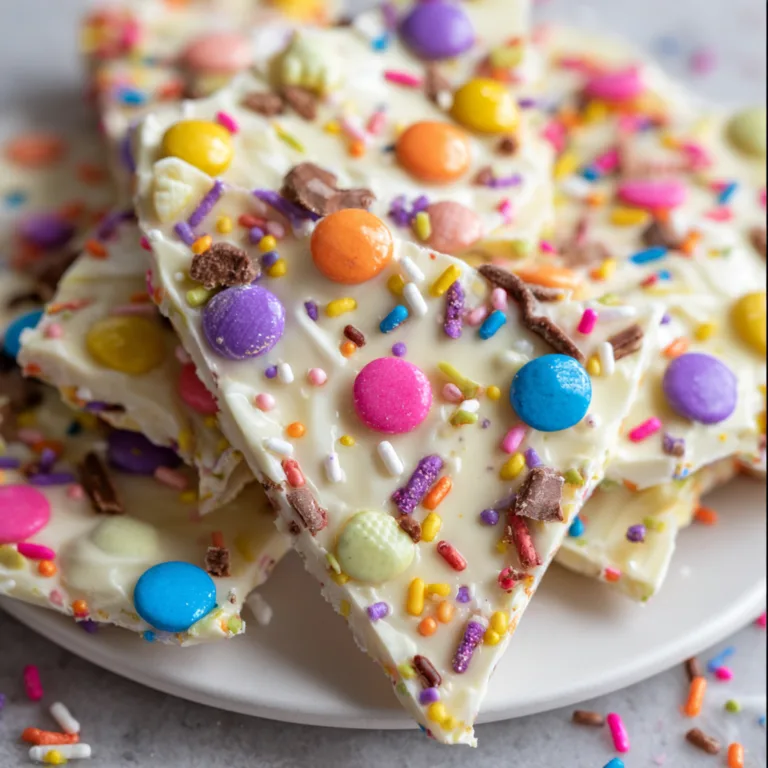
Easter Bunny Bark Recipe
This Easter Bunny Bark is a fun, colorful, and chocolatey treat that’s incredibly easy to make. Loaded with festive candies and crunchy toppings, it’s the perfect holiday dessert for sharing.
- Total Time: 30 minutes
- Yield: 12 pieces
Ingredients
For the Bark:
200 g white chocolate (melted)
200 g milk or dark chocolate (melted)
For the Toppings:
1 cup mini chocolate eggs
1/2 cup marshmallows
1/3 cup sprinkles
Optional:
Crushed cookies or pretzels
Food coloring for swirl effect
Instructions
1. Line a baking tray with parchment paper.
2. Melt white chocolate and milk chocolate separately.
3. Pour both chocolates onto the tray and spread evenly.
4. Swirl the chocolates together using a toothpick or knife.
5. Optional: add food coloring for a pastel swirl.
6. Sprinkle mini eggs, marshmallows, and sprinkles over the top.
7. Press toppings gently into the chocolate.
8. Let it set at room temperature or refrigerate for 30 minutes.
9. Break into pieces and serve.
Notes
Use high-quality chocolate for best flavor.
Work quickly before chocolate sets.
Customize toppings with your favorite candies.
Store in a cool place to keep it firm.
- Prep Time: 10 minutes
- Cook Time: 0 minutes
- Category: Dessert
- Method: No-Bake
- Cuisine: American
- Diet: Vegetarian
Why You’ll Love This Easter Bunny Bark
Perfect for Last-Minute Celebrations
This Easter Bunny Bark is my go-to rescue recipe when I need something impressive but time is ticking away. Last year, I completely forgot about the neighborhood Easter potluck until the morning of—panic mode activated! This bark saved the day because it takes just 20 minutes of active time. The hardest part is waiting for it to set! The simple melt-and-spread technique means even kitchen novices can create something spectacular. Plus, kids absolutely love helping with the sprinkles and candy placement, making it a fun family activity that doubles as a delicious treat.
Customizable for Every Easter Basket
What I adore about this Easter Bunny Bark is how infinitely adaptable it is. Don’t have pastel M&Ms? Use regular ones! Prefer dark chocolate over white? Go for it! One Easter, I made three different versions—one with milk chocolate base for the chocolate purists, one with white chocolate tinted pink and blue for the pastel lovers, and one with a swirl of both for the indecisive (like me!). You can even make it allergen-friendly by choosing dairy-free chocolate and appropriate candies. It’s like a blank canvas waiting for your personal touch, making it perfect for gifting in personalized Easter baskets.
Essential Tips & Tricks
Chocolate Selection Secrets
The foundation of spectacular Easter Bunny Bark lies in the quality of chocolate you choose. I learned this the hard way after a disastrous attempt with chocolate chips that refused to melt smoothly. For best results, use high-quality chocolate bars or melting wafers specifically designed for candy making. They contain the proper cocoa butter ratio for that perfect snap when broken. If you’re creating colorful swirls, white chocolate accepts food coloring beautifully—but stick with oil-based or powder colorants, as water-based ones can make your chocolate seize up faster than a bunny spotting a fox! For a truly decadent base, check out this Snickerdoodle Cobbler for inspiration on creating rich, flavorful foundations.
Perfect Setting Technique
The difference between amateur and professional-looking Easter Bunny Bark comes down to the setting technique. After pouring and decorating your bark, resist the urge to move it to the refrigerator immediately. Let it sit at room temperature for about 10 minutes first—this prevents condensation and gives the toppings time to slightly sink into the chocolate. Then refrigerate on a completely flat surface (use a level if you’re particular like me!) for at least 30 minutes. When breaking it apart, don’t use a knife which drags through the chocolate. Instead, lift the parchment paper slightly and apply gentle pressure from underneath, creating natural, rustic breaks that showcase all those beautiful layers and toppings.
Serving Ideas & Creative Variations
Elegant Easter Tablescape Additions
Transform your Easter Bunny Bark into a showstopping centerpiece by thinking beyond the basic serving plate. Last Easter, I created a “chocolate garden” by arranging bark pieces of varying sizes vertically in a bed of edible Easter grass, surrounded by fresh spring flowers. For brunch gatherings, try breaking the bark into uniform rectangles and using them as place cards by writing guests’ names with edible markers. You can even create a dessert grazing board with your bark as the star, accompanied by fresh berries, whipped cream for dipping, and complementary treats like those featured in these Cinnamon Sugar Soft Pretzels for a sweet-and-salty balance.
Seasonal Flavor Twists
While traditional Easter Bunny Bark features vanilla and chocolate flavors, exploring seasonal additions elevates this simple treat to gourmet status. My personal favorite variation incorporates finely zested orange peel into the white chocolate for a subtle citrus brightness that pairs beautifully with spring. For a sophisticated adult version, try adding a teaspoon of instant espresso powder to the dark chocolate layer, then topping with chocolate-covered espresso beans and gold shimmer dust. Feeling adventurous? Infuse your white chocolate with a drop of lavender or rose extract before coloring it pastel purple or pink, then garnish with crystallized edible flowers for a garden-inspired bark that tastes like spring itself.
Storage & Troubleshooting Guide
Keeping Your Bark Perfect for Days
The beauty of Easter Bunny Bark lies in its make-ahead potential. Store your finished bark in an airtight container with parchment paper between layers to prevent sticking. At cool room temperature (below 70°F), it stays fresh for up to 5 days, retaining that satisfying snap. In warmer environments, refrigerate it, but always serve at room temperature for the best flavor experience—cold chocolate doesn’t release its full flavor profile! If gifting, I’ve discovered that placing bark pieces in paper cupcake liners before packaging prevents them from sticking together and adds a charming presentation touch. For longer storage, you can freeze the bark for up to 3 months in freezer-safe containers.
Fixing Common Chocolate Mishaps
Even experienced candy makers encounter chocolate challenges. If your chocolate seizes (turns grainy and thick), don’t panic! For minor seizing, try adding a teaspoon of neutral oil like grapeseed and gently warming while stirring. For overheated chocolate that’s become dull or streaky, you’re experiencing blooming. While safe to eat, it’s not pretty—melt it down again with a touch of shortening for a quick fix. If your toppings are sinking completely instead of sitting prettily on top, your chocolate is likely too warm. Let it cool for a few minutes until it develops a slight skin before adding decorations. Remember that imperfection adds character—I once dropped my bark and created accidental “bunny paw” cracks that everyone thought were intentional!
Frequently Asked Questions
Can I make Easter Bunny Bark without a microwave?
Absolutely! Use a double boiler by placing a heat-safe bowl over simmering water. Stir constantly until melted, being careful not to let any water touch the chocolate as it will seize.
How far in advance can I make this for an Easter party?
You can make Easter Bunny Bark up to 5 days ahead. Store in an airtight container with parchment between layers at cool room temperature or in the refrigerator.
Can I use candy melts instead of real chocolate?
Yes! Candy melts are formulated to set well without tempering and come in various colors. They have a different flavor profile than real chocolate but work perfectly for this application.
What’s the best way to create distinct color swirls?
Pour each colored chocolate in separate sections, then use a toothpick to create swirls. Work quickly before the chocolate sets, and don’t over-swirl or you’ll lose the distinct colors.
Why did my white chocolate turn grainy when I added food coloring?
Standard liquid food coloring contains water which makes chocolate seize. Always use oil-based, powder, or gel food colorings specifically designed for chocolate work.
Final Thoughts
This Easter Bunny Bark has become my signature holiday contribution—the perfect balance of simplicity and wow-factor. There’s something magical about breaking apart those colorful, candy-studded shards that brings out the child in everyone. I’ve watched adults who claimed they were “just having a small piece” return to the plate multiple times with gleeful smiles. The versatility of this recipe means it can evolve with your Easter traditions year after year. Whether you’re creating memories with little ones or impressing at an adult gathering, this Easter Bunny Bark delivers sweet joy that’s as delightful to make as it is to eat. Find more seasonal inspiration on my Pinterest board where I’m constantly adding new Easter treat ideas!