

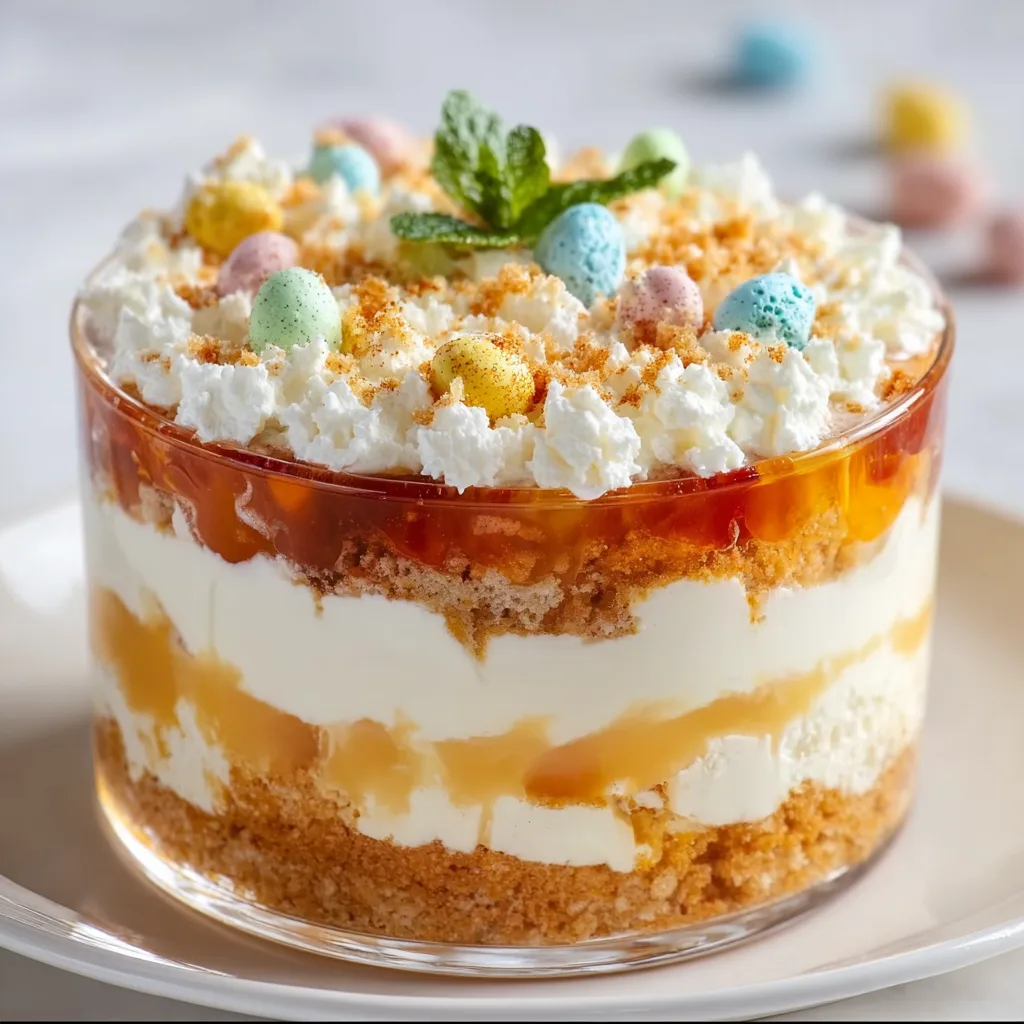
A Triffle Easter Dessert Showstopper is exactly what your holiday table needs this spring! I discovered the magic of trifles years ago when my grandmother’s crystal bowl transformed simple ingredients into something magnificent. There’s something almost theatrical about those beautiful layers—vibrant berries, velvety custard, and delicate cake all coming together in perfect harmony. The best part? This show-stopping dessert only looks complicated! I promise you’ll create something absolutely stunning with minimal effort. Ready to impress your Easter guests with a dessert that’s as gorgeous as it is delicious? Let’s dive into this perfect springtime treat.
Recipe
Print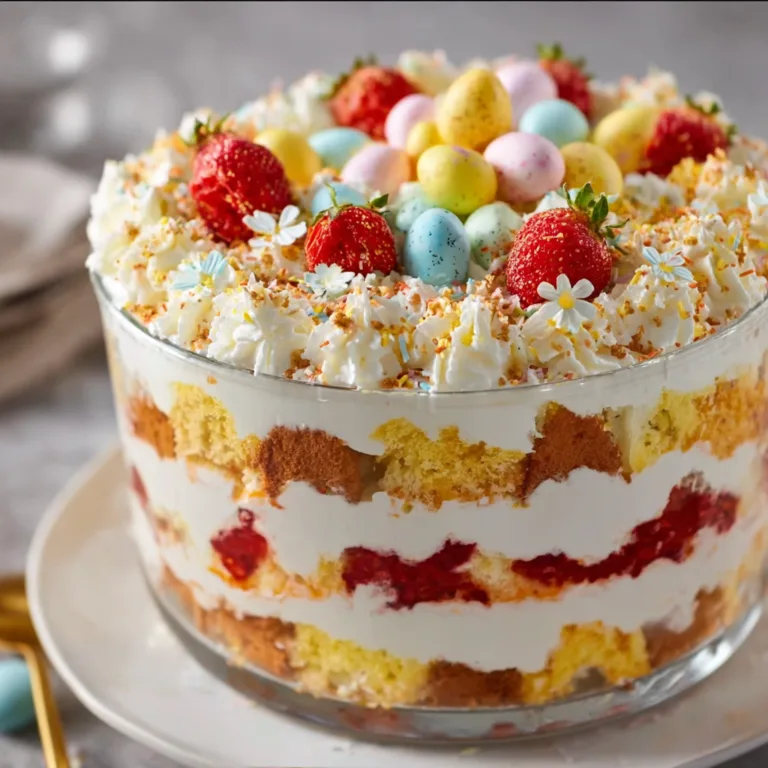
Trifle Easter Dessert Showstopper
This Trifle Easter Dessert Showstopper is a stunning layered treat with soft cake, creamy pudding, and fluffy whipped layers. Colorful, festive, and easy to make, it’s the perfect spring dessert to impress everyone.
- Total Time: 1 hour 20 minutes
- Yield: 8 servings
Ingredients
For the Cake Layer:
1 prepared vanilla cake (cut into cubes)
For the Cream Layer:
2 cups whipped cream
For the Pudding Layer:
2 cups milk
1 pack vanilla pudding mix
For the Layers:
1 cup crushed cookies or biscuits
1 cup mini chocolate eggs
Optional:
Food coloring (for pastel whipped cream)
Easter sprinkles
Fresh berries
Instructions
1. Prepare pudding by mixing with milk and let it set.
2. In a large glass bowl, add a layer of cake cubes.
3. Top with a layer of pudding.
4. Add a layer of whipped cream.
5. Sprinkle crushed cookies and mini eggs.
6. Repeat layers until the dish is full.
7. Optional: color whipped cream for a pastel effect.
8. Finish with whipped cream, sprinkles, and decorations.
9. Chill in the refrigerator for at least 1 hour before serving.
Notes
Use a clear bowl for a beautiful layered look.
Chill well before serving for best texture.
Swap pudding flavors for variation.
Perfect make-ahead dessert for Easter gatherings.
- Prep Time: 20 minutes
- Cook Time: 0 minutes
- Category: Dessert
- Method: No-Bake
- Cuisine: American
- Diet: Vegetarian
Why You’ll Love This Triffle Easter Dessert Showstopper
A Visual Feast That’s Actually Simple
The true beauty of a trifle lies in its impressive presentation that requires surprisingly little technical skill. I remember the first time I made one for my in-laws—their wide-eyed expressions when I carried it to the table made me feel like a culinary genius! The crystal-clear bowl reveals every gorgeous layer, creating instant drama. You’ll appreciate how forgiving this dessert is; slightly uneven layers or imperfect cake cubes? Nobody will notice once everything melds together. The vibrant colors of spring berries, pastel-tinted custards, or even edible flowers create a dessert that’s practically begging to be photographed before the first spoonful is taken.
Make-Ahead Magic for Stress-Free Entertaining
Nothing ruins holiday hosting like last-minute kitchen stress. That’s why this trifle deserves a permanent spot in your Easter repertoire. I now always prepare mine the day before, which not only saves precious time but actually improves the flavor! As the trifle sits, the cake layers soak up all those wonderful juices and creams, creating a perfectly melded dessert experience. The textures and flavors marry beautifully overnight, transforming good ingredients into something truly exceptional. Plus, having one major component complete gives you breathing room to focus on other aspects of your Easter celebration.
Essential Tips & Tricks
Mastering the Perfect Layers
Creating those Instagram-worthy layers isn’t just about aesthetics—it affects the eating experience too. Start with a completely cooled cake (even slightly stale works perfectly) to prevent soggy, collapsed layers. I learned the hard way that pressing gently along the edges creates that clean, defined look that makes trifles so impressive. Use a clear measuring cup to pour custard or cream evenly around the perimeter first, then fill in the center. For the sharpest visual impact, keep fillings distinctly colored—think vibrant berries against white cream, or pastel custards against chocolate cake. These visual contrasts are what make people reach for their phones before their spoons!
Flavor Balancing Secrets
The difference between a good trifle and an unforgettable one comes down to balance. I always include something slightly tart to offset the sweetness—lemon curd, fresh berries, or even a splash of liqueur for adult versions. This prevents the dessert from becoming cloying after a few bites. Don’t underestimate the power of texture either! I like incorporating unexpected elements like toasted coconut, crushed amaretti cookies, or candied pecans between layers. Remember that flavors intensify as they meld, so go lighter on extracts and spices than you might for stand-alone components. The perfect trifle should offer a slightly different flavor experience with each delicious spoonful.
Serving Ideas & Creative Variations
Presentation That Wows
The moment you bring out your trifle is pure theater, so maximize its impact! I serve mine on a cake stand surrounded by fresh flowers that echo the Easter theme—tulips, daffodils, or even a nest of decorative eggs creates a stunning centerpiece. For individual servings, consider clear glasses or mason jars that show off those beautiful layers. A dusting of edible luster dust on berries or a few edible flowers pressed against the glass creates that extra special touch. I’ve found that chilling your serving spoon makes for cleaner slices, preserving those picture-perfect layers from bowl to plate.
Seasonal & Dietary Adaptations
One reason I adore trifles is their incredible versatility. For spring, I love creating Easter-themed variations with pastel colors and seasonal fruits. Swap traditional berries for mangoes and pineapple for a tropical twist, or create an entirely chocolate version with alternating white and dark chocolate mousses. For gluten-free guests, simply substitute gluten-free cake or cookies in the base layers. Dairy-free? Coconut cream whips beautifully as an alternative to heavy cream. The modular nature of trifles means you can easily adapt components while maintaining that showstopper quality. I’ve even created vegan versions using aquafaba-based mousses that disappeared just as quickly as traditional recipes!
Storage & Troubleshooting Guide
Keeping Your Trifle Perfect
The beauty of trifles extends to their practicality—they actually improve with a little time! Store your creation covered in the refrigerator for up to 3 days, though the visual appeal peaks during the first 24-48 hours before fruits may begin to release excess juice. If making significantly in advance, consider assembling most components but adding the final whipped cream layer and decorative touches just before serving. For leftover portions (though I rarely have this problem!), transfer to individual containers rather than repeatedly exposing the entire trifle to room temperature. The texture will soften over time but remains delicious—my family actually fights over day-two trifle!
Rescuing Common Trifle Troubles
Even experienced bakers encounter trifle troubles occasionally! If your whipped cream begins to weep or deflate, fold in a tablespoon of instant pudding powder as a stabilizer. Soggy cake layers usually result from adding too much liquid—brush cake lightly with flavored syrups rather than soaking. If your trifle looks less defined than hoped, refrigerate for 30 minutes between layers to allow each to set. For runny custard issues, a quick fix is adding an extra layer of cake to absorb excess moisture. Remember that trifles are forgiving by nature—even if the appearance isn’t perfect, the combined flavors will still create a memorable dessert experience that guests will rave about.
Frequently Asked Questions
Can I make a Triffle Easter Dessert Showstopper without alcohol?
Absolutely! Simply substitute the traditional sherry or liqueur with fruit juice, flavored syrups, or even strong brewed tea. The moisture and flavor enhancement remains without the alcohol.
How far in advance can I make my trifle?
Ideally, prepare your trifle 12-24 hours before serving. This allows flavors to meld perfectly while maintaining visual appeal. You can prepare components separately up to 3 days ahead.
What’s the best bowl to use for a stunning presentation?
A clear glass trifle bowl with straight sides showcases the beautiful layers best. In a pinch, any large clear glass bowl, punch bowl, or even a glass salad bowl works wonderfully.
Can I create individual trifle portions instead of one large dessert?
Yes! Mason jars, wine glasses, or clear dessert cups make charming individual servings. They’re perfect for buffets and allow for easier portion control.
What’s the secret to perfectly defined layers in my trifle?
Chill each layer for 15-20 minutes before adding the next, especially puddings and creams. Use the back of a spoon to gently spread layers evenly to the edges of the bowl.
Final Thoughts
Creating a Triffle Easter Dessert Showstopper is more than just following a recipe—it’s about crafting a memorable centerpiece that brings joy to your celebration. I love watching faces light up when this magnificent creation makes its grand entrance to the table. The beauty of trifles lies in their adaptability and forgiving nature, allowing you to express your creativity while practically guaranteeing success. Whether you follow tradition or invent your own signature version, this layered masterpiece deserves its place in your Easter tradition. For more inspiration, check out my Pinterest board where I’ve gathered countless variations to spark your imagination. Happy trifle-making!