

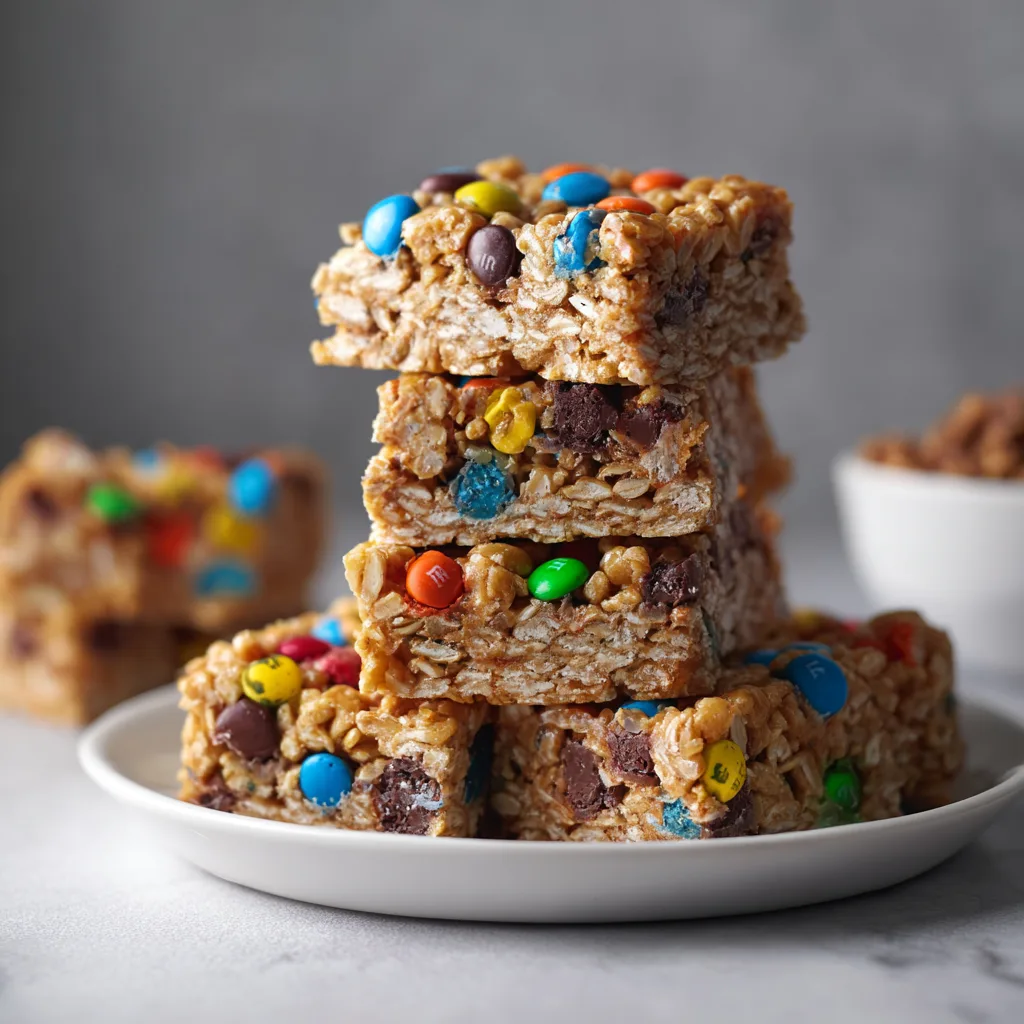
No-Bake Monster Cookie Bars are my absolute lifesaver when those sweet cravings hit and I don’t want to wait for the oven to preheat! These deliciously chewy, loaded treats combine everything I love about monster cookies—peanut butter, oats, chocolate chips, and colorful candy-coated chocolates—all pressed into an irresistible bar form. What makes them truly magical is how quickly they come together; just a few minutes of mixing, press into a pan, and a brief chill in the refrigerator. I discovered this recipe during a summer heatwave when turning on the oven seemed like torture, and they’ve been my go-to ever since for potlucks, after-school snacks, or midnight munchies!

Table of Contents
Recipe
Print
No-Bake Monster Cookie Bars Recipe | Easy & Delicious Treats
These No-Bake Monster Cookie Bars are loaded with peanut butter, oats, M&Ms, and chocolate chips for a fun, chewy treat that comes together in minutes—no oven required! A perfect make-ahead dessert or lunchbox snack.
- Total Time: 1 hour 15 minutes (includes chill time)
- Yield: 16 bars
Ingredients
1 cup creamy peanut butter
1/2 cup honey or corn syrup
1/2 cup brown sugar
2 teaspoons vanilla extract
2 1/2 cups quick oats
1/2 cup mini chocolate chips
1/2 cup mini M&Ms
Optional: pinch of salt
Instructions
1. Line an 8×8-inch or 9×9-inch baking dish with parchment paper.
2. In a saucepan over medium heat, stir together peanut butter, honey, and brown sugar.
3. Heat until melted and smooth—do not boil.
4. Remove from heat and stir in vanilla and optional pinch of salt.
5. Mix in oats until well combined.
6. Let mixture cool slightly, then fold in chocolate chips and M&Ms.
7. Press mixture evenly into prepared pan.
8. Chill in the refrigerator for 1–2 hours or until firm.
9. Slice into bars and serve.
Notes
Use rolled oats for a chewier texture or quick oats for smoother bars.
Substitute sunflower butter for nut-free version.
Store in an airtight container at room temperature for 3 days or in the fridge for up to a week.
- Prep Time: 10 minutes
- Cook Time: 5 minutes
- Category: Dessert
- Method: No-Bake
- Cuisine: American
Why You’ll Love This No-Bake Monster Cookie Bars
Perfect for Any Occasion
These No-Bake Monster Cookie Bars have become my secret weapon for just about every gathering. Last month, my neighbor’s surprise birthday party was announced with only a day’s notice, and I was assigned dessert duty. With a toddler clinging to my leg and zero time to bake, these bars saved the day! They’re incredibly versatile—festive enough for celebrations but casual enough for everyday snacking.
The beauty of these bars lies in their universal appeal. Kids absolutely devour them (my nephew once ate four in one sitting!), while adults appreciate the nostalgic flavors that remind them of childhood. I’ve brought them to book clubs, office potlucks, and family gatherings, and the recipe request always follows. Their portable nature makes them perfect for picnics and lunchboxes too—no crumbling cookies to worry about! Plus, they hold up well in warm weather since they’re already designed to be served chilled.
Quick and Foolproof Preparation
If you’ve ever experienced a baking disaster (and trust me, I’ve had my share!), you’ll appreciate how foolproof these No-Bake Monster Cookie Bars truly are. There’s no need to worry about over-mixing batter, cookies spreading too thin, or anything burning in the oven. The most challenging part might be waiting for them to chill before diving in!
The hands-on time is minimal—just about 10 minutes from start to finish. I often make them while simultaneously helping with homework or catching up on my favorite podcast. Unlike traditional cookie recipes that require precise measurements and techniques, these bars are incredibly forgiving. Added a bit too much peanut butter? They’ll just be creamier. Extra chocolate chips? Nobody’s complaining! This flexibility makes them perfect for cooking with little ones, too. My daughter loves to help measure and mix, and the colorful candy additions make it feel like an art project as much as a cooking activity. For busy days when you still want something homemade, these bars are absolutely unbeatable.
Essential Tips & Tricks
Ingredient Selection Matters
The beauty of No-Bake Monster Cookie Bars lies in their simplicity, but choosing the right ingredients elevates them from good to absolutely irresistible. For the peanut butter, I strongly recommend using the creamy, conventional variety rather than natural versions that separate. The stabilizers in regular peanut butter help the bars hold their shape better. That said, if you need a peanut-free version, sunflower seed butter works beautifully as a substitute—I made them this way for my niece’s nut-free classroom party, and nobody could tell the difference!
When it comes to oats, old-fashioned rolled oats provide the best texture. Quick oats work in a pinch but give a slightly less chewy result. For chocolate additions, I love using a combination of semi-sweet chocolate chips and milk chocolate M&Ms for the perfect balance of chocolate intensity. During holiday seasons, I switch to color-themed candies—red and green for Christmas, pastels for Easter—making them instantly festive! If you’re looking for more no-bake inspiration, check out my No-Bake Ube Coconut Cheesecake Bars for another quick treat that doesn’t require an oven.
Perfecting the Texture
The difference between good and great No-Bake Monster Cookie Bars often comes down to texture. The most common issue I see is bars that are either too soft and fall apart or too hard and difficult to bite through. The secret to perfect consistency lies in the honey-butter mixture that binds everything together. You need to bring this mixture to a full rolling boil and maintain it for exactly one minute—not 30 seconds, not two minutes. I learned this the hard way after making a batch that never quite set properly!
Another crucial step is pressing the mixture firmly into your pan. I use the bottom of a measuring cup wrapped in parchment paper to really compact the mixture, especially around the edges. This ensures even thickness and helps the bars hold together when cut. The chilling time is non-negotiable—at least two hours in the refrigerator allows everything to set properly.
However, if you’re truly in a rush (like I was when my son’s friend unexpectedly stayed for dinner), you can speed things up by placing the pan in the freezer for about 30 minutes. Just don’t forget them there! For more amazing no-bake desserts, my 5-Minute Hot Cocoa Dip is another quick treat that’s perfect for satisfying sweet cravings without turning on the oven.
Serving Ideas & Creative Variations
Beyond the Basic Bar
While these No-Bake Monster Cookie Bars are absolutely delicious on their own, I love getting creative with how I serve them! For an elevated dessert experience, try crumbling a bar over a scoop of vanilla ice cream—the combination of cold, creamy ice cream with the chewy, sweet bar creates an incredible contrast of textures. At my daughter’s birthday party, I used these bars as the base for an ice cream sandwich bar, letting kids choose their ice cream flavor to sandwich between two thin slices. The result was messy but magical!
For a more sophisticated presentation, I sometimes cut these into bite-sized squares and arrange them on a platter with fresh berries and a drizzle of chocolate sauce. This transforms the humble bar into an elegant dessert board perfect for dinner parties. During the holidays, I package stacks of these bars in cellophane bags tied with festive ribbon for homemade gifts that everyone appreciates. The bars pair beautifully with coffee or tea, making them perfect for afternoon gatherings. For more delightful pairing ideas, check out my Strawberry Crunch Cheesecake Tacos which complement these bars wonderfully in a dessert spread.
Exciting Flavor Twists
One of the reasons I keep coming back to these No-Bake Monster Cookie Bars is their incredible versatility when it comes to flavors! My family has a running competition to create the most delicious variation. My personal favorite is the “Autumn Harvest” version, where I swap the M&Ms for butterscotch chips and add a teaspoon of pumpkin pie spice and some dried cranberries. The warm spices with tangy cranberries create a completely different experience.
For chocolate lovers in your life, try the triple chocolate version—use chocolate peanut butter, add white chocolate chips alongside the regular chocolate chips, and top with chocolate candies. It’s almost brownie-like in its intensity! My husband’s preference is what we call the “Salty-Sweet Sensation,” which adds a handful of broken pretzel pieces and a light sprinkle of flaky sea salt on top. The contrast between sweet and salty is absolutely addictive.
If you’re feeding a crowd with diverse tastes, consider making a basic batch and creating a “bar bar” where people can add their own toppings like toasted coconut, crushed cookies, or different types of chocolate chips. This interactive approach is always a hit at gatherings! You can find more inspiration for creative dessert ideas on my MugMealMagic Pinterest board where I save all my favorite sweet treat variations.
Storage & Troubleshooting Guide
Optimal Storage Methods
Proper storage is key to maintaining the perfect texture and flavor of your No-Bake Monster Cookie Bars. In my experience, these bars keep beautifully in the refrigerator for up to one week when stored in an airtight container. I prefer to place parchment paper between layers to prevent any sticking or transfer of colors from the candy pieces. The chilled bars have a delightfully firm texture, but if you prefer them slightly softer, simply let them sit at room temperature for about 10 minutes before serving.
For longer storage, these bars freeze exceptionally well—something I discovered by accident when I made too many for a school bake sale! To freeze, wrap the entire slab (or individual portions) tightly in plastic wrap, then place in a freezer-safe container or bag. They’ll maintain their quality for up to three months. When you’re ready to enjoy them, thaw in the refrigerator overnight rather than at room temperature to prevent condensation from making them soggy. I often make a double batch specifically to freeze half, giving me a ready-made dessert option for unexpected guests or chocolate emergencies (which are very real in my household!).
Fixing Common Problems
Even with a recipe as forgiving as No-Bake Monster Cookie Bars, occasional issues can arise. The most common problem is bars that don’t hold together properly. If your mixture seems too dry and crumbly when you’re pressing it into the pan, add an extra tablespoon of peanut butter to help bind everything. Conversely, if your bars are too soft even after proper chilling, the honey-butter mixture likely didn’t boil long enough. Remember that full minute of boiling is crucial for the sugar to reach the right stage.
Another issue I’ve encountered is chocolate chips that melt too quickly when added to the mixture. The solution is simple—let your oat mixture cool for about 5 minutes before folding in the chocolate additions. I learned this the hard way after ending up with chocolate-swirled bars rather than distinct chips! If your bars turn out too sweet for your taste (which happened when my mother-in-law made them with extra honey), balance the sweetness next time by adding a pinch of salt or using unsweetened peanut butter. Remember that no-bake recipes are generally more forgiving than baked goods, so don’t be afraid to make adjustments to suit your preferences.
Frequently Asked Questions
Can I make No-Bake Monster Cookie Bars without peanut butter?
Absolutely! I’ve made these bars with several peanut butter alternatives with great results. Almond butter creates a slightly more delicate flavor, while sunflower seed butter makes them completely nut-free for school settings or allergies. Cookie butter (like Biscoff) creates an entirely different but equally delicious bar with warm spice notes. Just make sure whatever substitute you choose has a similar consistency to conventional peanut butter for the best texture results.
How long do these bars need to chill before serving?
For optimal texture, I recommend chilling these No-Bake Monster Cookie Bars for at least 2 hours in the refrigerator. This gives them enough time to fully set and hold their shape when cut. In a pinch, you can speed up the process by placing them in the freezer for 30-45 minutes, but watch carefully as you don’t want them completely frozen unless you’re planning to store them long-term.
Can I use quick oats instead of old-fashioned rolled oats?
Yes, quick oats will work in this recipe, though the texture will be slightly different. Quick oats create a more uniform, less chewy bar since they’re already partially processed. If using quick oats, you might need to reduce the amount slightly (by about 2 tablespoons) as they absorb moisture differently than old-fashioned oats. I prefer the heartier texture from old-fashioned oats, but in a pantry pinch, quick oats definitely do the job!
Why didn’t my bars set properly?
If your No-Bake Monster Cookie Bars remained too soft even after chilling, the most likely culprit is that the honey-butter-sugar mixture didn’t boil long enough. This mixture needs to reach a specific temperature (essentially a soft-ball stage) to set properly when cooled. Make sure you bring it to a full rolling boil and maintain that boil for a complete 60 seconds. Another possibility is too much liquid ingredient or not enough oats to absorb the moisture.
How can I make these bars healthier?
I’ve experimented with several healthier variations of these bars! Try using natural peanut butter (though you may need to add a bit more honey for binding), reducing the sugar by 2-3 tablespoons, and using dark chocolate chips instead of milk chocolate. You can also substitute half the chocolate candies with dried fruit like raisins or chopped dried apricots. Adding a tablespoon of ground flaxseed or chia seeds boosts nutrition without significantly altering the taste. For a lower-sugar version, use sugar-free chocolate chips and a stevia-honey blend.
Final Thoughts
There’s something wonderfully satisfying about creating a delicious treat without ever turning on the oven, and these No-Bake Monster Cookie Bars perfectly capture that magic. I’ve made them during summer heatwaves, power outages, and those moments when I simply need something sweet without the wait. They’ve become more than just a recipe in my household—they’re a solution for last-minute potlucks, after-school snacks, and midnight cravings.
What I love most about these No-Bake Monster Cookie Bars is how they bring people together. There’s something about their colorful appearance and nostalgic flavors that makes everyone smile. Whether you’re making them with kids on a rainy afternoon or packaging them as homemade gifts, they carry that special touch that says “made with love.” I encourage you to make this recipe your own—experiment with different mix-ins, adjust the sweetness to your liking, and create your own family tradition. And please, come back and let me know your favorite variation! The beauty of home cooking is in the sharing, both of the food itself and the stories we create around it.