

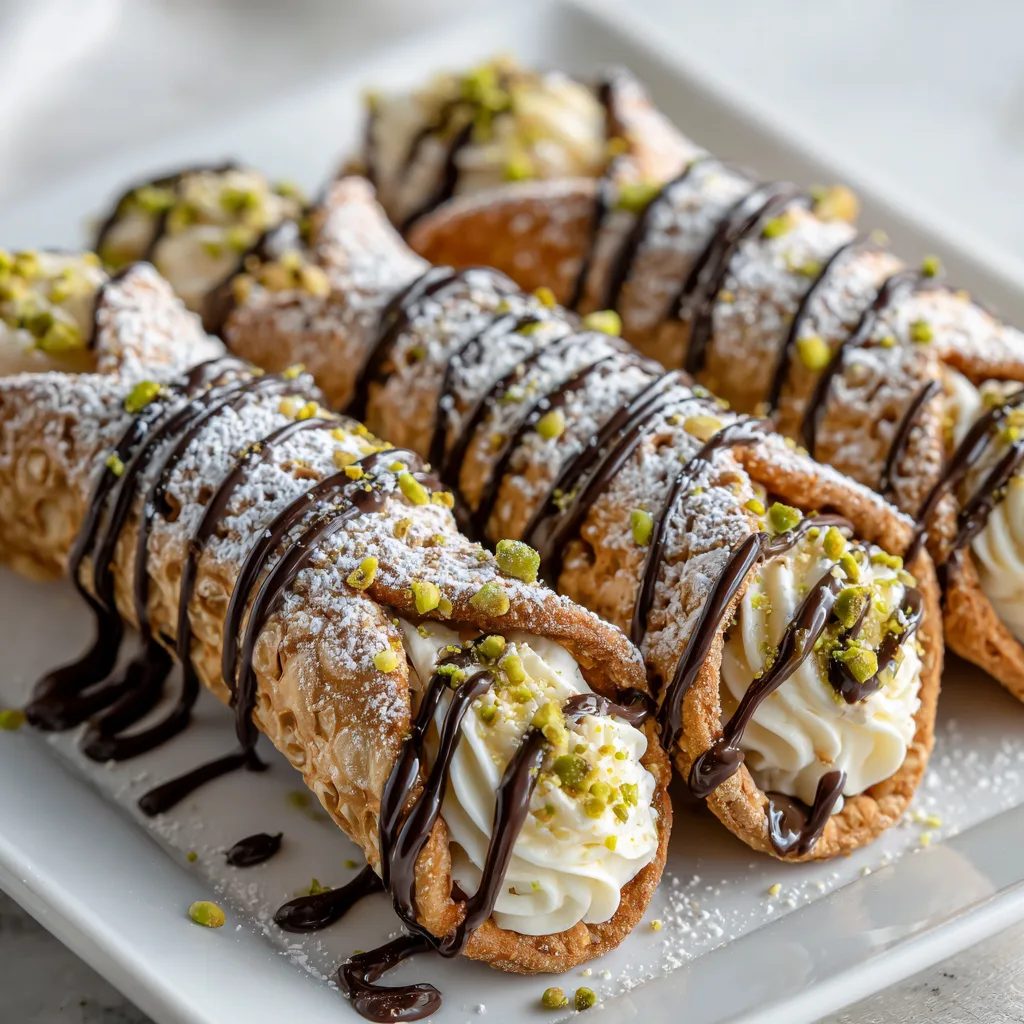
Cannoli Cookies that melt in your mouth with just the right balance of sweetness and spice – these are the little bites of heaven that have become my go-to for impressing guests (and honestly, treating myself on those nights when only something special will do). I discovered this recipe during a late-night craving when I wanted the flavors of my favorite Italian pastry but without the fuss of making actual cannoli shells.
The magical combination of ricotta, mini chocolate chips, and that hint of cinnamon and orange zest captures everything wonderful about traditional cannoli in a convenient, perfectly portioned cookie form. These Cannoli Cookies have that crisp edge and tender center that makes you close your eyes with each bite – pure bliss in under 30 minutes!

Table of Contents
Recipe
Print
Delicious Cannoli Cookies Recipe | Easy Italian Dessert Treats
These Cannoli Cookies capture the creamy, nutty flavor of a classic Italian cannoli—all in a soft, bakery-style cookie. Ricotta, pistachios, orange zest, and mini chocolate chips give these cookies irresistible texture and flavor.
- Total Time: 28 minutes
- Yield: 24 cookies
Ingredients
1/2 cup unsalted butter, softened
3/4 cup granulated sugar
1/2 cup whole milk ricotta cheese
1 egg
1 teaspoon vanilla extract
1/2 teaspoon almond extract
1 1/4 cups all-purpose flour
1/2 teaspoon baking powder
1/4 teaspoon salt
1/2 teaspoon orange zest
1/3 cup mini chocolate chips
1/3 cup chopped pistachios (plus extra for topping)
Instructions
1. Preheat oven to 350°F (175°C) and line a baking sheet with parchment paper.
2. In a large bowl, cream together butter and sugar until light and fluffy.
3. Add ricotta, egg, vanilla, and almond extract. Mix well.
4. In a separate bowl, whisk together flour, baking powder, and salt.
5. Gradually mix dry ingredients into wet mixture until just combined.
6. Fold in orange zest, mini chocolate chips, and chopped pistachios.
7. Drop heaping tablespoons of dough onto the prepared baking sheet.
8. Sprinkle extra pistachios on top if desired.
9. Bake for 12–14 minutes or until edges are lightly golden.
10. Cool on wire rack and enjoy!
Notes
Store in an airtight container in the fridge for up to 5 days.
Cookies will remain soft and slightly cakey—just like cannoli filling.
Try dusting with powdered sugar before serving for an extra festive touch.
- Prep Time: 15 minutes
- Cook Time: 13 minutes
- Category: Dessert
- Method: Baking
- Cuisine: Italian-American
- Diet: Vegetarian
Why You’ll Love These Cannoli Cookies
Perfect Balance of Flavors and Textures
There’s something absolutely magical about biting into these Cannoli Cookies. The exterior has just the right amount of crispness that gives way to a tender, slightly chewy center that melts in your mouth. The secret is in the ricotta cheese, which creates that distinctive cannoli-filling texture we all crave. I’ve spent countless evenings perfecting this recipe, and the balance of sweetness is spot on – not too sugary, but sweet enough to satisfy your dessert cravings.
What makes these cookies truly special is how they capture all the traditional cannoli flavors in each bite. The subtle hint of orange zest brightens everything up, while the cinnamon adds that warm, cozy note that makes you feel like you’re sitting in a little Italian bakery. And those mini chocolate chips? They distribute perfectly throughout the dough, ensuring you get that chocolate hit in every single bite. I’ve had friends who claim they don’t even like cannoli fall head over heels for these cookies – they’re that good!
Quick and Fuss-Free Preparation
Let’s be honest – traditional cannoli are a labor of love that most of us don’t have time for on a regular Tuesday night. That’s where these Cannoli Cookies shine brilliantly. The first time I made these, I was shocked at how quickly the dough came together – literally 10 minutes of mixing and they were ready for the oven. No special equipment needed, just a bowl, a spoon, and your ingredients.
What I particularly love about this recipe is that it doesn’t require chilling the dough. So many cookie recipes demand that hour-long wait in the refrigerator, but these Cannoli Cookies go straight from mixing bowl to baking sheet. This means you can decide you want cookies at 8 PM and be enjoying them by 8:30! The simplicity of the process doesn’t compromise the flavor either – these taste like you spent hours in the kitchen. They’re my go-to when I need to bring something to a last-minute gathering or when unexpected guests announce they’re stopping by. Everyone always thinks I’ve gone to much more trouble than I actually have!
Essential Tips & Tricks
Perfecting Your Ricotta Texture
The most crucial ingredient in these Cannoli Cookies is the ricotta cheese, and how you handle it makes all the difference between good cookies and mind-blowing cookies. I learned this the hard way after my first batch turned out too wet and spread like pancakes on the baking sheet! The key is to drain your ricotta properly. I place mine in a fine-mesh strainer lined with paper towels and let it sit for at least 30 minutes before using it in the recipe. Sometimes, if I’m planning ahead, I’ll do this step the night before and leave it in the refrigerator overnight.
Another game-changer I discovered is using whole milk ricotta rather than part-skim. The higher fat content creates a richer flavor that more closely resembles traditional cannoli filling. When you’re mixing your dough, pay close attention to the consistency. It should be soft but still hold its shape when scooped. If your dough seems too wet even after draining the ricotta, add flour one tablespoon at a time until you reach the right consistency. This technique pairs beautifully with my Apple Cranberry Crisp recipe, which also relies on achieving the perfect moisture balance for that ideal texture.
Flavor Enhancement Strategies
While the basic Cannoli Cookie recipe is delicious on its own, I’ve discovered some flavor-boosting secrets through countless batches of experimentation. My absolute favorite addition is a tiny splash of fiori di sicilia, an Italian citrus and vanilla extract that adds authentic cannoli flavor. If you can’t find it, a combination of pure vanilla extract and an extra pinch of orange zest works wonderfully too.
For the chocolate component, mini chocolate chips distribute best throughout the dough, but I sometimes chop high-quality dark chocolate into tiny pieces for a more sophisticated flavor profile. A trick I learned from my Italian neighbor is to toast your pistachios before chopping and adding them to the dough – this simple step intensifies their flavor dramatically. For a special holiday version, try adding a tablespoon of amaretto liqueur to the dough and a sprinkle of sliced almonds on top before baking. These cookies make a perfect pairing with my 5-Minute Hot Cocoa Dip for an indulgent dessert spread that will have everyone asking for your recipes!
Serving Ideas & Creative Variations
Elevated Presentation Techniques
Transform these humble Cannoli Cookies into showstoppers with a few simple presentation tricks I’ve perfected over the years. My favorite way to serve them for guests is to create a dessert board centered around these cookies. I arrange them in a circular pattern, then fill the center with additional mini chocolate chips, chopped pistachios, and candied orange peel for guests to add extra toppings if desired. A light dusting of powdered sugar just before serving adds that classic cannoli look and a touch of elegance.
For holiday gatherings, I love to sandwich two cookies with a thin layer of sweetened ricotta filling, then dip half in melted chocolate and festive sprinkles. The presentation is gorgeous, and they taste even more like traditional cannoli. When I’m feeling particularly creative, I’ll drizzle them with a simple orange glaze made from powdered sugar and fresh orange juice. The bright citrus complements the cookie perfectly and creates a beautiful finish. These cookies pair wonderfully with my Strawberry Crunch Cheesecake Tacos for a dessert spread that offers contrasting textures and complementary flavors your guests will rave about.
Seasonal and Dietary Adaptations
One of the reasons I return to this Cannoli Cookies recipe again and again is its incredible versatility. During fall, I add a pinch of nutmeg and substitute the pistachios with toasted walnuts for a seasonal twist. For Christmas, a touch of peppermint extract and crushed candy canes on top creates a festive holiday version that disappears from cookie exchanges in minutes. Summer brings opportunities for adding lemon zest instead of orange and incorporating fresh berries into the dough.
For friends with dietary restrictions, I’ve successfully made these with gluten-free flour blends (just add 1/4 teaspoon of xanthan gum if your blend doesn’t include it). The texture remains remarkably similar to the original. For a dairy-sensitive option, I’ve experimented with dairy-free ricotta alternatives, though you’ll want to drain these especially well as they tend to contain more moisture. You can also check out my No-Bake Ube Coconut Cheesecake Bars for another dessert option that can be easily adapted for various dietary needs. The key to successful adaptations is maintaining the balance of wet to dry ingredients and not overmixing, regardless of which substitutions you make.
Storage & Troubleshooting Guide
Optimal Storage Methods for Freshness
The ricotta in these Cannoli Cookies creates a uniquely tender texture, but it also means they require proper storage to maintain their quality. After countless batches (and some disappointing next-day experiences), I’ve perfected my storage method. For maximum freshness, store completely cooled cookies in an airtight container at room temperature with parchment paper between layers to prevent sticking. They’ll maintain their best texture for 2-3 days this way.
If you need to keep them longer, refrigeration is your friend. The cookies will stay fresh for up to a week when refrigerated, though the texture becomes slightly more dense and chewy – still delicious, just different from freshly baked. For long-term storage, these cookies freeze beautifully!
I place them in a single layer on a baking sheet until frozen solid, then transfer to a freezer-safe container with parchment between layers. When sealed properly, they’ll keep for up to 3 months. To enjoy, thaw at room temperature for about 30 minutes. For an extra-special touch, warm them in a 300°F oven for 3-5 minutes to restore some of that fresh-baked quality. The aroma that fills your kitchen is an added bonus!
Common Issues and Easy Solutions
Even with a straightforward recipe like these Cannoli Cookies, things can occasionally go awry. The most common issue I’ve encountered (and heard from readers) is cookies that spread too much during baking. This almost always comes down to the moisture content in your ricotta. If your cookies are spreading, try draining your ricotta even longer next time, or add an additional 2-3 tablespoons of flour to your current batch. Another trick is to chill the shaped dough balls for 15 minutes before baking, which helps them hold their shape.
If your cookies seem too dry or crumbly, you’ve likely gone too far in the opposite direction. Add a teaspoon of milk to your dough and gently mix until incorporated. For cookies that aren’t browning properly, try positioning your oven rack in the upper third of the oven and extending baking time by 1-2 minutes. Sometimes, ovens run cooler than their stated temperature – an inexpensive oven thermometer can be a game-changer for consistent results. Finally, if your chocolate chips are sinking to the bottom of the cookies, try tossing them in a teaspoon of flour before folding into the dough. This helps them stay suspended throughout the cookie rather than gravitating downward during baking.
Frequently Asked Questions
Can I make the dough ahead of time?
Yes! You can prepare the dough up to 24 hours in advance and store it covered in the refrigerator. When ready to bake, let the dough sit at room temperature for about 15-20 minutes to take the chill off. This actually improves the flavor as it gives the ingredients time to meld together, similar to how traditional cannoli filling tastes better after resting. The cookies might bake up slightly thicker when made with chilled dough, which many people prefer!
Why did my Cannoli Cookies spread too much?
Too much spreading usually indicates excess moisture in your dough. The culprit is typically undrained ricotta cheese. Make sure to drain your ricotta thoroughly using a fine-mesh strainer lined with paper towels for at least 30 minutes before incorporating it into your dough. If you’re in a hurry, you can press gently on the ricotta with additional paper towels to extract moisture more quickly.
Can I freeze these cookies after baking?
Absolutely! These Cannoli Cookies freeze beautifully for up to 3 months when stored properly. Place completely cooled cookies in an airtight container with parchment paper between layers to prevent sticking. When you’re ready to enjoy them, thaw at room temperature for about 30 minutes. For that fresh-baked taste, warm them in a 300°F oven for 3-5 minutes.
What’s the best substitute if I don’t have ricotta?
While ricotta gives these cookies their authentic cannoli flavor and texture, mascarpone cheese makes an excellent substitute in a pinch. It has a similar moisture content and creamy texture. Cottage cheese that’s been blended until smooth can also work, though you’ll need to drain it very thoroughly and the flavor will be slightly different. Either way, you’ll still get delicious cookies!
How do I know when the Cannoli Cookies are done baking?
The perfect Cannoli Cookie should have light golden edges while remaining relatively pale on top. Look for a slight firmness when you gently press the center – it should feel set but still yield slightly to pressure. They’ll continue to firm up as they cool on the baking sheet. Overbaking will result in dry cookies that lose that signature tender cannoli-like interior, so it’s better to underbake slightly if you’re unsure.
Final Thoughts
There’s something truly magical about how these Cannoli Cookies transform simple ingredients into a treat that captures all the beloved flavors of a classic Italian pastry. Every time I bake a batch, I’m transported back to my first taste of cannoli in a tiny bakery tucked away on a side street in Boston’s North End – that perfect balance of creamy filling, chocolate, and crisp shell that made me fall in love with the dessert in the first place.
What makes these cookies special isn’t just their delicious taste, but how they bring people together. I’ve watched friends who claim not to have a sweet tooth reach for seconds and thirds, and seen children’s eyes light up when they discover the tiny chocolate chips hidden inside. They’ve become my signature contribution to potlucks, holiday gatherings, and impromptu coffee dates with neighbors. I’d love to see how you make these Cannoli Cookies your own! Share your creations on Pinterest or tag me on social media – I’m always delighted to see your kitchen adventures with my recipes. Happy baking, friends!