

Red Velvet Snowballs have completely changed my holiday baking game, friends! These little bite-sized treats combine the rich, cocoa-infused tang of red velvet with a sweet, snowy coating that makes them absolutely irresistible. I discovered this recipe last December when I was frantically searching for something festive to bring to my neighbor’s cookie exchange. With just my trusty microwave and favorite mug, I whipped up the base in minutes, rolled them into balls, and watched them disappear faster than hot chocolate on a snow day! They’re perfect for holiday parties, gift boxes, or those moments when you need something sweet but don’t want to deal with the oven. Trust me, these Red Velvet Snowballs will become your new festive favorite!

Table of Contents
Recipe
Print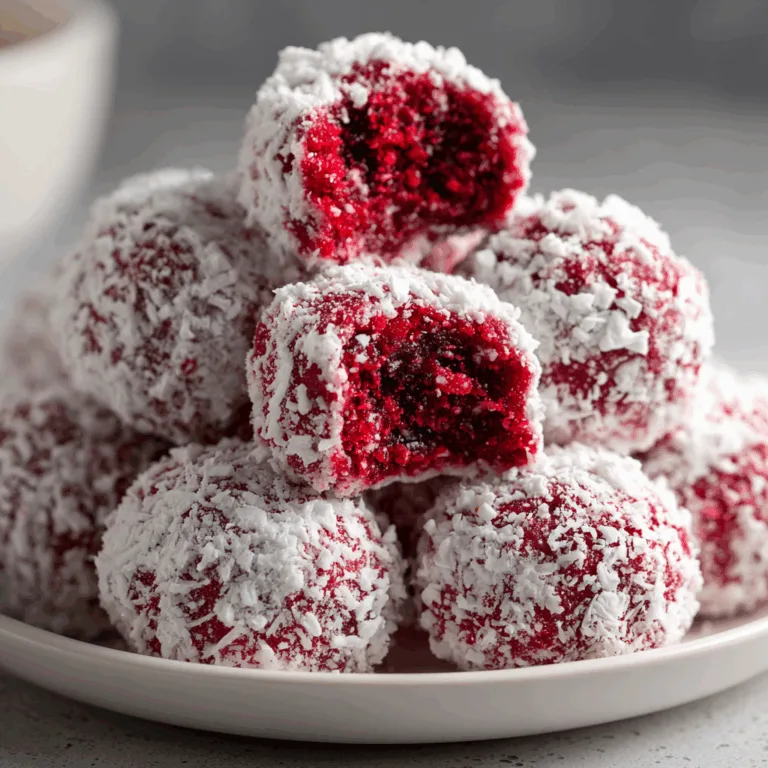
Delicious Red Velvet Snowballs Recipe | Best Holiday Dessert Treat
These Delicious Red Velvet Snowballs are soft, cocoa-kissed cookies rolled in powdered sugar for the perfect festive finish. They’re tender, rich, and melt-in-your-mouth delightful—ideal for cookie exchanges, Christmas trays, or a cozy winter baking day.
- Total Time: 27 minutes
- Yield: 24 cookies
Ingredients
1 cup unsalted butter, softened
1/2 cup powdered sugar
1 teaspoon vanilla extract
1/2 teaspoon red gel food coloring
2 1/4 cups all-purpose flour
2 tablespoons cocoa powder
1/4 teaspoon salt
1/2 cup mini chocolate chips (optional)
1 cup powdered sugar, for rolling
Instructions
1. In a large bowl, beat the softened butter and 1/2 cup powdered sugar until light and fluffy.
2. Mix in vanilla extract and red gel food coloring until evenly combined.
3. In a separate bowl, whisk together flour, cocoa powder, and salt.
4. Gradually add dry ingredients to the wet mixture, stirring until a dough forms.
5. Fold in mini chocolate chips, if using.
6. Cover and chill the dough for 30 minutes.
7. Preheat oven to 350°F (175°C). Line a baking sheet with parchment paper.
8. Scoop and roll dough into 1-inch balls and place on the baking sheet.
9. Bake 10–12 minutes, or until set but not browned.
10. Cool for 5 minutes, then roll warm cookies in powdered sugar.
11. Cool completely and roll again for a snowball effect.
Notes
For extra flavor, add 1/4 teaspoon almond extract to the dough.
Use white chocolate chips instead of mini chocolate chips for a festive contrast.
These cookies freeze well—roll in sugar after thawing for best texture.
- Prep Time: 15 minutes
- Cook Time: 12 minutes
- Category: Dessert
- Method: Baking
- Cuisine: American
- Diet: Vegetarian
Why You’ll Love This Red Velvet Snowballs
No-Bake Convenience with Gourmet Results
These Red Velvet Snowballs might look like they require hours of baking expertise, but they’re actually one of the most forgiving treats in my recipe collection. The beauty lies in their simplicity! You start with a microwave-friendly mug cake base that takes just 90 seconds to cook. Once it cools slightly, you’ll crumble it, mix in a touch of cream cheese frosting, and roll into perfect little balls.
What makes these so special is how they transform humble ingredients into something that looks and tastes professionally made. I’ve brought these to holiday gatherings where people assumed I spent hours in the kitchen or picked them up from a fancy bakery! The texture is wonderfully moist and fudgy inside with that signature red velvet tang, while the powdered sugar coating creates a delightful sweet contrast with each bite.
Even better, you can make the base ahead of time and store it in the refrigerator. When you’re ready to serve, just roll them in the powdered sugar coating for that fresh, snowy appearance. This make-ahead capability has saved me countless times during the hectic holiday season!
Perfect for Festive Occasions and Gifting
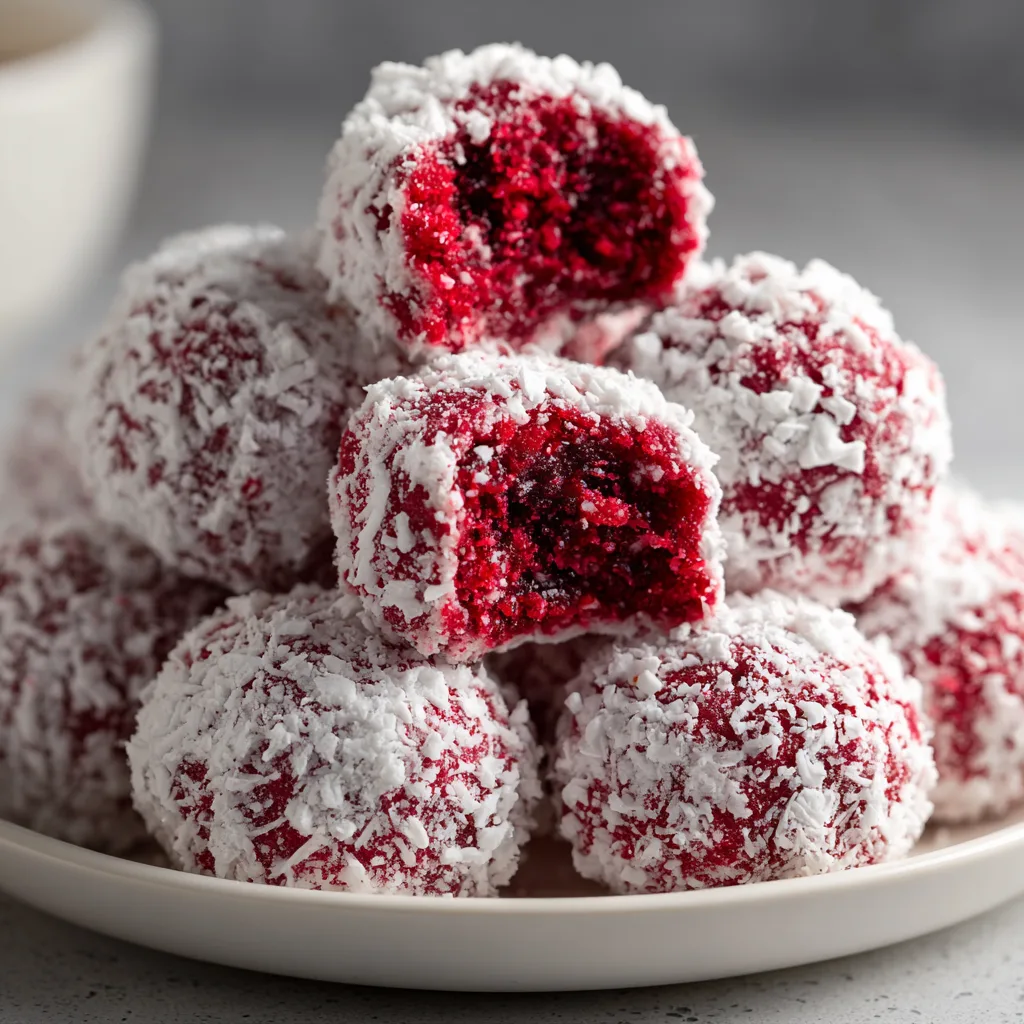
There’s something magical about the contrast between the vibrant red interior and the pristine white coating that makes these Red Velvet Snowballs absolutely perfect for holiday celebrations. They create an instant festive atmosphere on any dessert table, and their bite-size nature makes them ideal for parties where people prefer to sample multiple treats.
I’ve used these as edible decorations around a holiday cake, lined them up in festive paper cups for cookie exchanges, and even carefully packed them in decorative tins as heartfelt homemade gifts. Last Christmas, I arranged them in small bakery boxes with holiday ribbon for my children’s teachers, and received the sweetest thank-you notes about how they became family favorites!
The versatility extends beyond Christmas too. With their rich red color, they’re perfect for Valentine’s Day celebrations or any occasion where you want to add a touch of elegance without hours of work. I’ve even made them for bridal showers by adding tiny edible pearl sprinkles to the powdered sugar coating for an extra special touch. Their impressive appearance completely belies how simple they are to make!
Essential Tips & Tricks
5 Secrets for Perfect Texture Every Time
The key to truly exceptional Red Velvet Snowballs lies in achieving that perfect, truffle-like texture that’s firm enough to hold its shape but still wonderfully tender when bitten into. My first attempt years ago resulted in dry, crumbly balls that wouldn’t hold together, but I’ve since perfected the technique!
First, don’t overbake your mug cake base. In fact, slightly underbaking it is better as it keeps the mixture moist. Aim for 70-90 seconds in most microwaves, but start checking at 60 seconds since all microwaves vary. The center should be just set but still quite moist.
Second, let the cake cool for at least 10 minutes before crumbling. If you try to work with it while hot, you’ll end up with a gummy mixture that’s difficult to shape. However, don’t let it cool completely either – warm cake crumbles blend much better with the frosting component.
Third, use just enough cream cheese frosting to bind the mixture – usually 2-3 tablespoons per mug cake. Too much makes them too soft to roll; too little and they’ll crumble. The mixture should hold together when pressed between your fingers without being sticky. This is similar to how I make the base for my No-Bake Monster Cookie Bars, which use a similar binding technique.
Fourth, chill the mixture for 15-30 minutes before rolling into balls. This firms everything up and makes the rolling process much cleaner and easier. I place mine in the refrigerator in the same mug I used for cooking – fewer dishes is always a win!
Finally, use a small cookie scoop or measuring spoon for consistent sizing. Uniformly sized balls not only look more professional but also ensure even texture throughout each piece.
Flavor Boosting Variations to Try
While the classic red velvet flavor is divine on its own, I’ve experimented with several variations that take these snowballs to new heights! My family now requests these customized versions throughout the year.
The simplest enhancement is adding extracts. A quarter teaspoon of almond extract gives them a sophisticated cherry-like note that pairs beautifully with the cocoa. For a more decadent version, add half a teaspoon of coffee extract to intensify the chocolate flavor – this pairs wonderfully with my 5-Minute Hot Cocoa Dip for a truly indulgent dessert spread.
For texture contrast, fold in 2-3 tablespoons of mini chocolate chips or finely chopped white chocolate after mixing in the frosting. The little pockets of melty chocolate create a delightful surprise. White chocolate works particularly well with the red velvet flavor profile.
Consider playing with the coating too! While traditional powdered sugar creates that classic “snowball” look, I’ve rolled them in finely chopped nuts, cocoa powder, or even crushed freeze-dried strawberries for a berry twist. My personal favorite is a mixture of powdered sugar and finely ground pistachios, which adds a subtle nuttiness and beautiful speckled appearance.
For special occasions, try adding a surprise center. Form the mixture around a whole hazelnut, a small piece of chocolate, or even a tiny spoonful of jam before rolling into balls. This creates a wonderful textural and flavor contrast that elevates them from simple treats to impressive confections!
Serving Ideas & Creative Variations
Elegant Presentation Techniques
The beauty of Red Velvet Snowballs lies not just in their taste but in how versatile they are for presentation. I’ve found countless ways to showcase these little gems that make them look like they came from a high-end patisserie rather than my humble kitchen!
For holiday gatherings, try arranging them in concentric circles on a pure white serving plate, creating a beautiful spiral pattern. Dust the plate with additional powdered sugar and add fresh mint leaves or small sprigs of rosemary for a festive touch. The contrast of the bright red interior (when bitten into) against the white exterior creates a stunning visual effect.
For gift-giving, I love to line small paper bakery boxes with parchment paper and arrange the snowballs in neat rows. Tie with a ribbon and attach a small card with serving suggestions. They pair beautifully with coffee or hot chocolate, making them perfect for winter gift baskets. They also make wonderful companions to my Cannoli Cookies in holiday cookie boxes!
For a more formal dessert presentation, try serving them on individual dessert spoons with a tiny dollop of whipped cream and a sprinkle of cocoa powder. This creates an elegant one-bite dessert perfect for dinner parties. I’ve even seen them served alongside espresso shots for a sophisticated after-dinner treat.
Another stunning presentation is to create a “snowball tower” – carefully stack them in a pyramid shape on a cake stand, then dust the entire structure with additional powdered sugar just before serving. This creates a showstopping centerpiece that guests will be talking about long after the party ends!
Seasonal Adaptations Year-Round
While these treats scream “holiday season” with their snowy appearance, I’ve found ways to adapt Red Velvet Snowballs for enjoyment throughout the entire year by making simple seasonal adjustments.
For Valentine’s Day, I shape them into hearts instead of balls and add a tiny drop of cherry extract to the base. The red interior becomes perfectly themed for the holiday of love! You can also press a small heart-shaped sprinkle into each one before the powdered sugar sets.
Come springtime, I love adding finely grated orange zest to the mixture and rolling some in shredded coconut instead of powdered sugar. This creates a refreshing citrus variation that pairs beautifully with spring brunches. These make wonderful Easter treats when arranged in small paper nests!
For summer gatherings, try adding a teaspoon of finely chopped fresh mint to the mixture and serving them slightly chilled. The cool, refreshing flavor is unexpected and delightful on hot days. I’ve even served these alongside fresh strawberries for July 4th parties – the red and white color scheme works perfectly!
In autumn, I incorporate warm spices like cinnamon and nutmeg into the base, which complements the cocoa beautifully. Rolling them in a mixture of powdered sugar and pumpkin pie spice creates a fall-appropriate treat that pairs wonderfully with my No-Bake Eggnog Cheesecake Bars during the transition to holiday season.
Storage & Troubleshooting Guide
Preserving Freshness and Texture
The beauty of Red Velvet Snowballs is that they can be made ahead and stored properly without sacrificing any of their delicious texture or flavor. I’ve developed some foolproof methods to keep them tasting fresh whether you need them the next day or want to prepare weeks in advance.
For short-term storage (1-3 days), place the finished snowballs in an airtight container, separating layers with parchment paper to prevent sticking. Store at room temperature in a cool, dry place away from direct sunlight. The powdered sugar coating helps seal in moisture, keeping them fresh. If your kitchen is particularly warm, refrigeration is better, but allow them to come to room temperature before serving for the best texture experience.
For longer storage (up to 1 week), refrigeration is necessary. Place them in a container with a tight-fitting lid, again separating layers with parchment paper. The texture will firm up slightly when chilled, which some people actually prefer! Just note that the powdered sugar coating may absorb some moisture in the refrigerator, so you might want to give them a fresh dusting before serving.
For make-ahead convenience (up to 1 month), these snowballs freeze beautifully! I often make a double batch and freeze half for unexpected guests or last-minute gatherings. Freeze them on a baking sheet until solid, then transfer to a freezer-safe container or zip-top bag. To serve, thaw in the refrigerator overnight, then let them stand at room temperature for 30 minutes. A fresh roll in powdered sugar will restore their snowy appearance.
One pro tip I’ve discovered: if you plan to freeze them, roll the balls in the powdered sugar coating after thawing, not before freezing. This ensures the coating looks fresh and pristine when served!
Solving Common Challenges
Even with a recipe as forgiving as Red Velvet Snowballs, occasional challenges can arise. Here are solutions to the most common issues I’ve encountered over my years of making these treats.
If your mixture is too wet and sticky to roll, the most likely culprit is too much frosting or an underbaked mug cake base. The fix is simple: add dry ingredients gradually until you reach the right consistency. Graham cracker crumbs, finely crushed cookies, or even a tablespoon of cocoa powder work beautifully. Alternatively, refrigerate the mixture for 30-60 minutes, which often firms it up enough to work with.
Conversely, if your mixture is too dry and crumbly, add a little more frosting or even a teaspoon of cream cheese at a time until it holds together when pressed. In a pinch, a few drops of milk or even melted butter can help bind a dry mixture.
For snowballs that flatten or lose their shape after rolling, the temperature is likely the issue. The mixture might be too warm or your kitchen too hot. Chill the rolled balls for 15-20 minutes before coating them in powdered sugar. This helps them maintain their perfect round shape.
If the powdered sugar coating disappears or gets absorbed (which can happen in humid environments), the solution is a double-coating technique. Roll the balls in powdered sugar, let them sit for 5-10 minutes, then roll them again in fresh powdered sugar. This creates a thicker, more stable coating that resists absorption.
Lastly, if your red color isn’t vibrant enough, make sure you’re using gel food coloring rather than liquid. Gel provides intense color without adding additional liquid to the recipe. For a natural alternative, beetroot powder works surprisingly well and adds no flavor to the final product!
Frequently Asked Questions
Can I make Red Velvet Snowballs without food coloring?
Yes! While the traditional vibrant red color is part of the charm of Red Velvet Snowballs, you can absolutely make them without artificial food coloring. For a natural alternative, try using 1-2 tablespoons of beetroot powder, which provides a beautiful reddish hue without affecting the flavor. Another option is using 2 tablespoons of pureed cooked beets (make sure they’re very finely pureed). The natural red color won’t be as vibrant as with food coloring, but the taste will be just as delicious!
How far in advance can I make these for a party?
Red Velvet Snowballs are perfect for make-ahead preparation! You can make the mixture and form the balls up to 3 days in advance, storing them in the refrigerator in an airtight container. For best presentation, I recommend adding the final powdered sugar coating just a few hours before serving. If you need to prepare them even further ahead, the formed balls freeze beautifully for up to a month – just thaw in the refrigerator overnight and roll in fresh powdered sugar before serving.
My snowballs are too sticky to roll properly. What did I do wrong?
Don’t worry – this is easily fixed! Sticky snowballs usually mean either your mug cake base was slightly underbaked or you added too much frosting. The quickest solution is to chill the mixture for 30 minutes, which often firms it up enough to roll. If it’s still too sticky after chilling, gradually add 1-2 tablespoons of dry ingredients like graham cracker crumbs, finely crushed cookies, or cocoa powder until you reach a rollable consistency.
Can I use a cake mix instead of making the mug cake from scratch?
Absolutely! A cake mix makes this recipe even more convenient. Simply prepare about 1/2 cup of red velvet cake mix according to package directions in a mug, microwave until just set (usually 60-75 seconds), then proceed with the recipe as written. This shortcut works particularly well when you need to make a large batch of Red Velvet Snowballs for bigger gatherings.
Are there any dairy-free options for making Red Velvet Snowballs?
Yes! These treats can be adapted for dairy-free diets. Use your favorite plant-based milk in the mug cake batter and replace the cream cheese frosting with a dairy-free alternative. Several brands make excellent dairy-free cream cheese frostings now, or you can make your own using vegan cream cheese. The texture might be slightly different, but the flavor will still be delicious. Just make sure your dairy-free mixture is firm enough to roll into balls.
Final Thoughts
There’s something truly magical about these Red Velvet Snowballs that goes beyond their festive appearance and delicious taste. Perhaps it’s how they transform simple ingredients into something that looks professionally crafted, or maybe it’s the joy they bring to everyone who tries them. I’ve watched eyes light up as people bite through the snowy exterior to discover the rich red velvet inside – that moment of surprise and delight never gets old!
What I love most about sharing this recipe is knowing that it might become part of your holiday traditions too. Food has this wonderful way of creating memories and connecting us, especially during special occasions. Whether you’re making these Red Velvet Snowballs for a cookie exchange, packaging them as heartfelt gifts, or simply enjoying them with a cup of hot chocolate on a cozy winter evening, they’re sure to bring a little extra sweetness to your celebrations.
I’d love to see your creations if you try this recipe! Share your Red Velvet Snowballs on Pinterest or tag us on social media. And remember, the best recipes are the ones that you make your own, so don’t be afraid to experiment with different flavors and coatings. Happy baking, friends!